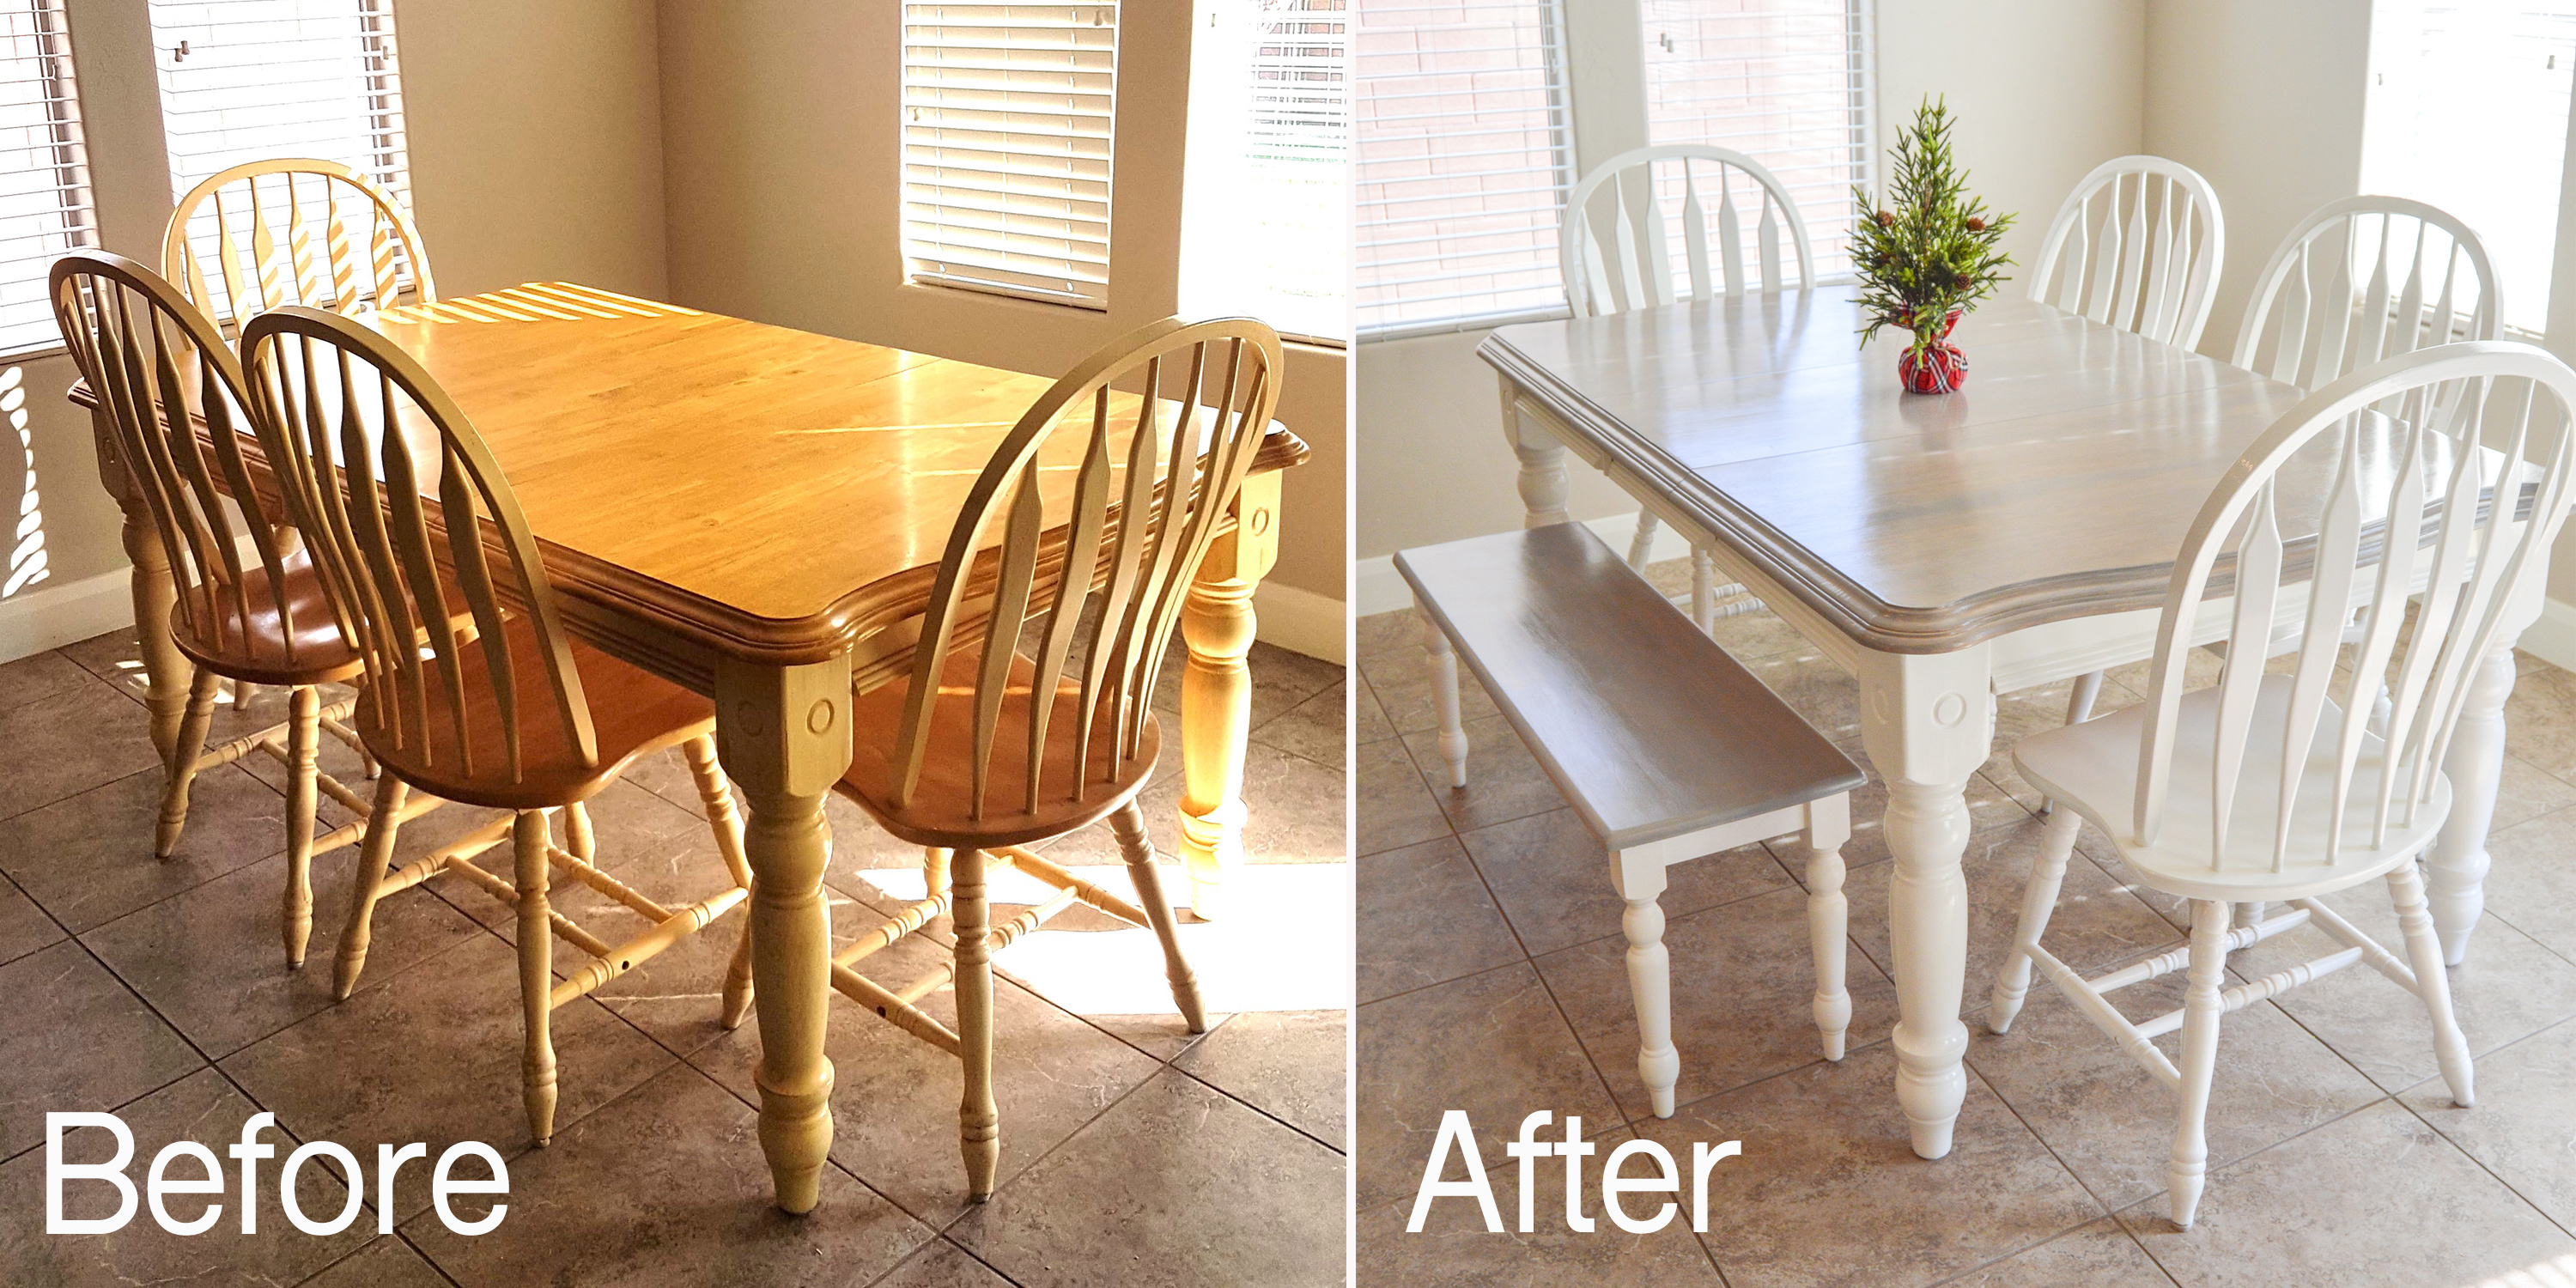
I’m in love with our grey paint wash dining table and bench. And our beautiful white chairs. I love the lightness of the colors. It nicely contrasts the darker feel in the kitchen and ties in the lighter living room area to the space. If you’re thinking about doing your own grey paint wash then give this a read! And if you’re thinking about staining your table give this a read too haha.
(This page contains affiliate links that we may be compensated for. Your clicks and purchases help support The DIY Lighthouse at no extra charge to you. We only put links to products we love and would recommend anyway.)
The Grey Paint Wash Dining Table & Bench
This semi- DIY beautiful grey paint wash dining table has taken quite a journey. You’ll see what I mean by “semi” if you keep reading.
The Before Pics and the Vision
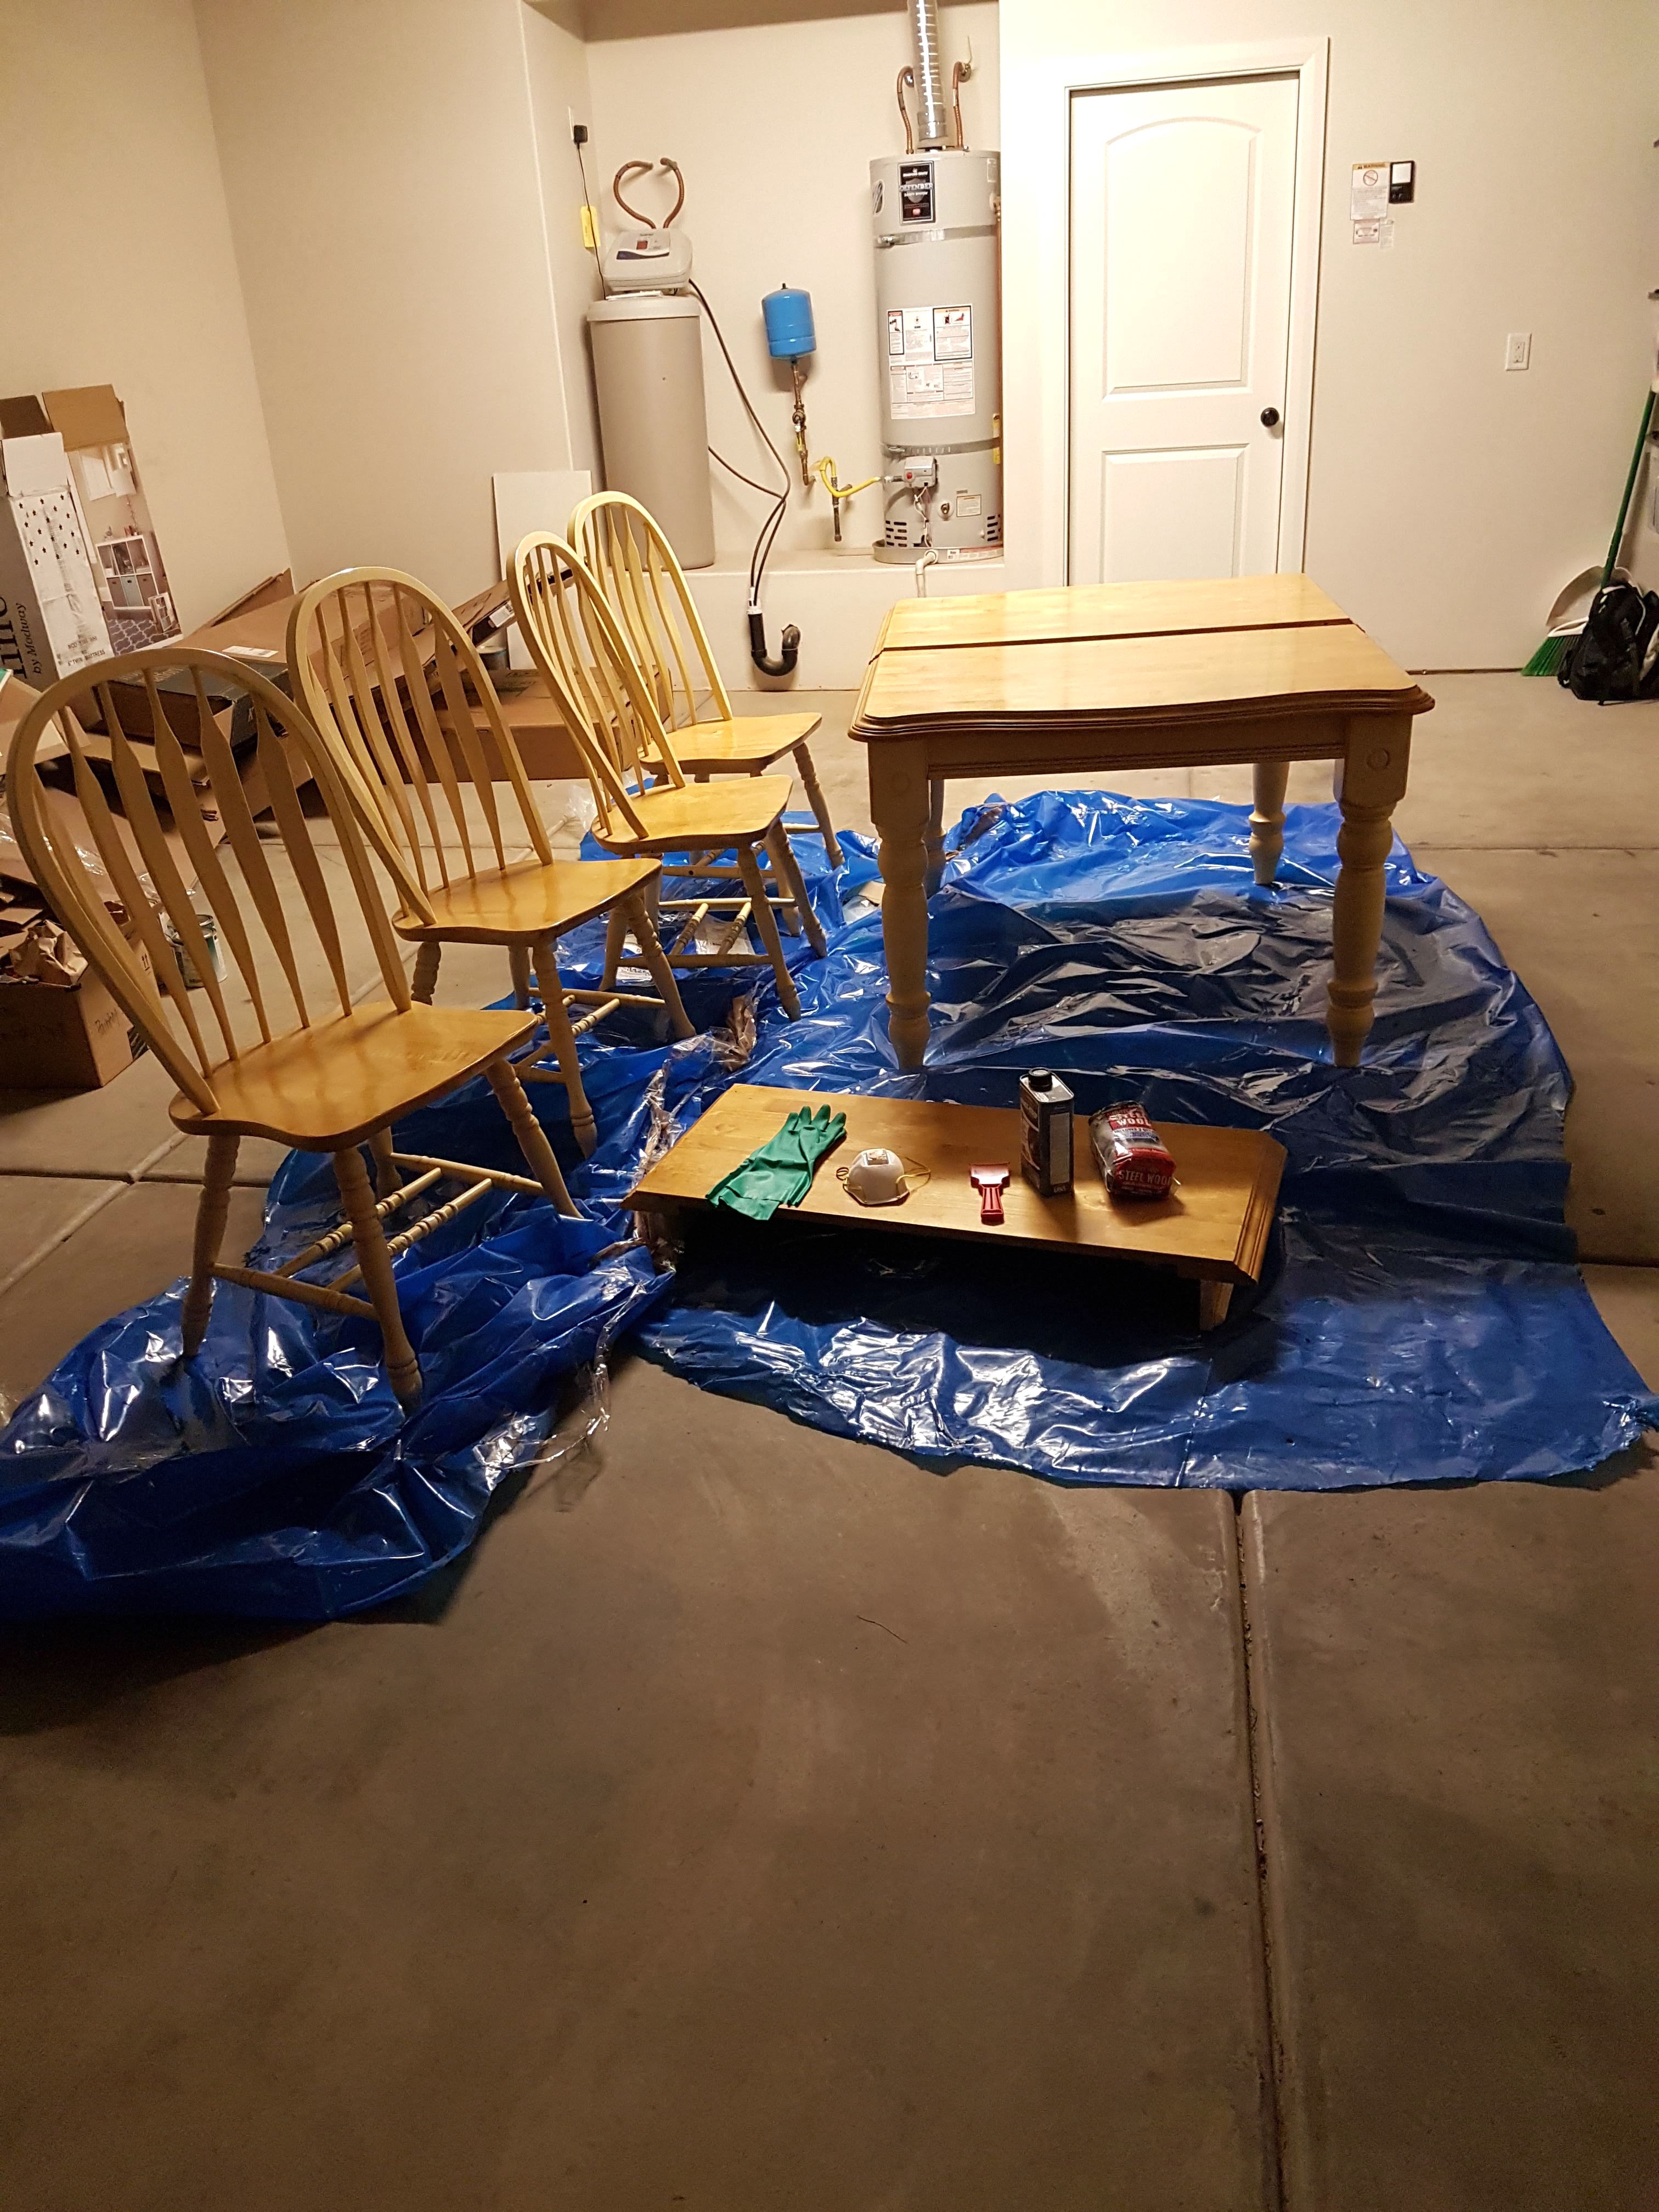
This whole grey paint wash journey started because we moved into our new house, and my parents-in-law were kind enough to give us their old dining table and chairs. Although it was already a beautiful table, it wasn’t quite the right color for our home. You can see it has a yellowy wood. I also wanted more seating, so I bought this farmhouse bench on Amazon. It is pretty inexpensive and adds a lot more seating to the table.
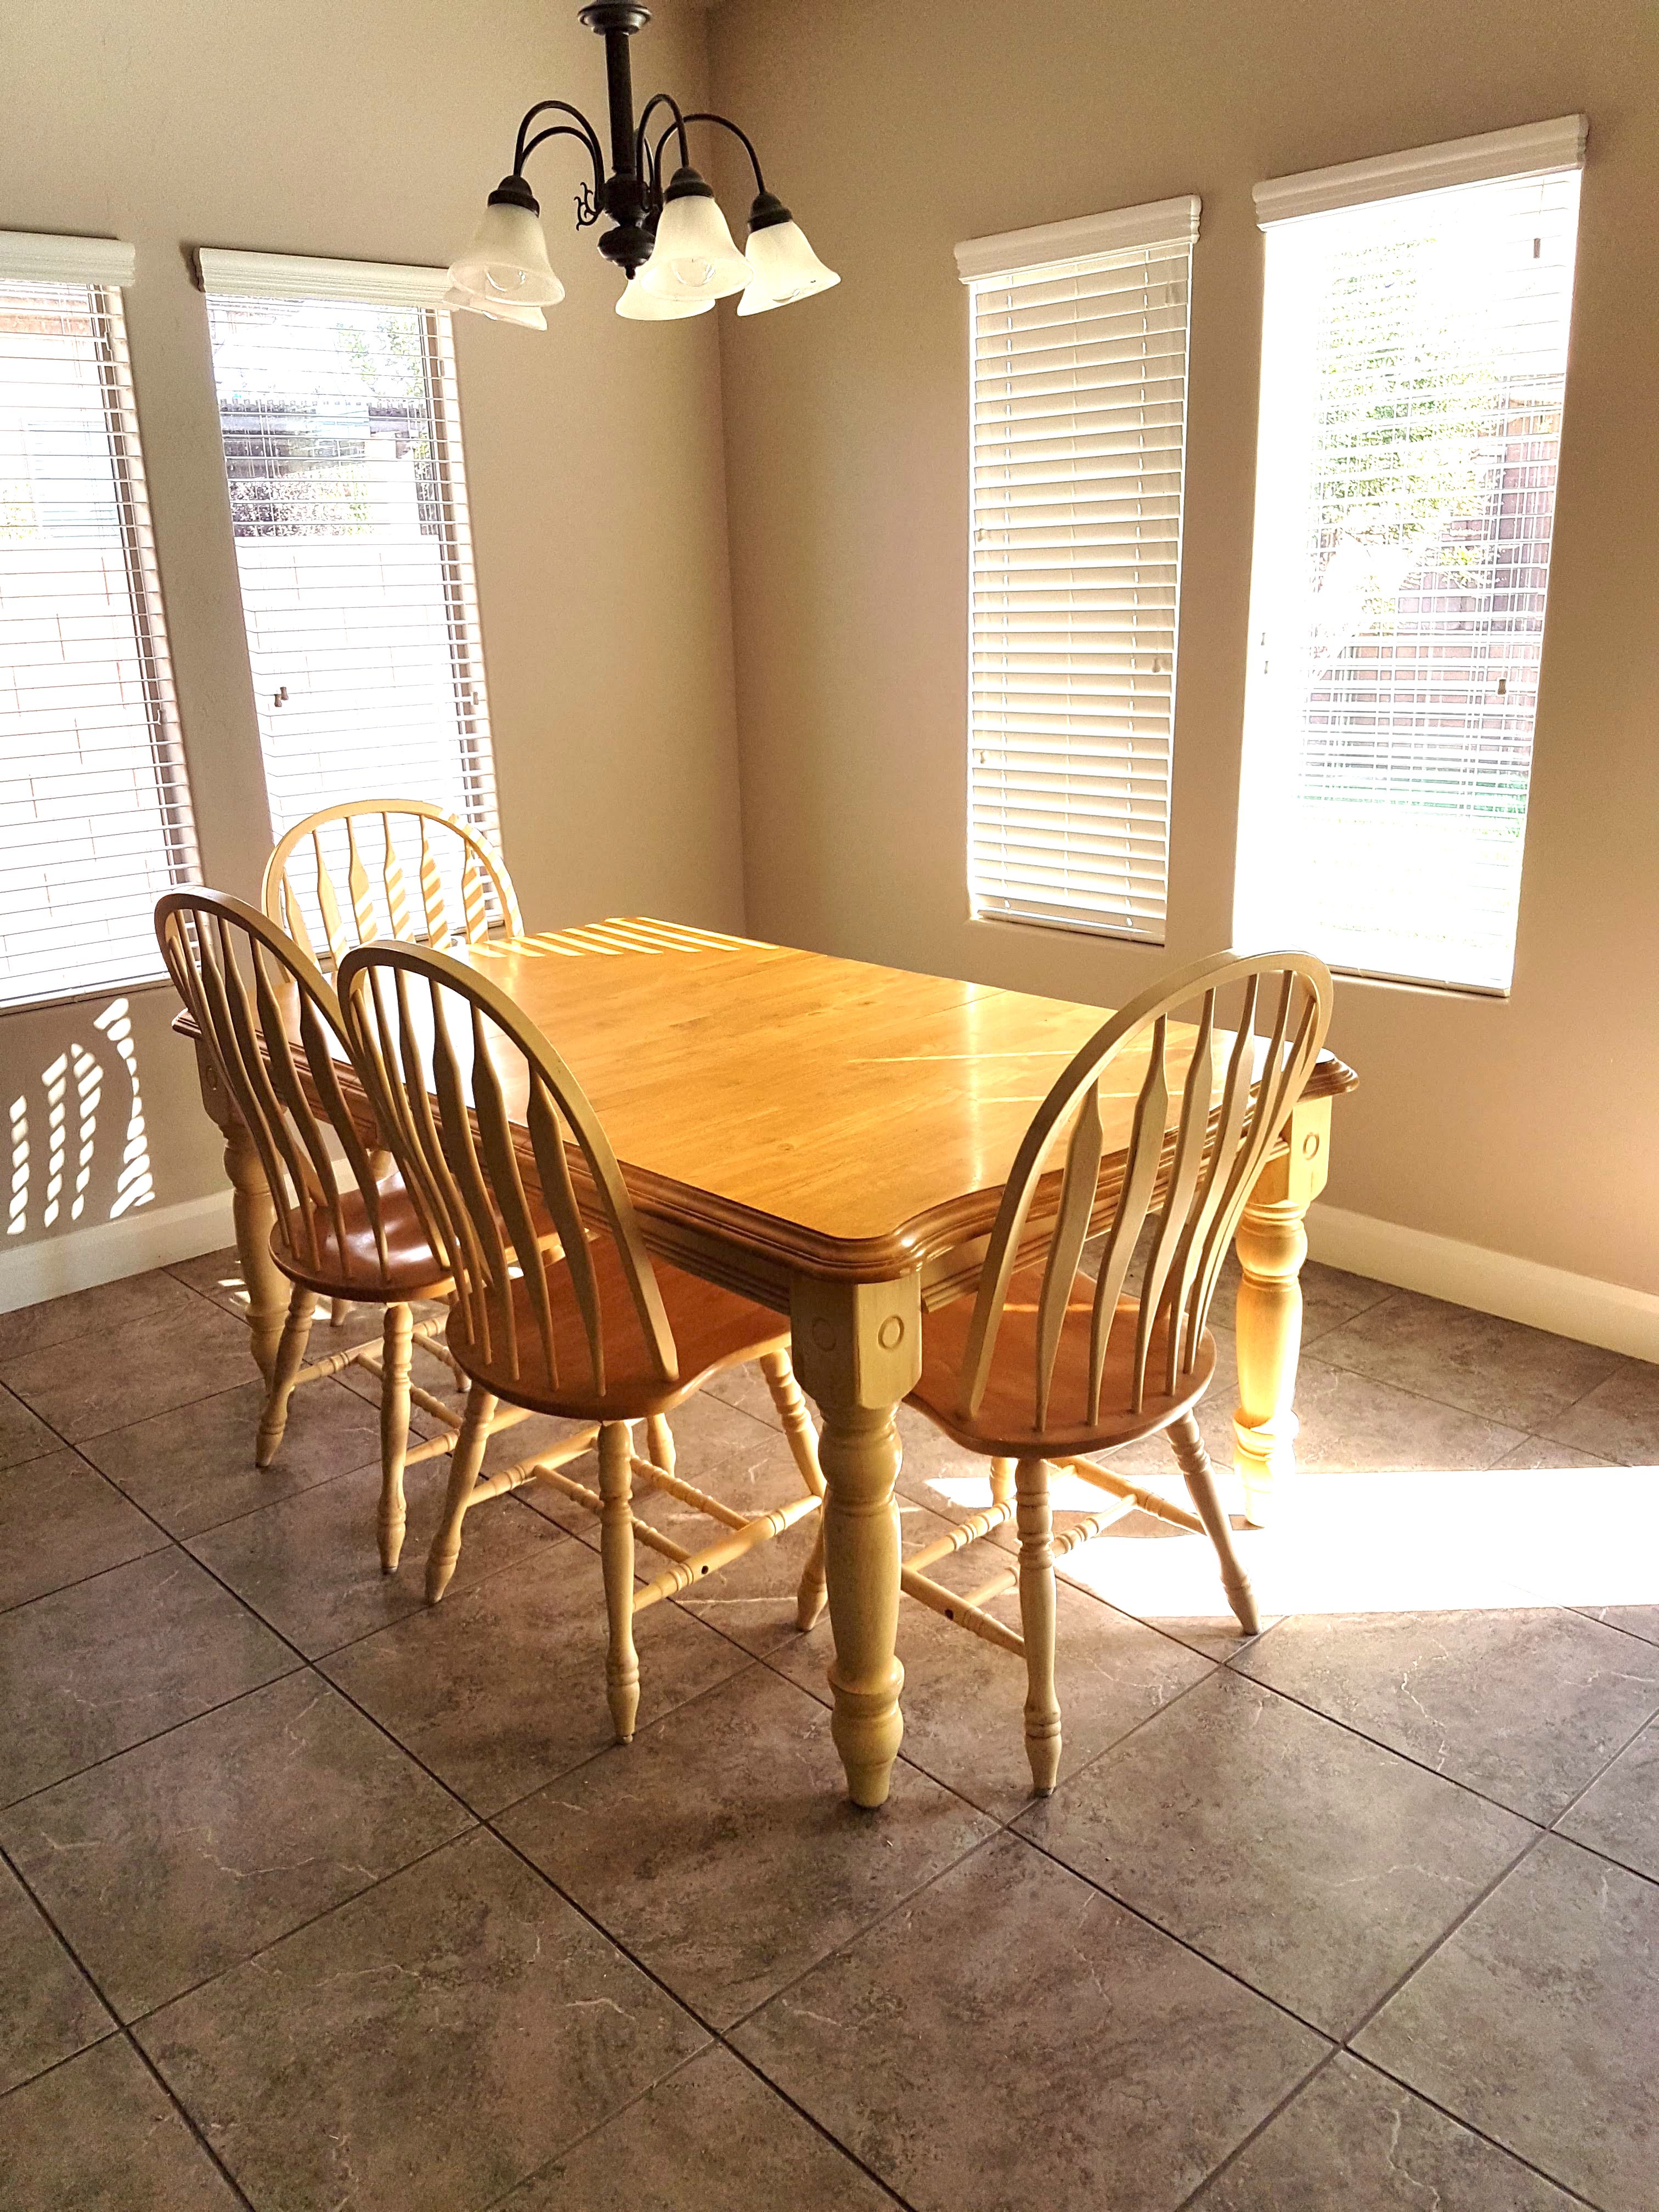
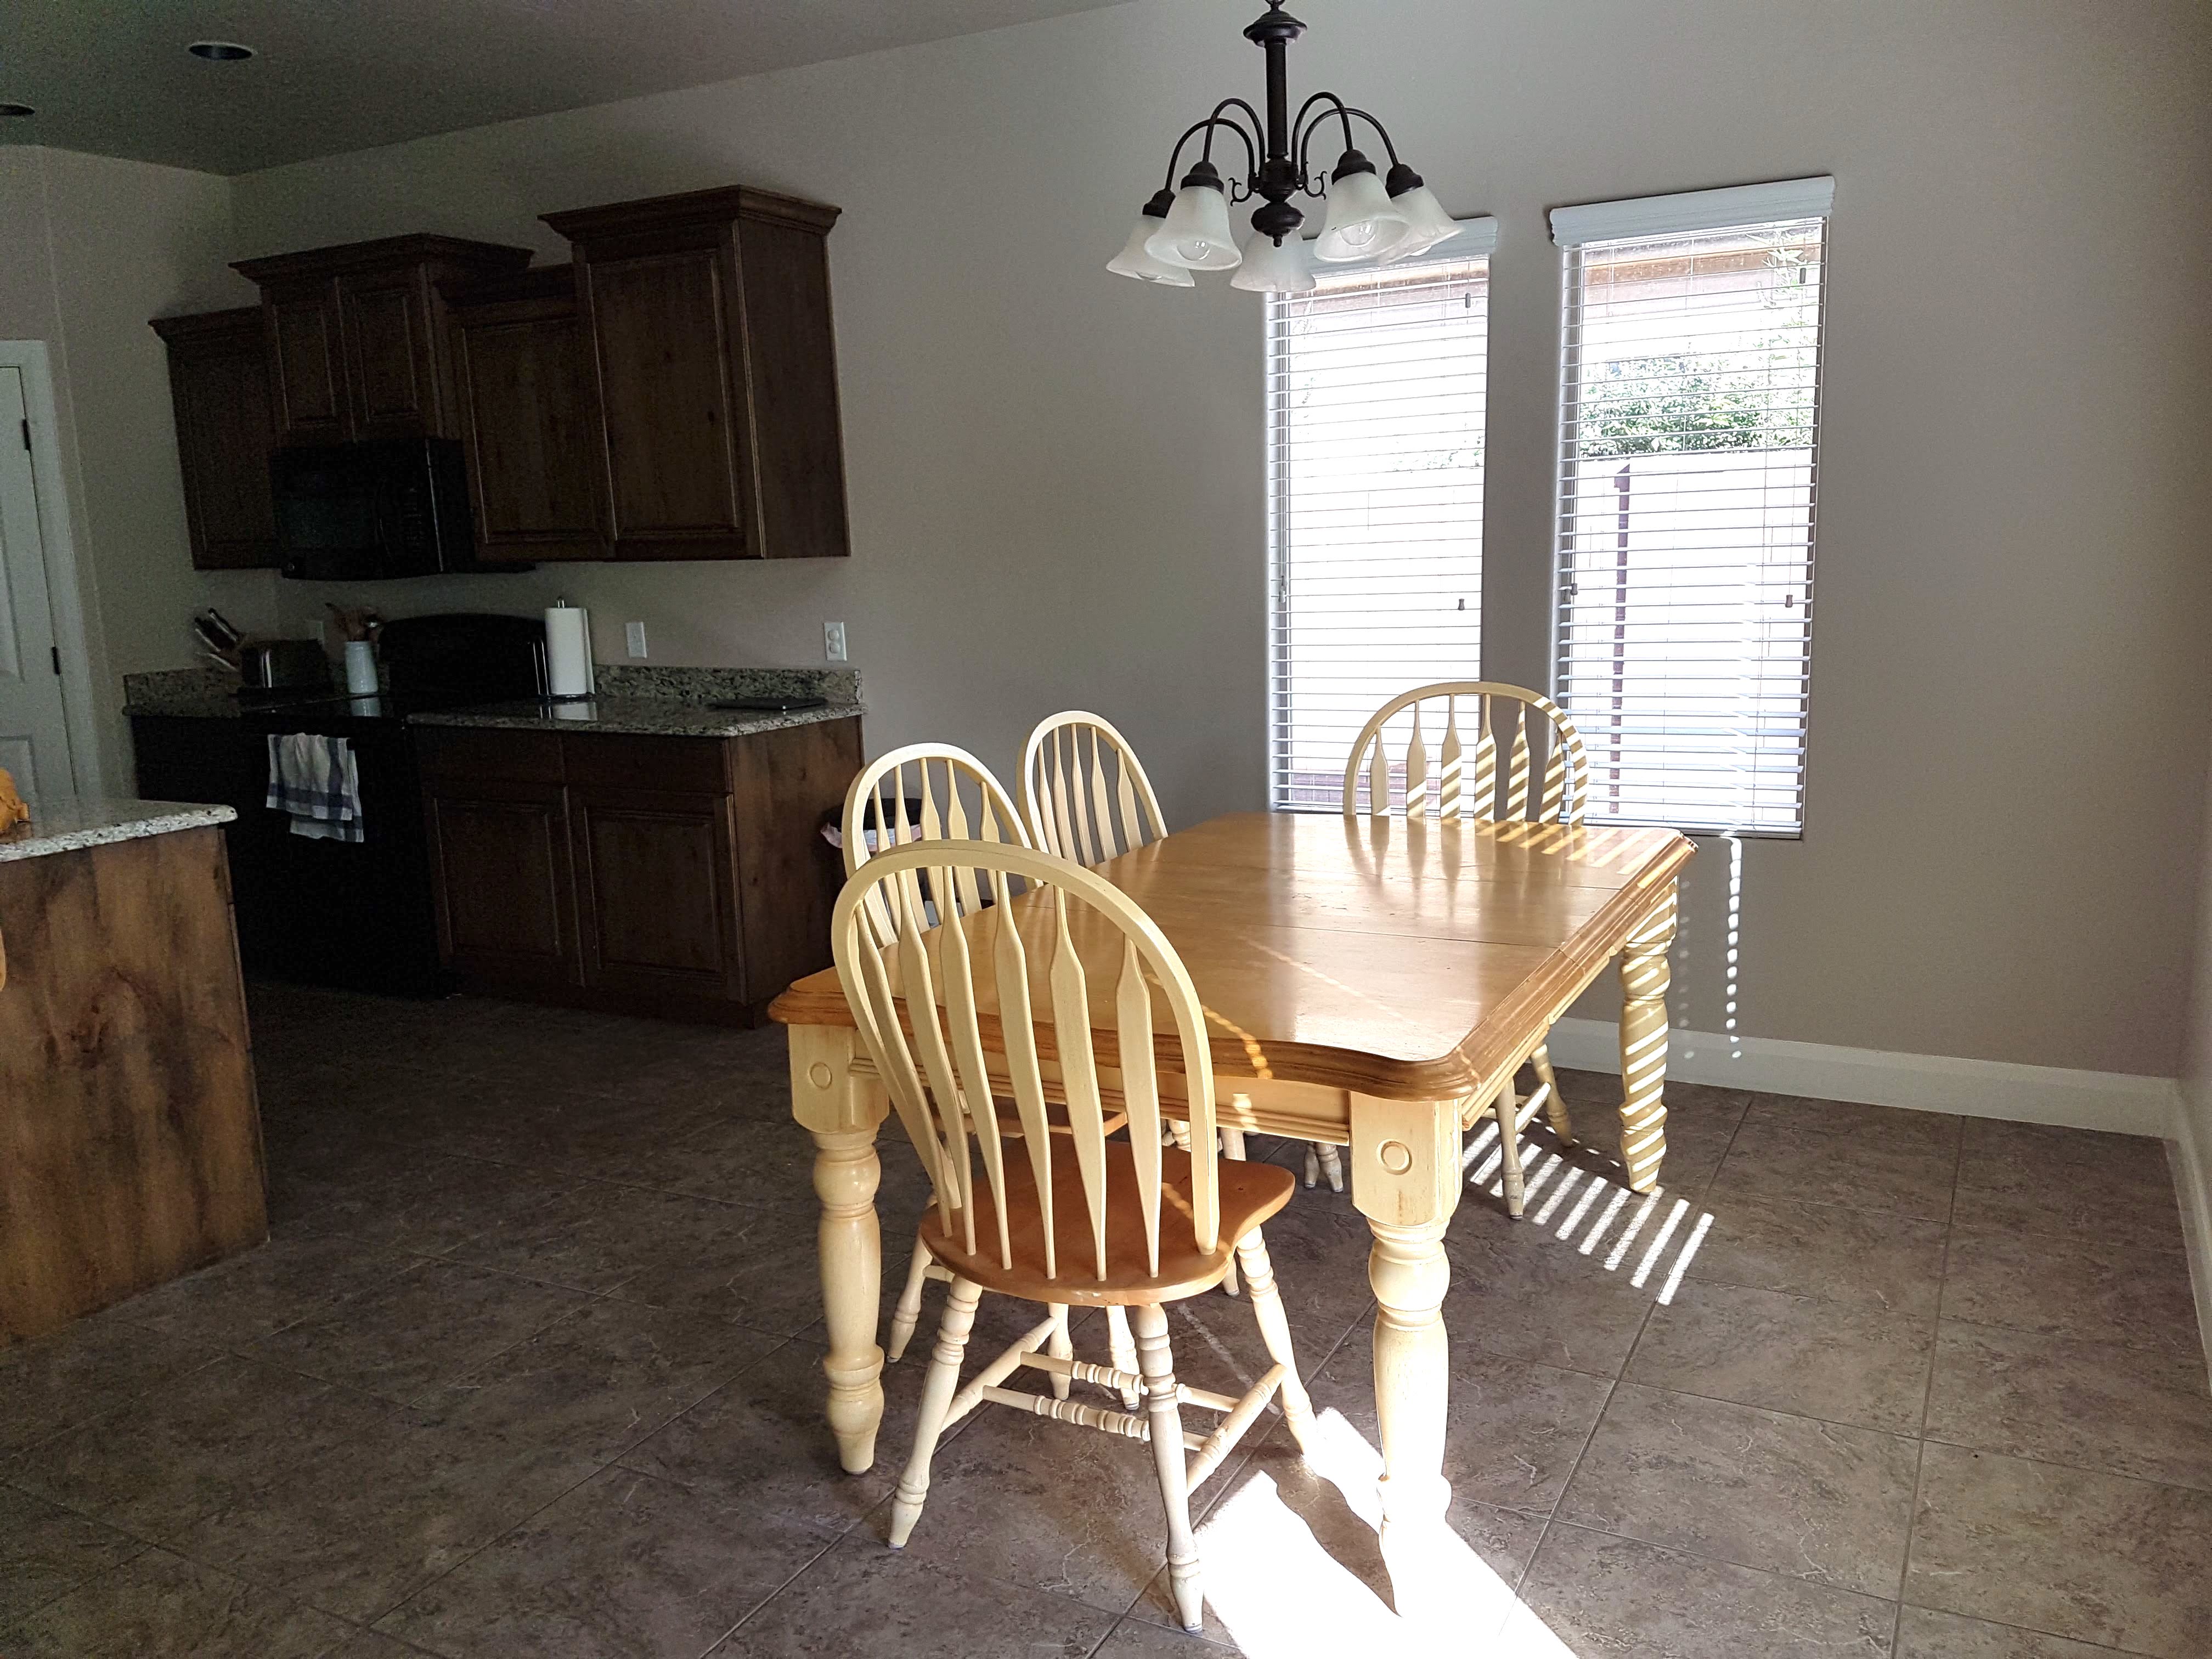
But I love the table and could see the potential, so I decided to stain the table top and bench top a dark brown to match the kitchen cabinets and paint the legs white to match the built-ins in the living room. (The grey paint wash had not even crossed my mind.) I was also going to do the wood stain on chair seat and paint the rest white. Things started out great. My husband and I moved the table and chairs into the garage, and I started stripping the heavy duty wax (I think?) sealant on the table and chairs.
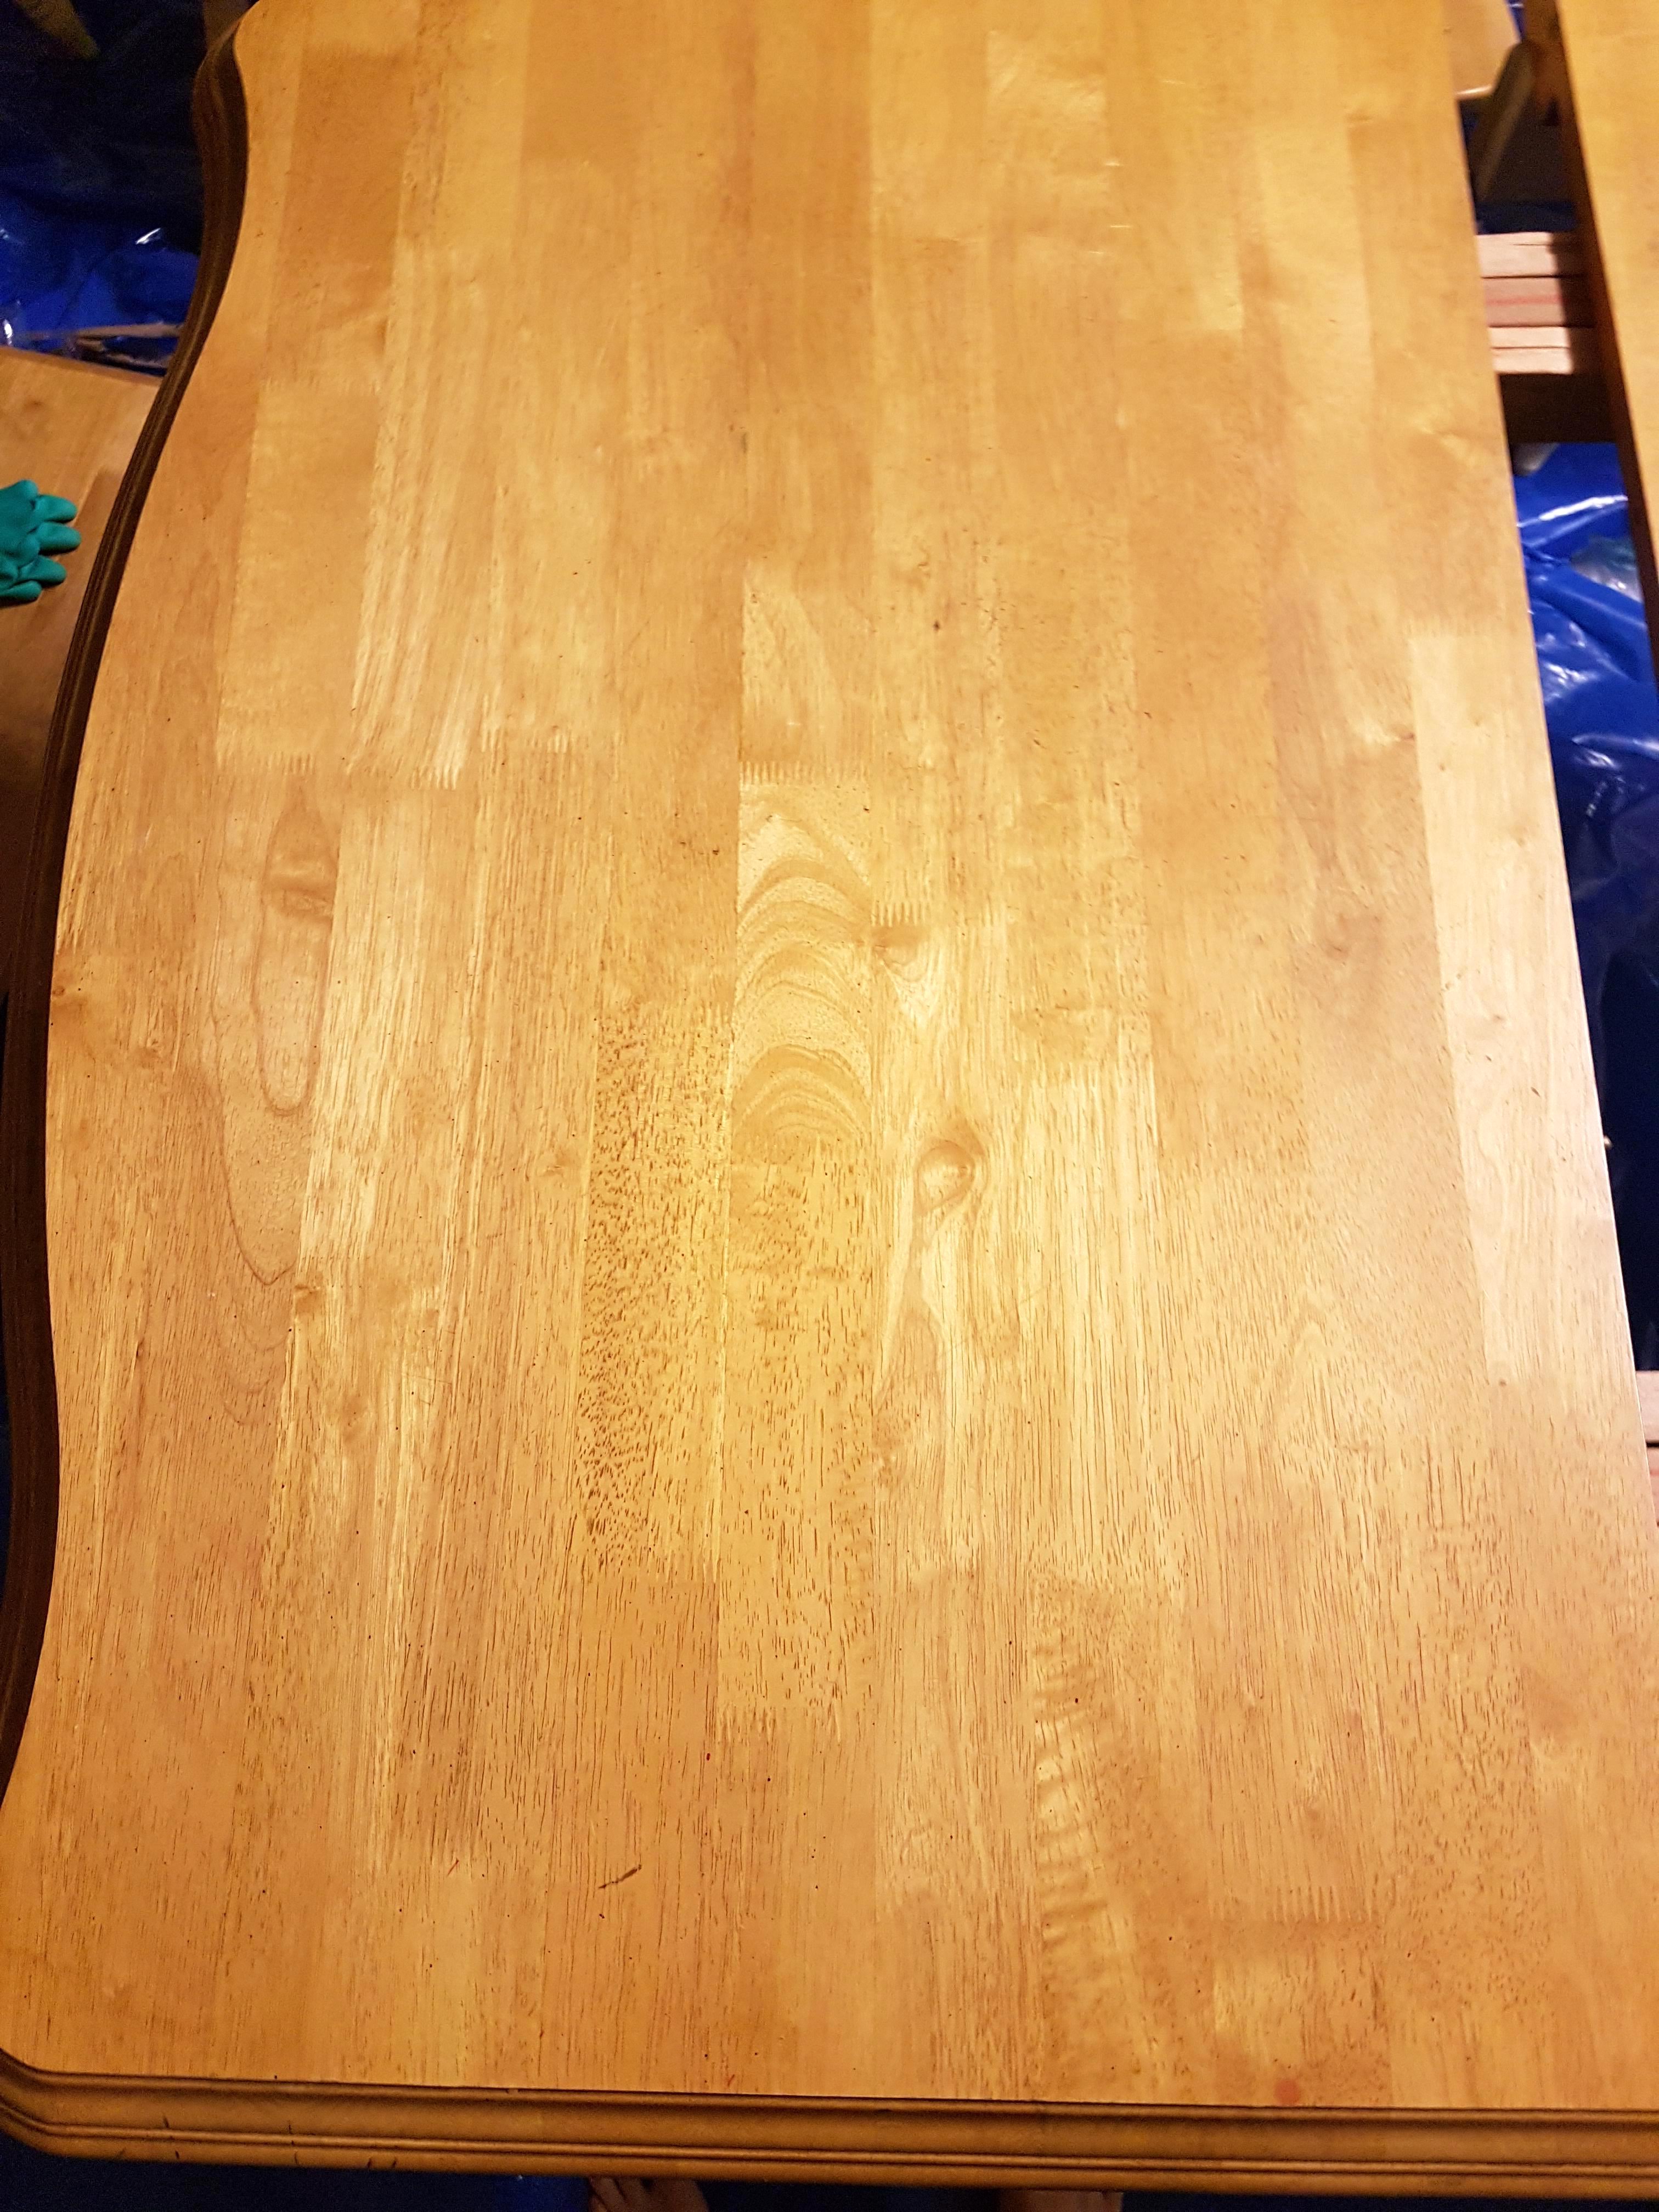
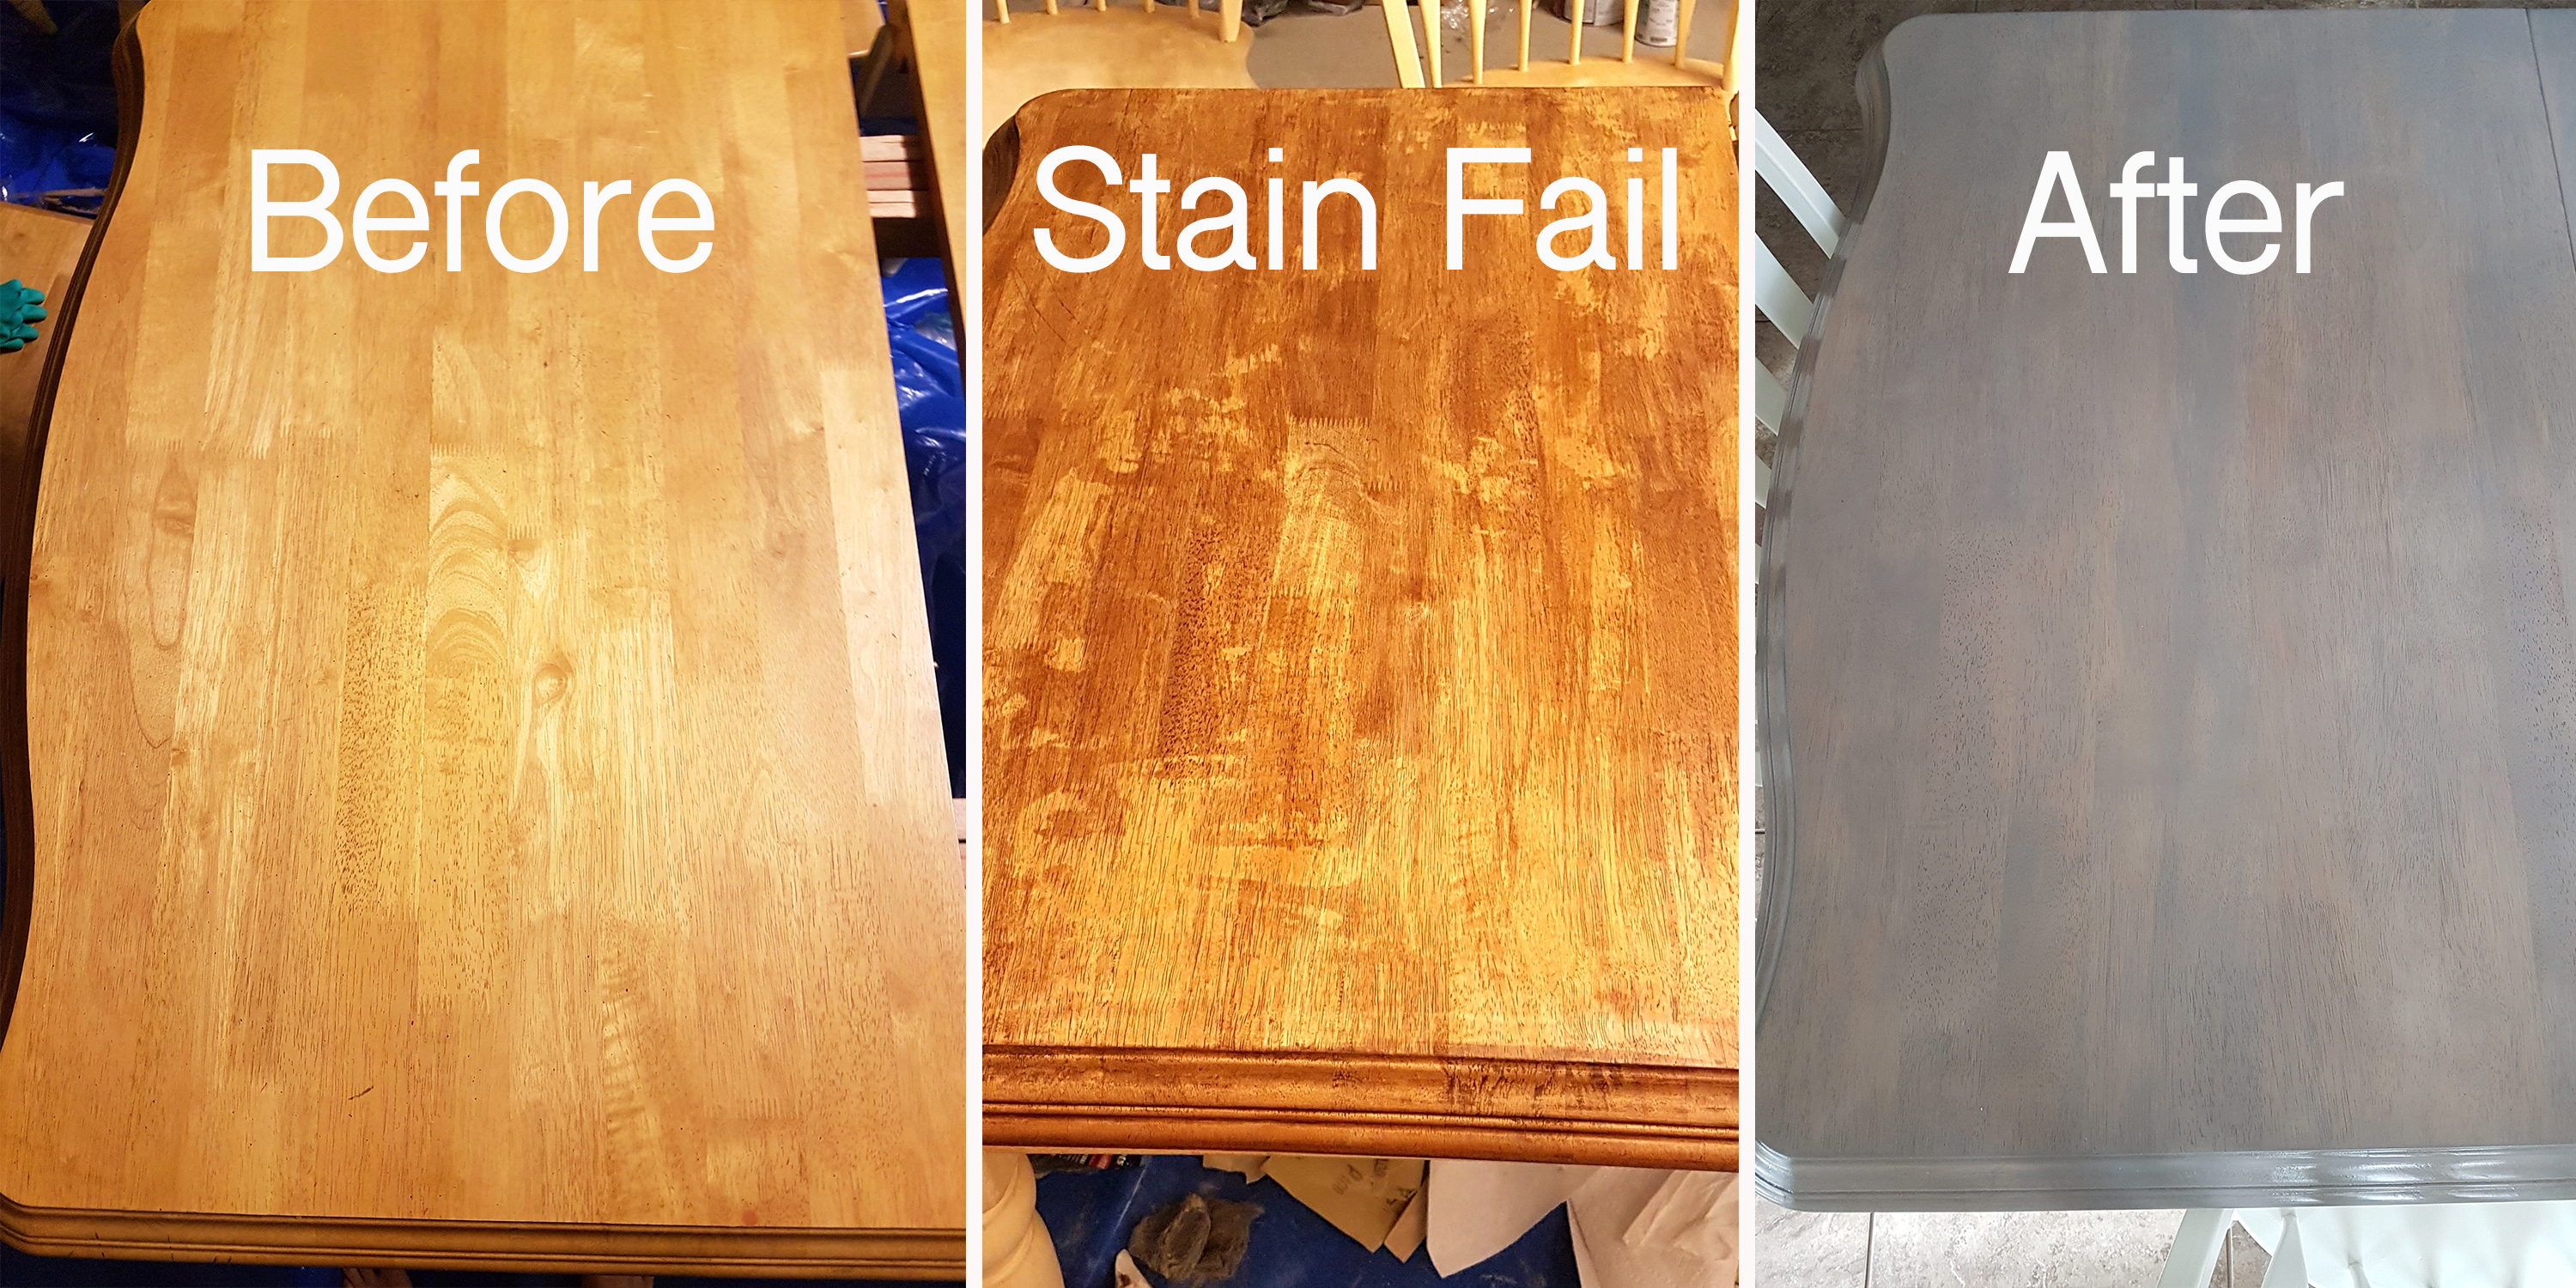
Blotchy Wood Stain
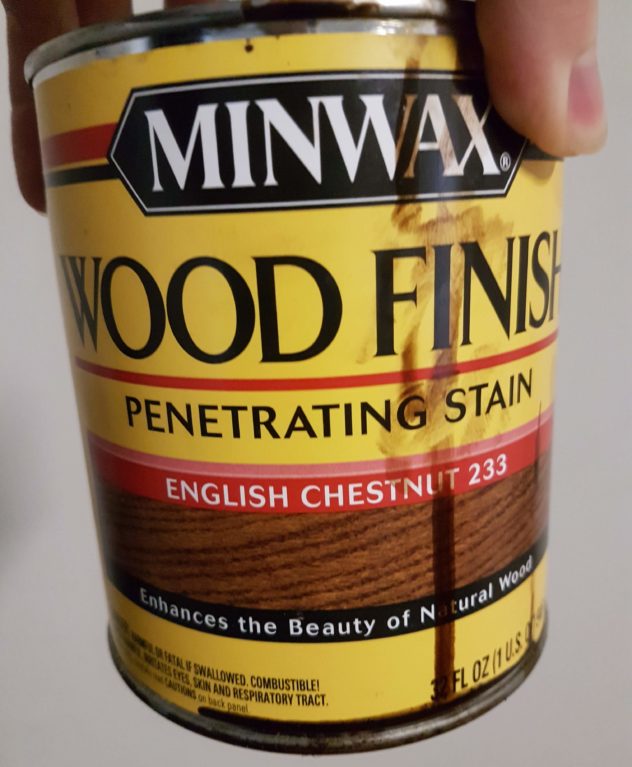
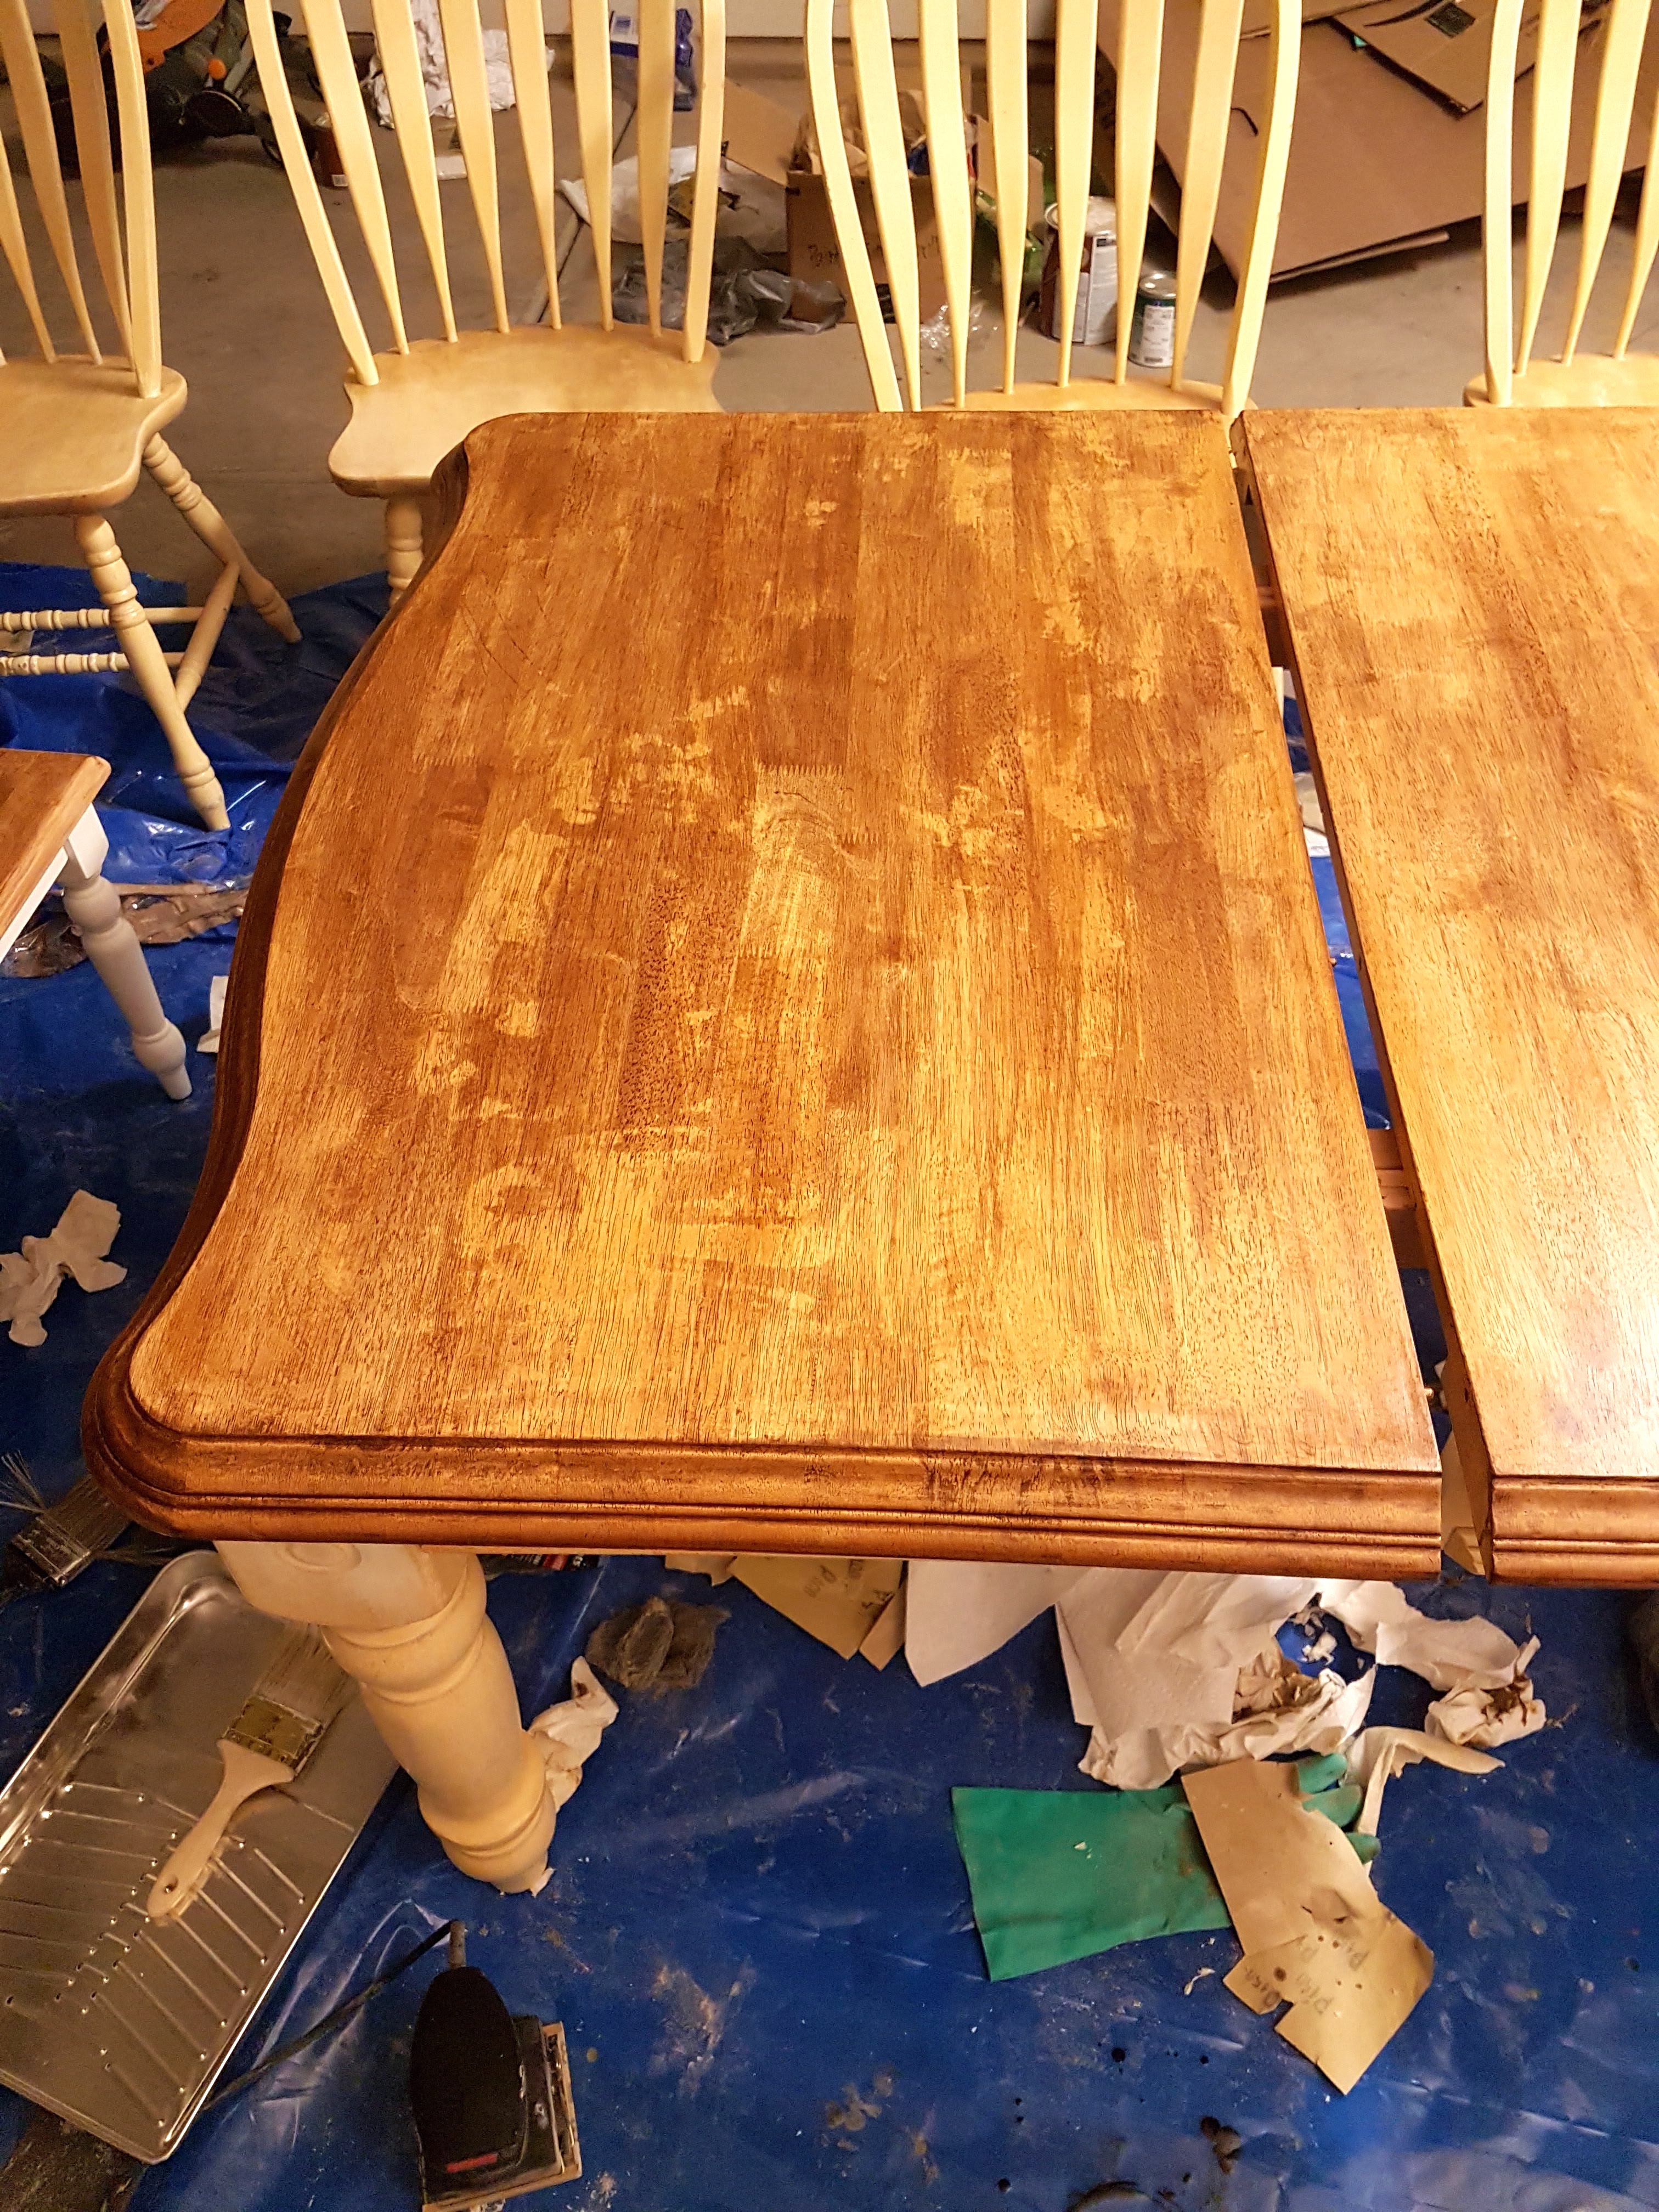
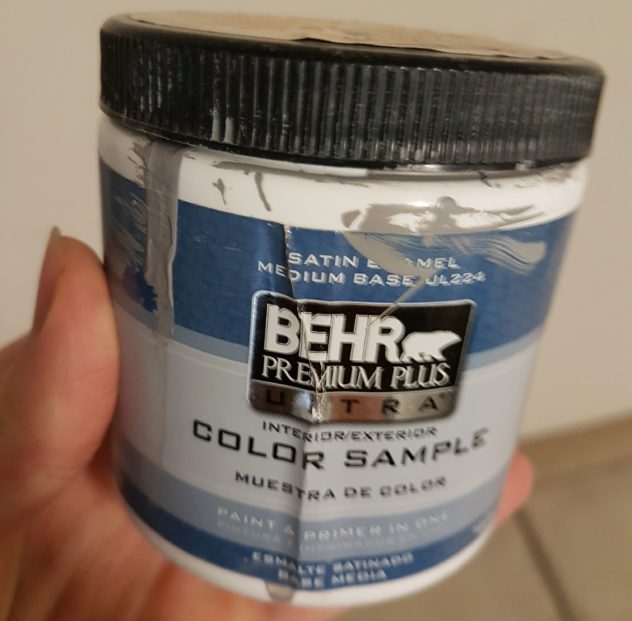
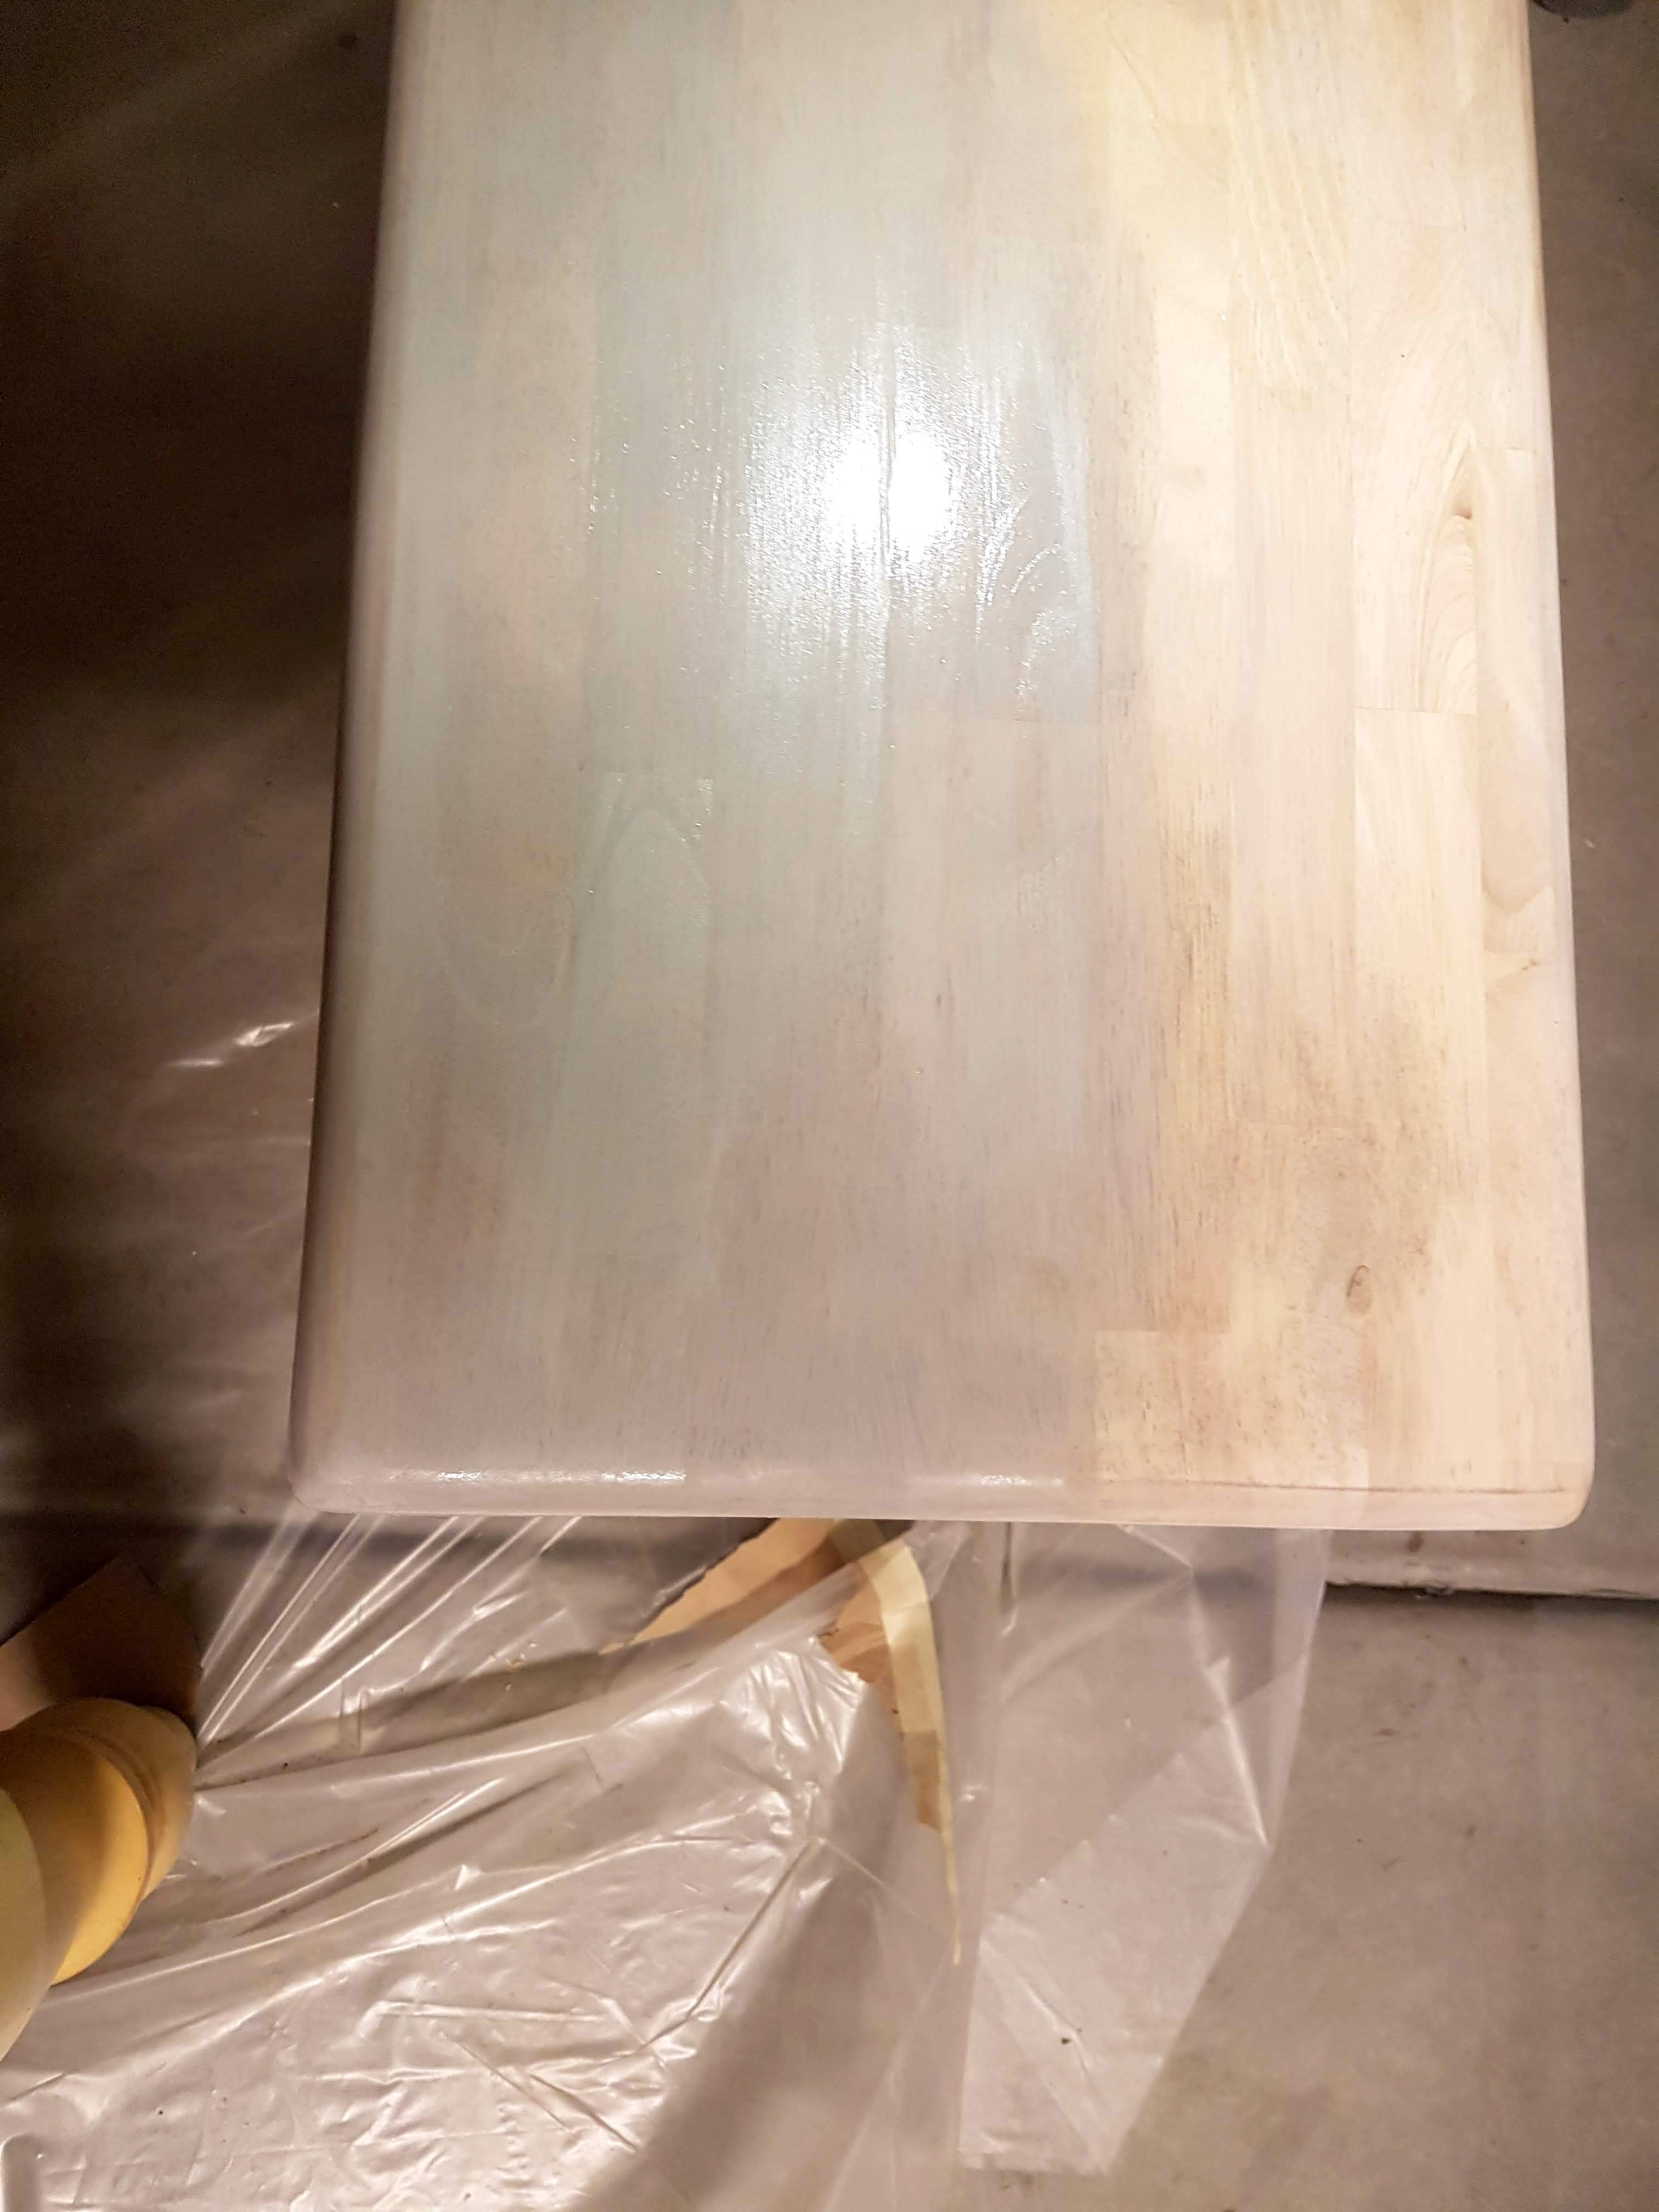
I used a terrible paint stripper that dried up in seconds, so I picked up a different one that I thought was working better. (And, yes, I followed all of the directions to a T!) I even sanded down the top a bit after using the paint stripper just to make sure and it seemed ready to go. But then… we tried staining. I used this stain from Lowes to work well with the color of my kitchen cabinets.
And it looked horrendous. Super blotchy and not at all what I was envisioning.
Calling in the Expert
At this point, I had already poured in hours of hard work and some money for nothing, so I caved on my “DIY” project and called in an expert. I found Sherrie through a mutual friend, and called her up. She was very kind and offered to come over to give me advice on my project, but she said she wouldn’t be able to do it herself for at least 6 weeks. She came and gave me great advice (work in small sections with the paint stripper, which paint stripper to use, . But, I ended up begging her that night to just do the project herself because I didn’t want to go through another horrible outcome. She very sweetly agreed to do the table and bench for $200+ material cost, but said she didn’t have time to do the chairs. I was so relieved!
Sherrie’s Hiccup
So off the table went to her house. At this point I thought all of our table troubles were over. Her plan was to strip, stain, and poly the top of the table and top of the bench. Not too much later I get a call and it’s Sherrie. She said there’s a problem and asked if I would come over. I was nervous heading over, and sure enough it was a problem with the table top. I’m not super knowledgable about wood so I don’t know exactly what the problem was, but it was something about how she was sanding down to the veneer and there was no way the stain would be able to soak into the wood and look consistent and nice. I was so bummed because I really wanted the stain.
The Grey Paint Wash Idea
Sherrie suggested painting instead of staining, but I told her that I really wanted the wood grain to show through. So, Sherri suggested doing a grey paint wash with this paint.
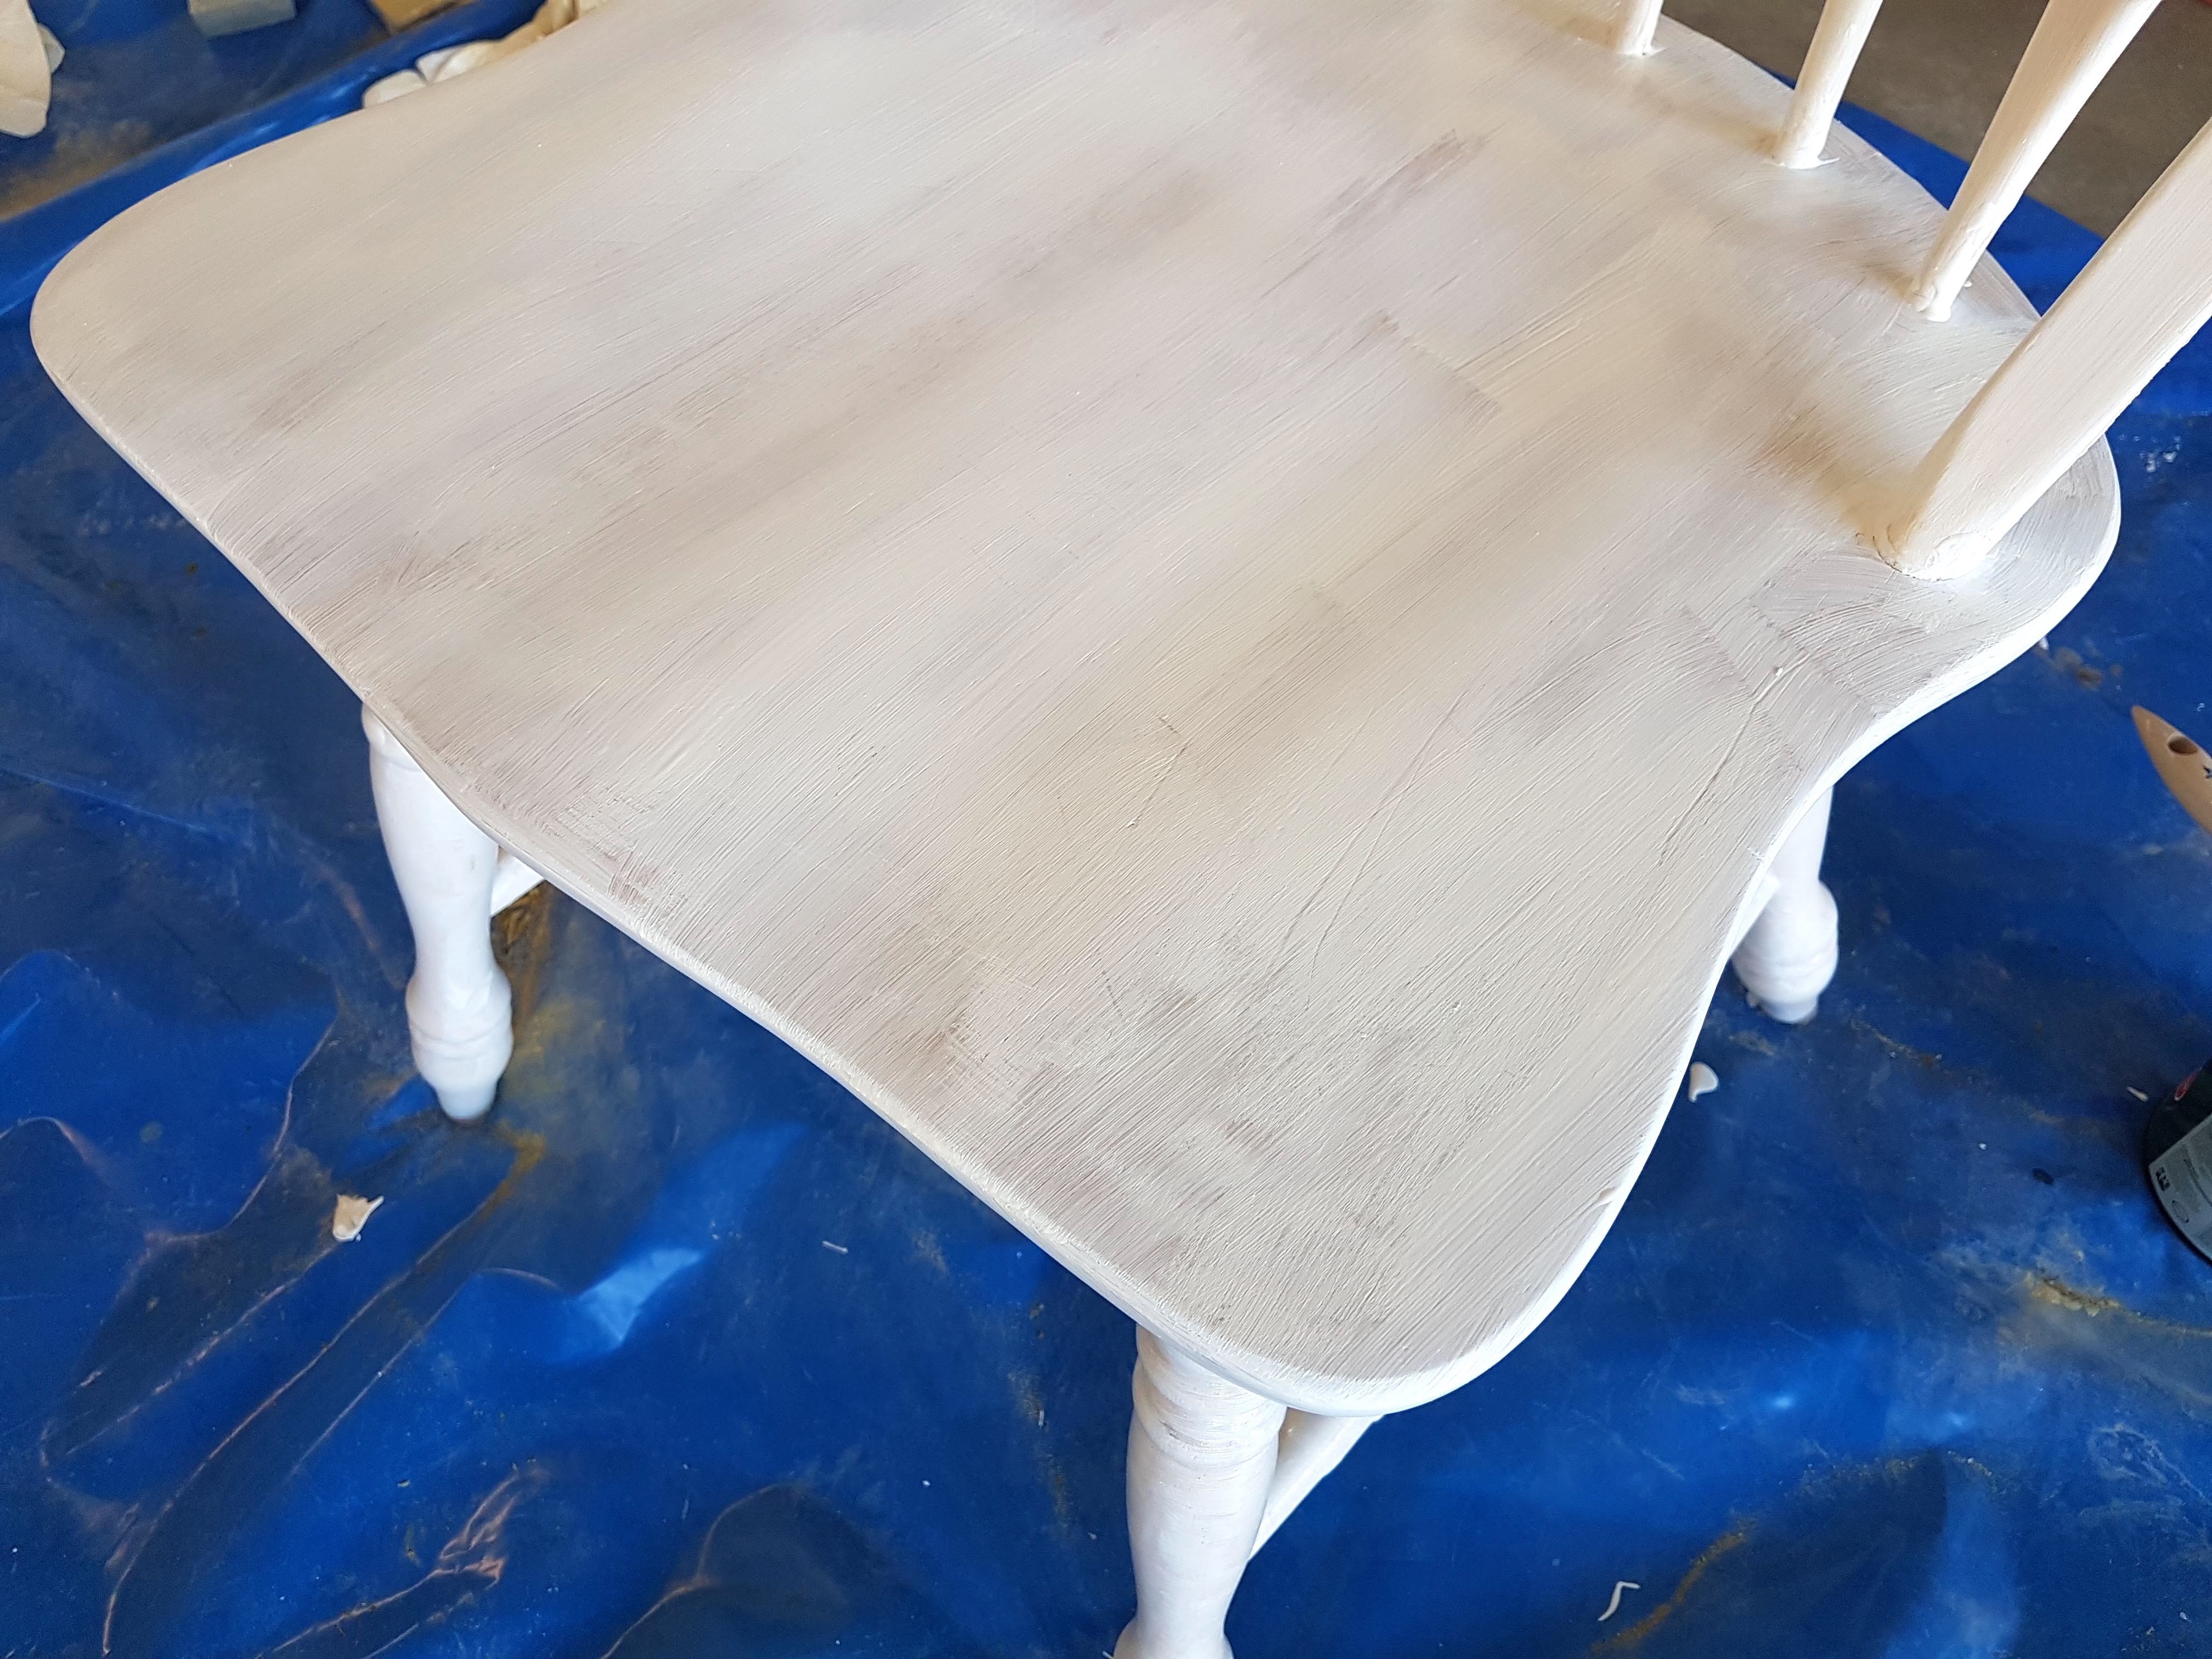
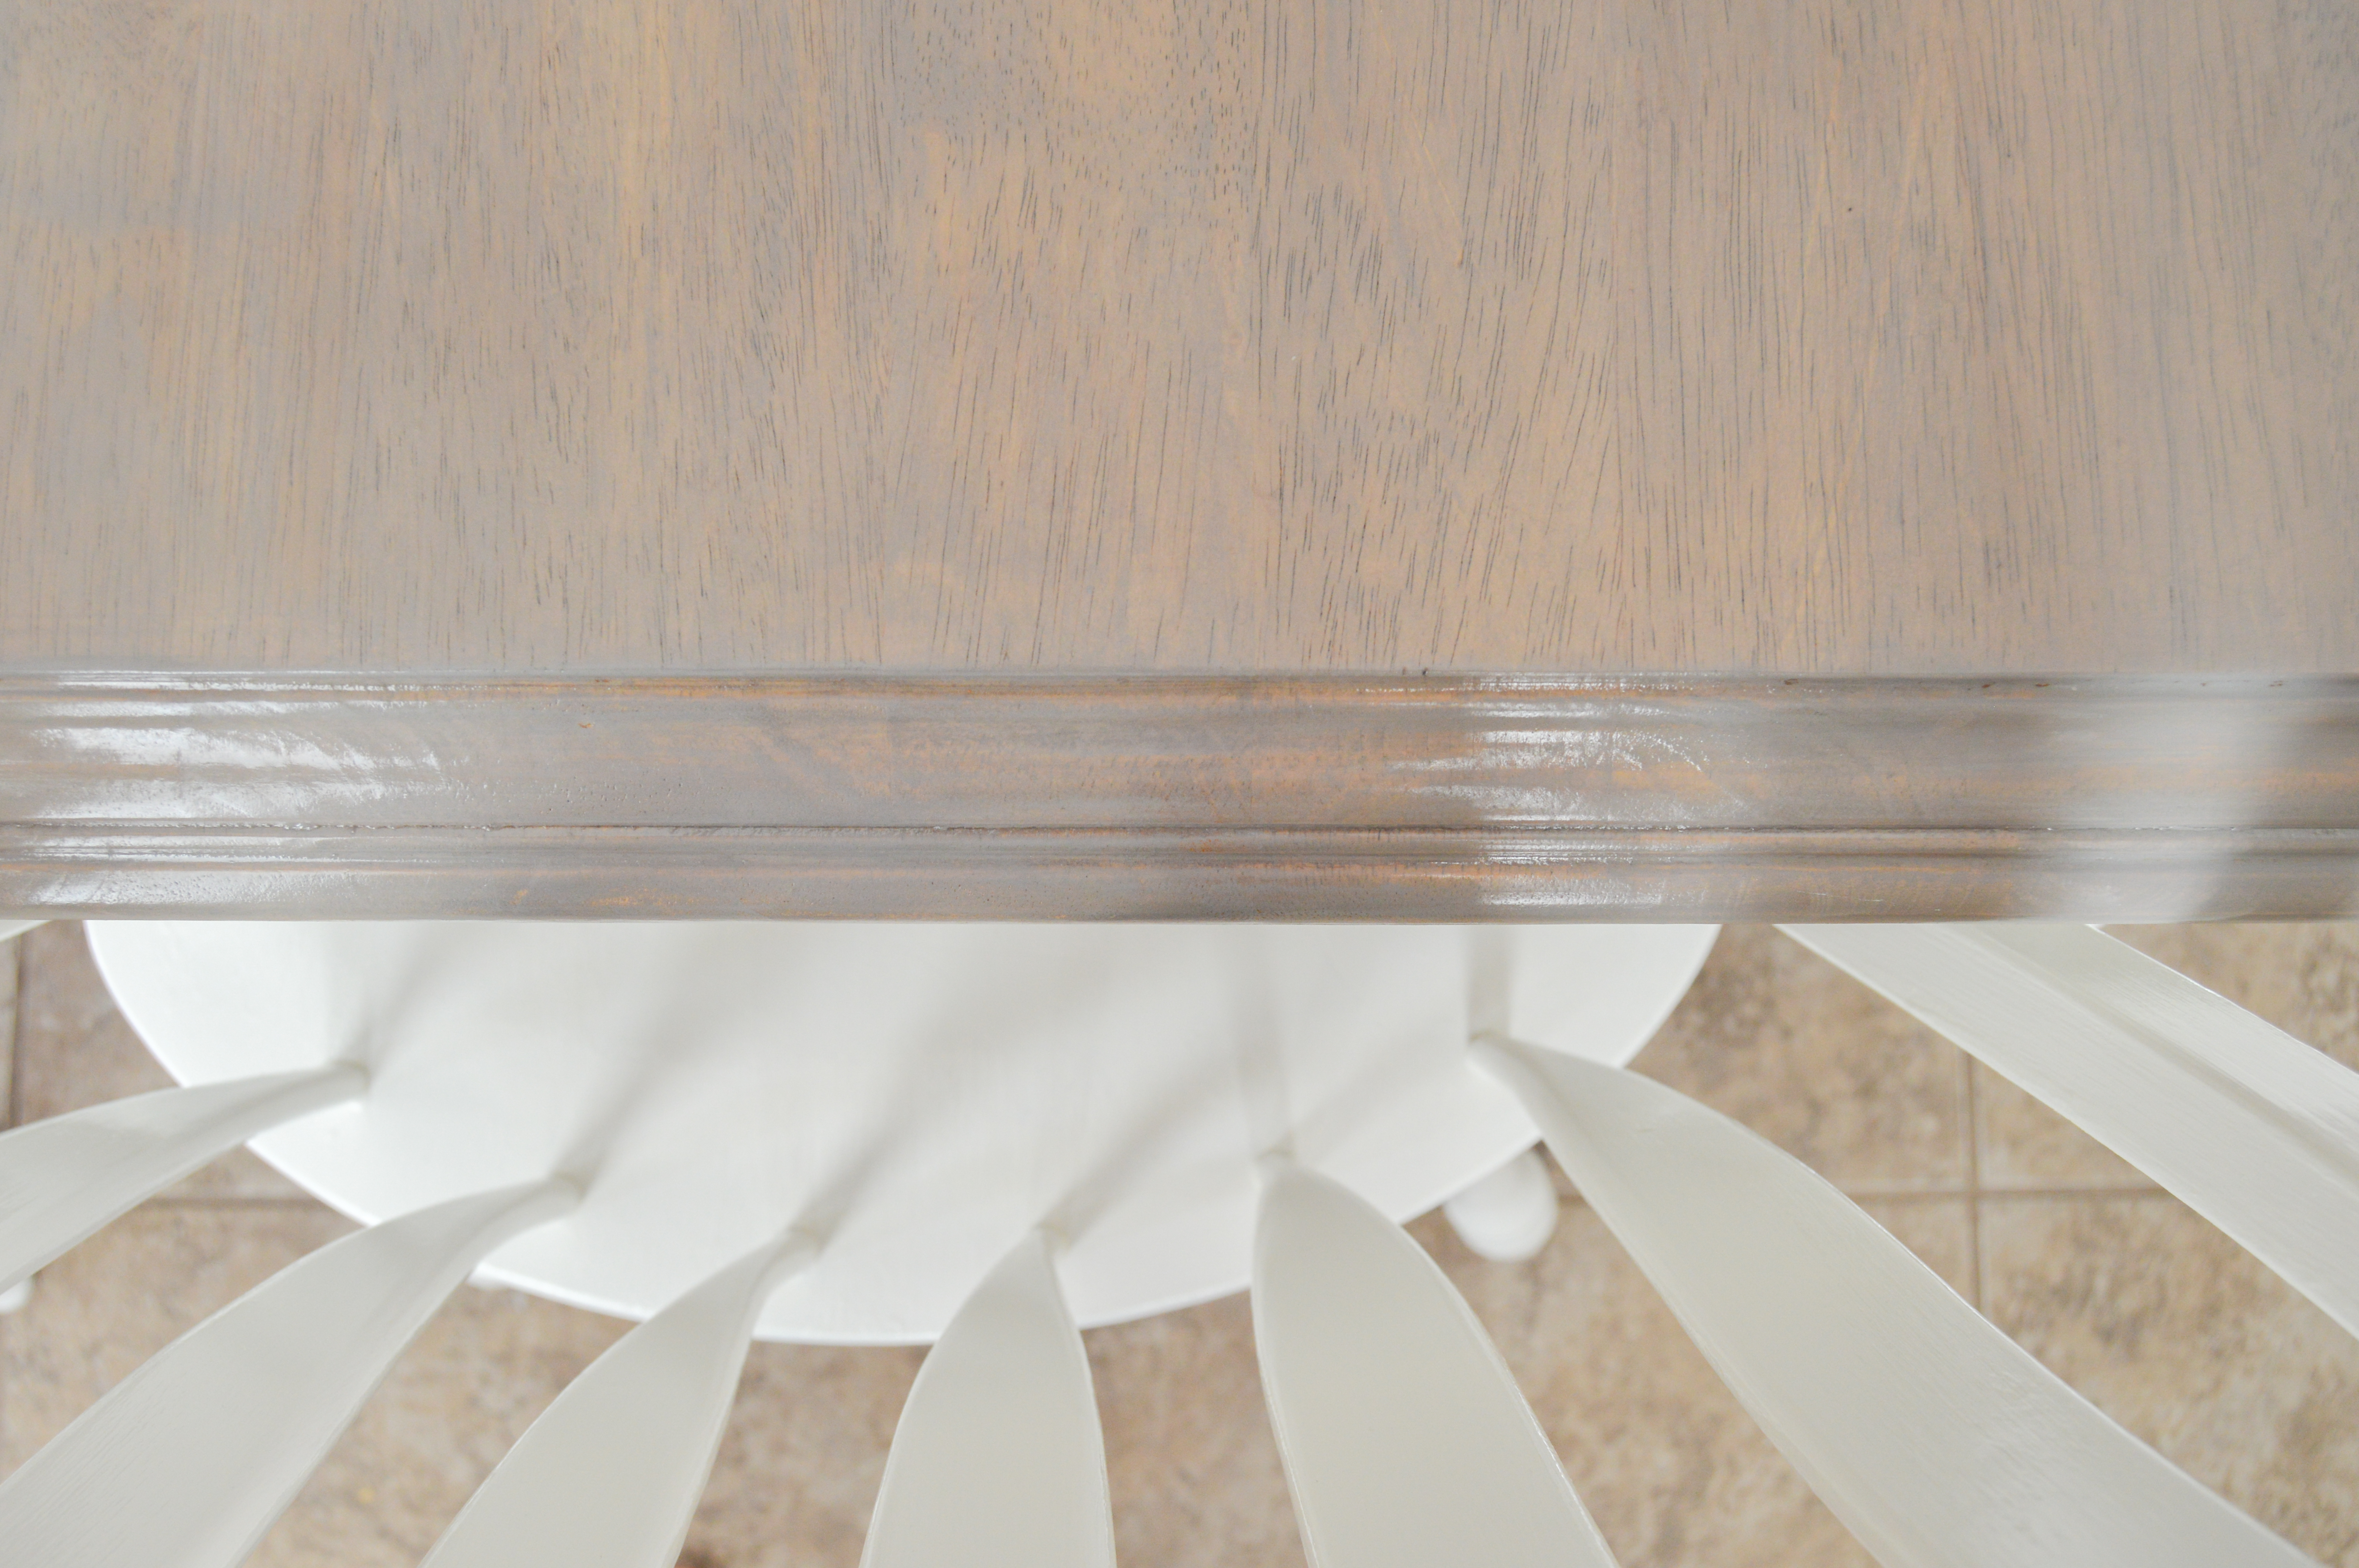
Showing me what the grey paint wash would look like, Sherrie applied a grey paint wash to the bench top. First, she painted a small area with the grey paint. Then, using a damp cloth, she gently wiped away some of the paint. This left a semi-painted washy look. The grey paint wash seemed fairly easy to do and a good method even for beginners.
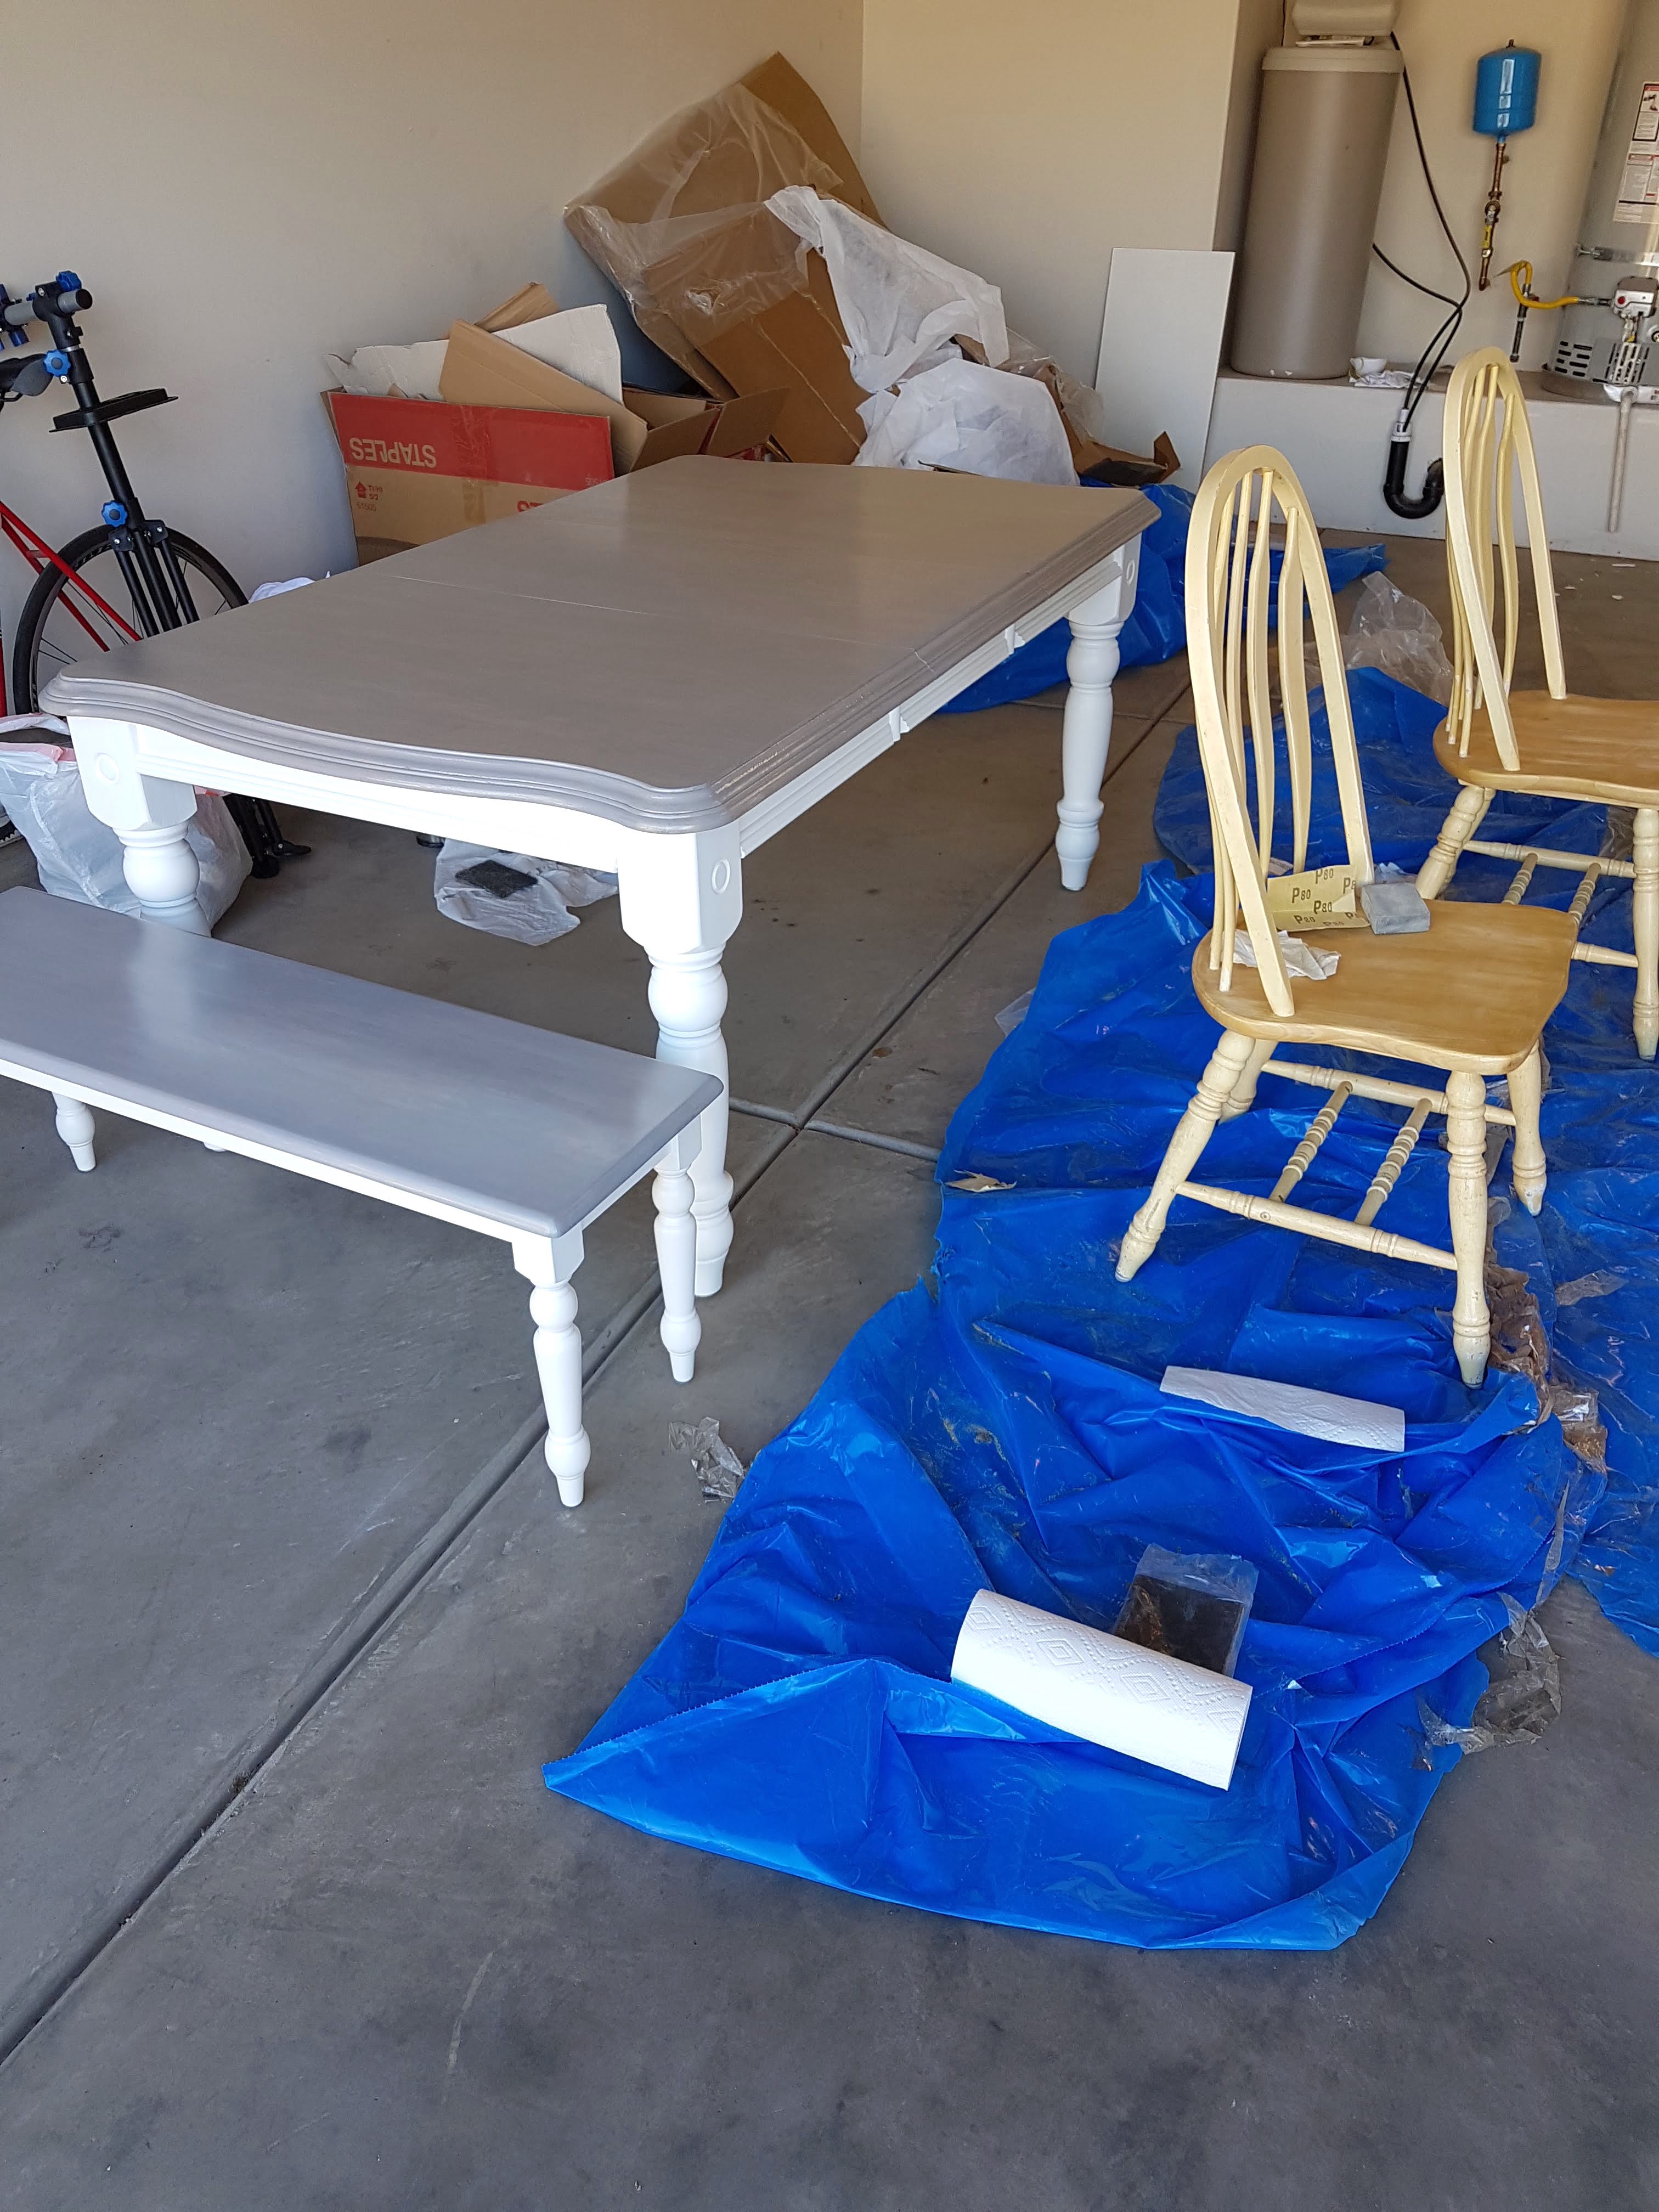
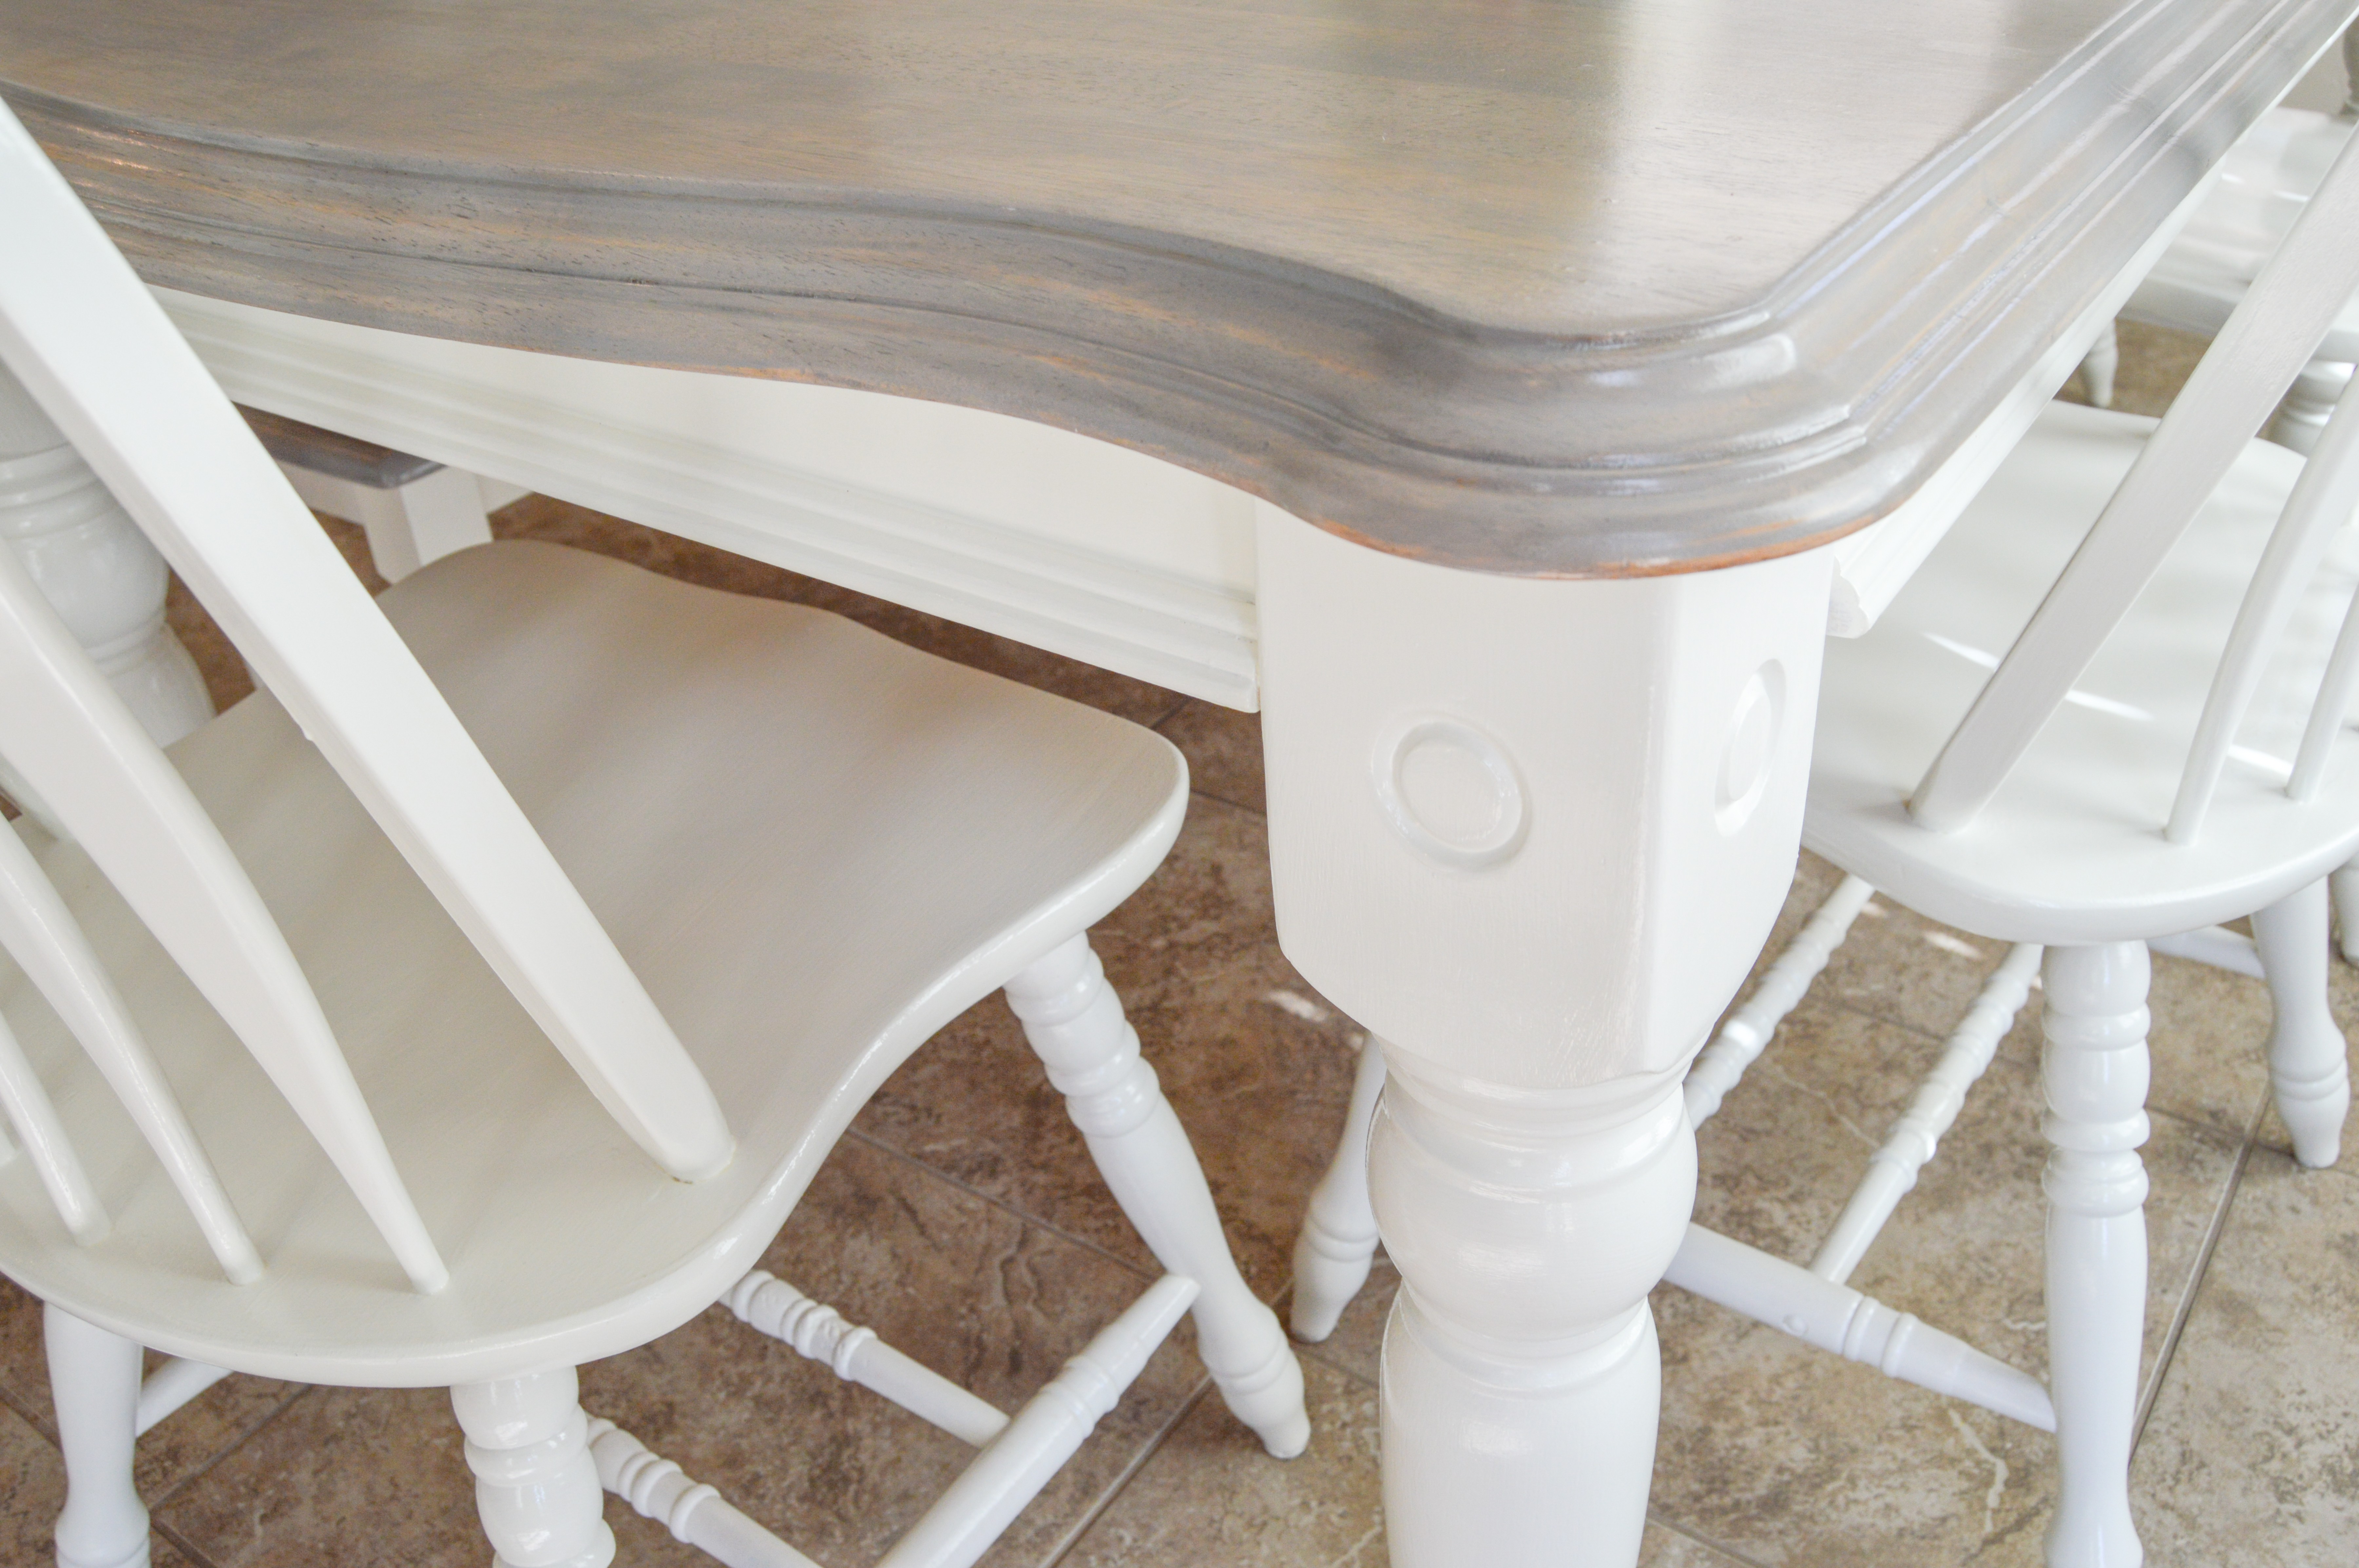
Because I was able to see the wood grain through the grey paint wash and I had grey accents in my home, I told her to go for it. Sherrie returned the table and bench a couple of days later with the grey paint wash and poly on the tops and with the table bottom primed and painted. She was moving that day (bless her heart!) and said with all the fuss over the table top she didn’t have any time left to poly the table bottom.
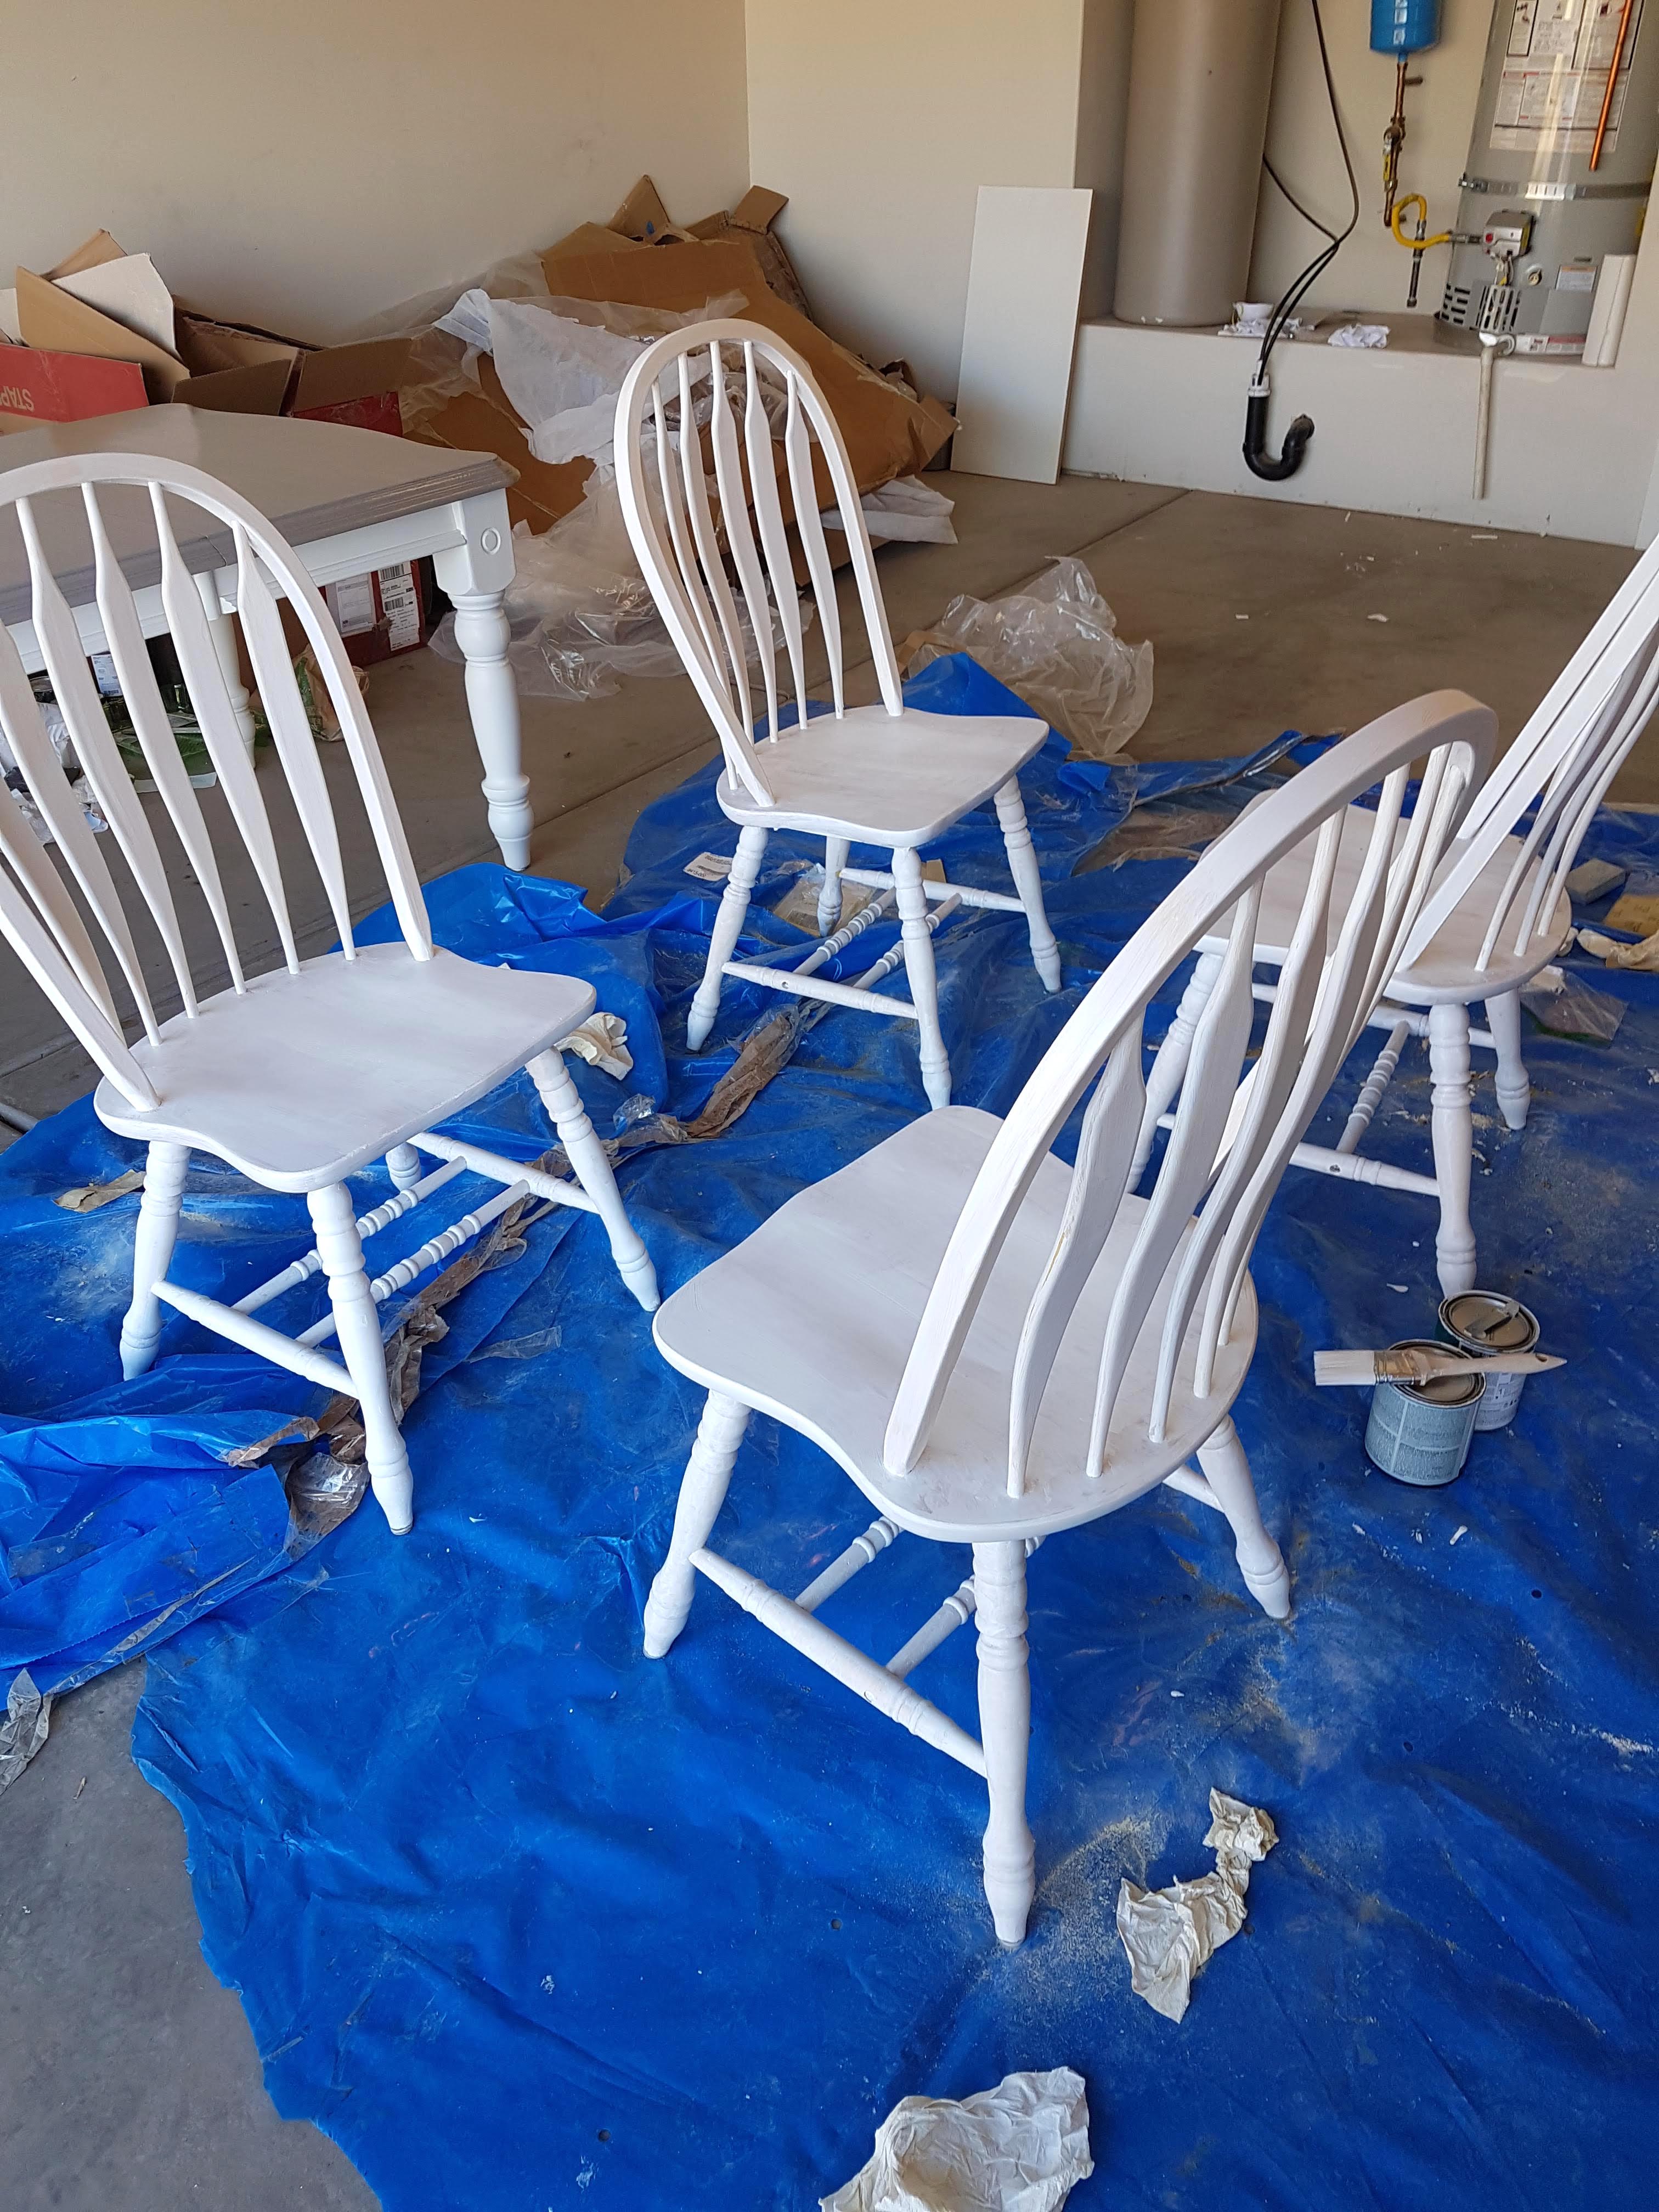
The Painted Dining Chairs
So I put poly on the bottom of the table and then started the long chair process. I decided to not do any grey paint wash on the chairs to make it as easy on myself as possible, so I stuck to all white paint.
Painting the Chairs
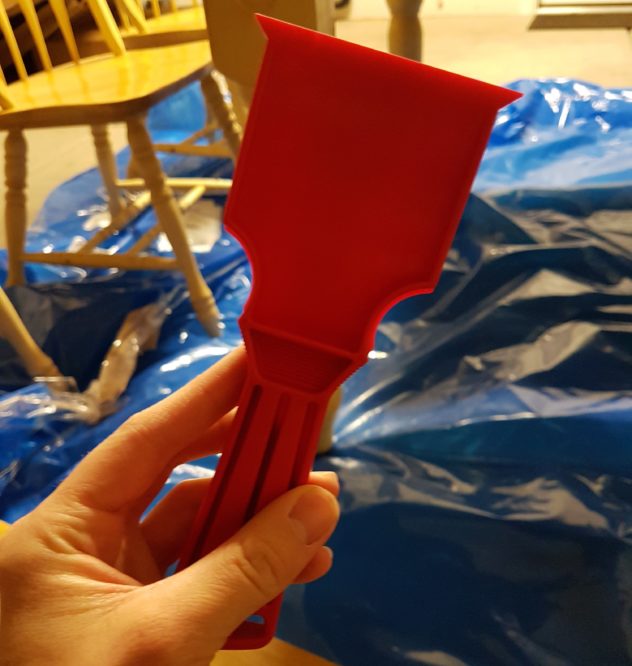
First, I worked to strip the wax off of the chairs. This is probably my least favorite part of the whole process because it’s dangerous stuff. You have to wear a mask and heavy duty gloves and work in a ventilated area. Be sure to also grab one of these little red things for scraping.
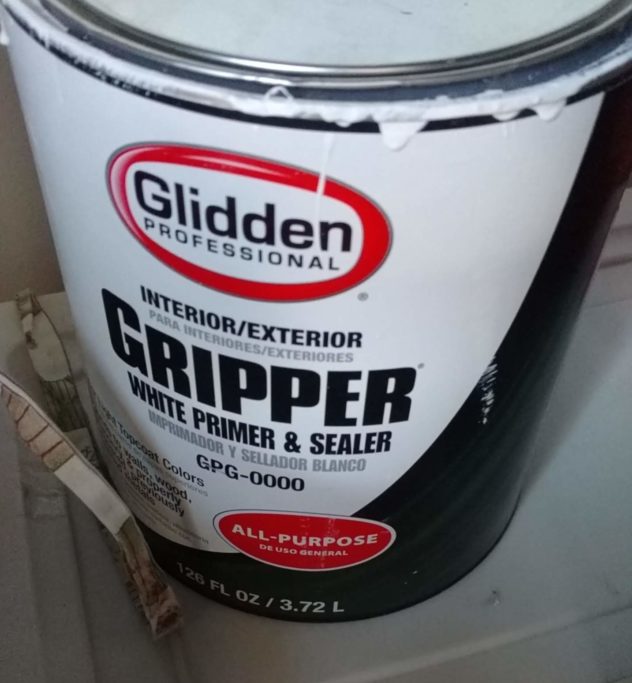
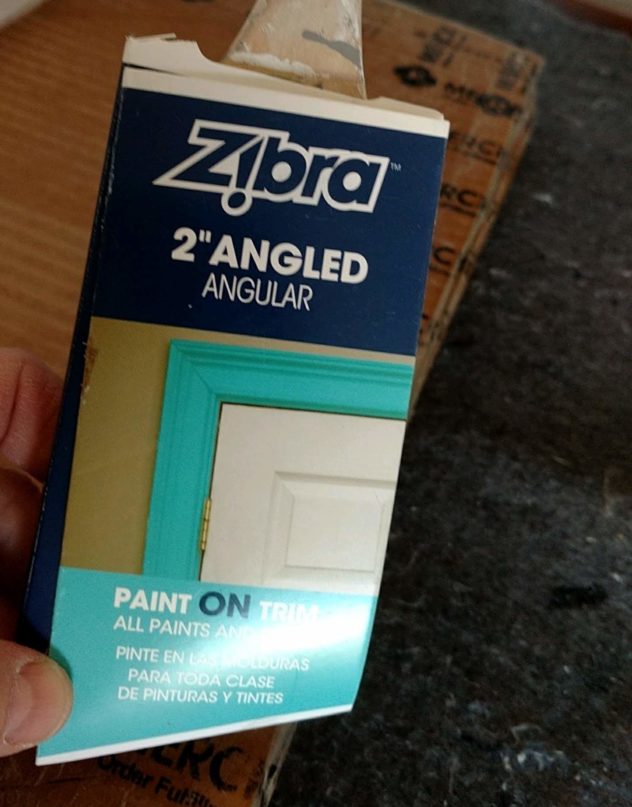
Then I sanded down the chairs too a little bit before applying the gripper primer. These are the gripper primer and brush that Sherrie suggests and they work great! I got them from Home Depot.
Here is what a chair looks like after priming. (Tip: Be sure to rinse your brush out really well after each use! You can even use a little bit of dish soap. If you take care of your brush it will last you a long time. You can use the same brush you used for your primer as your paint brush. Just be sure to use a different brush for the poly coat.)
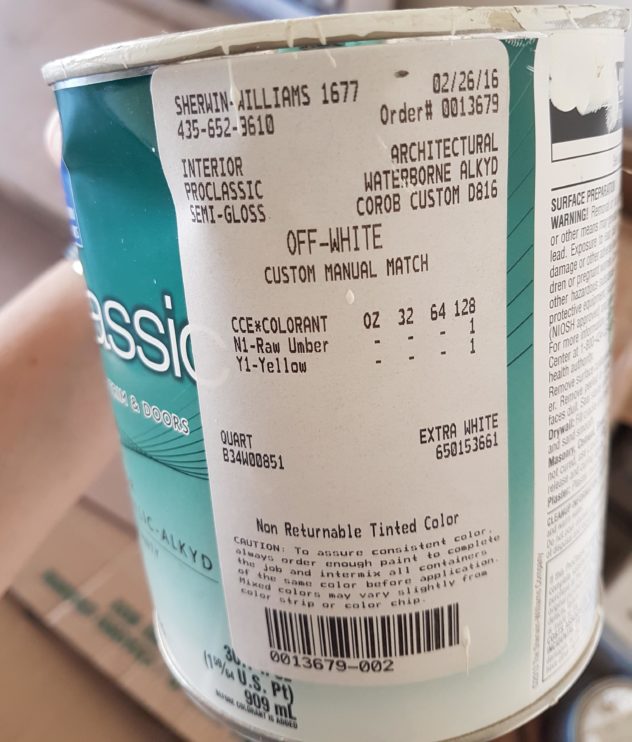
And then here are the chairs after one coat of white paint. I want these chairs to match the white of our living room built-ins, so I went to Sherwin Williams and they matched it for me.
I was surprised how long it took me to paint these chairs. One coat of paint on one chair took me half an hour. There were so many nooks and spindles to paint! My biggest tip for painting these chairs is to start with the less important pieces and then do the most important pieces last. (For example, do the spindles under the chair and then the chair legs. And do the back rest pieces first and then the seat surface.) This will ensure that the most important parts have a nice, smooth coat.
I’d also suggest painting in one direction (with the grain of the wood) as much as you can. Although to be totally honest, I did not do that with the chair spindles and legs. I was just wanted to get those done as quickly as possible. And no one is on their hands and knees inspecting the bottom.
Poly on the Chairs
I ended up doing two coats of paint and three coats of poly for protection. Here is the Minwax water based polycrylic from Lowes that Sherrie suggested I use. Make sure you use water based poly if your paint was water based too. Again, I needed a new brush for the poly coats, so I got another Zibra brush like the one pictured above.

Poly Coating Tips
Sherrie is a sweetheart. She came over before I started the poly process to give me these 6 main tips.
Poly Tip 1: Short, Short, Long Strokes
Because the poly can pool in areas, she suggests brushing in a line like: short, short, long. The short strokes moving in a line and the long stroke going back over the strokes in the same line. This method enables the poly to get spread out a bit when your brush is the wettest instead of all of the poly puddling at the beginning when you first start brushing. (Does that make sense? If you have questions feel free to ask for clarification in the comments section below.)
Poly Tip 2: Do Main Surfaces Last
When working on a chair, do the backrest part of the chair first, then the boarder piece of the backrest, then the boarder of the chair seat, then the chair seat surface. This way the seat gets the final strokes and isn’t touched by the brush when doing the other areas. Likewise, on the bottom, the spindles should be done first and then the chair legs.
Poly Tip 3: Use a Plastic Cup
Don’t dip your brush into the can. Instead, pour a small amount into a plastic cup that you can discard later. Dipping into the can could contaminate your poly.
Poly Tip 4: Rise Your Brush Immediately
Rinse your brush immediately after uses. Unlike paint, poly dries really quickly. To make sure your brush doesn’t get ruined between uses, you should immediately wash it out with warm water and dish soap. Then make sure it’s dry before your next use.
Poly Tip 5: Use 1-3 Coats
Do at least 3 coats on surfaces that will get a lot of beating. Chair seats, and the front of chair legs will get a lot of wear. The spindles underneath and the middle of the chair backs probably won’t get touched as often so you only need a couple of poly coats down there.
Poly Tip 6: Wait a Week
Even though the can says you can use the chair pretty soon after applying your last coat, Sherrie suggested waiting a week to make sure the poly really had a chance to harden. I didn’t want to take any chances after all of my hard work, so I followed her advice.
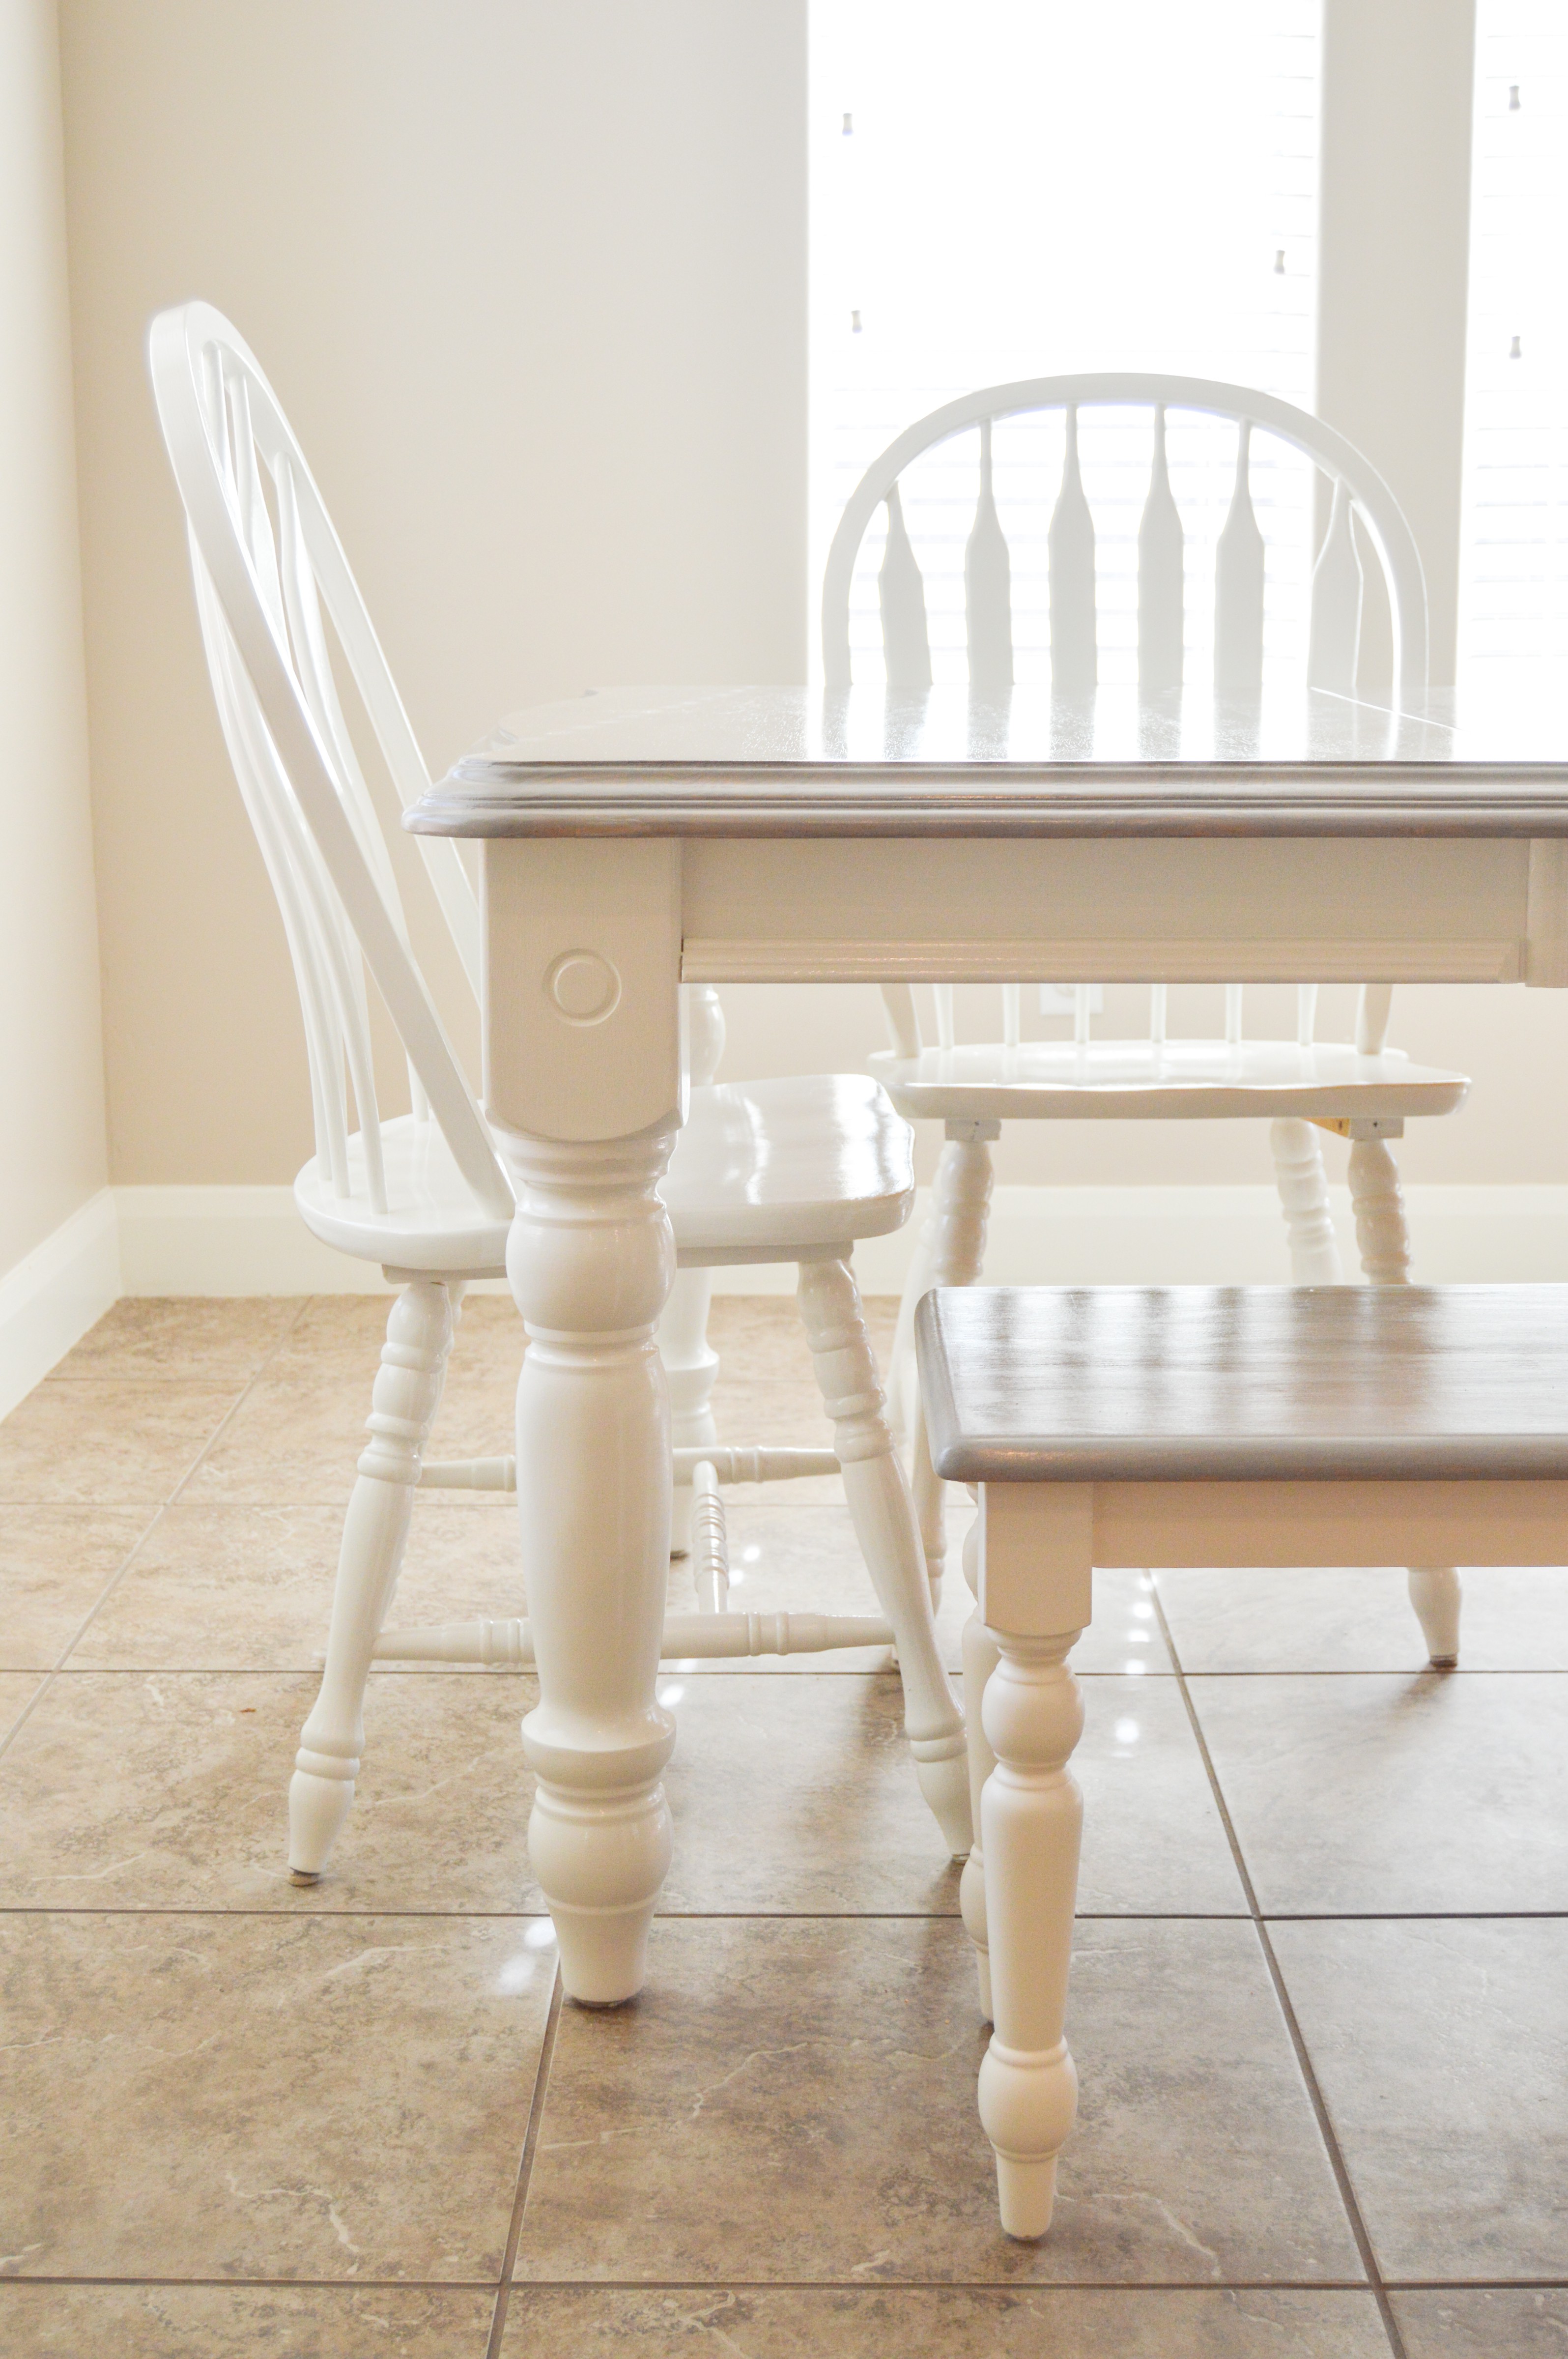
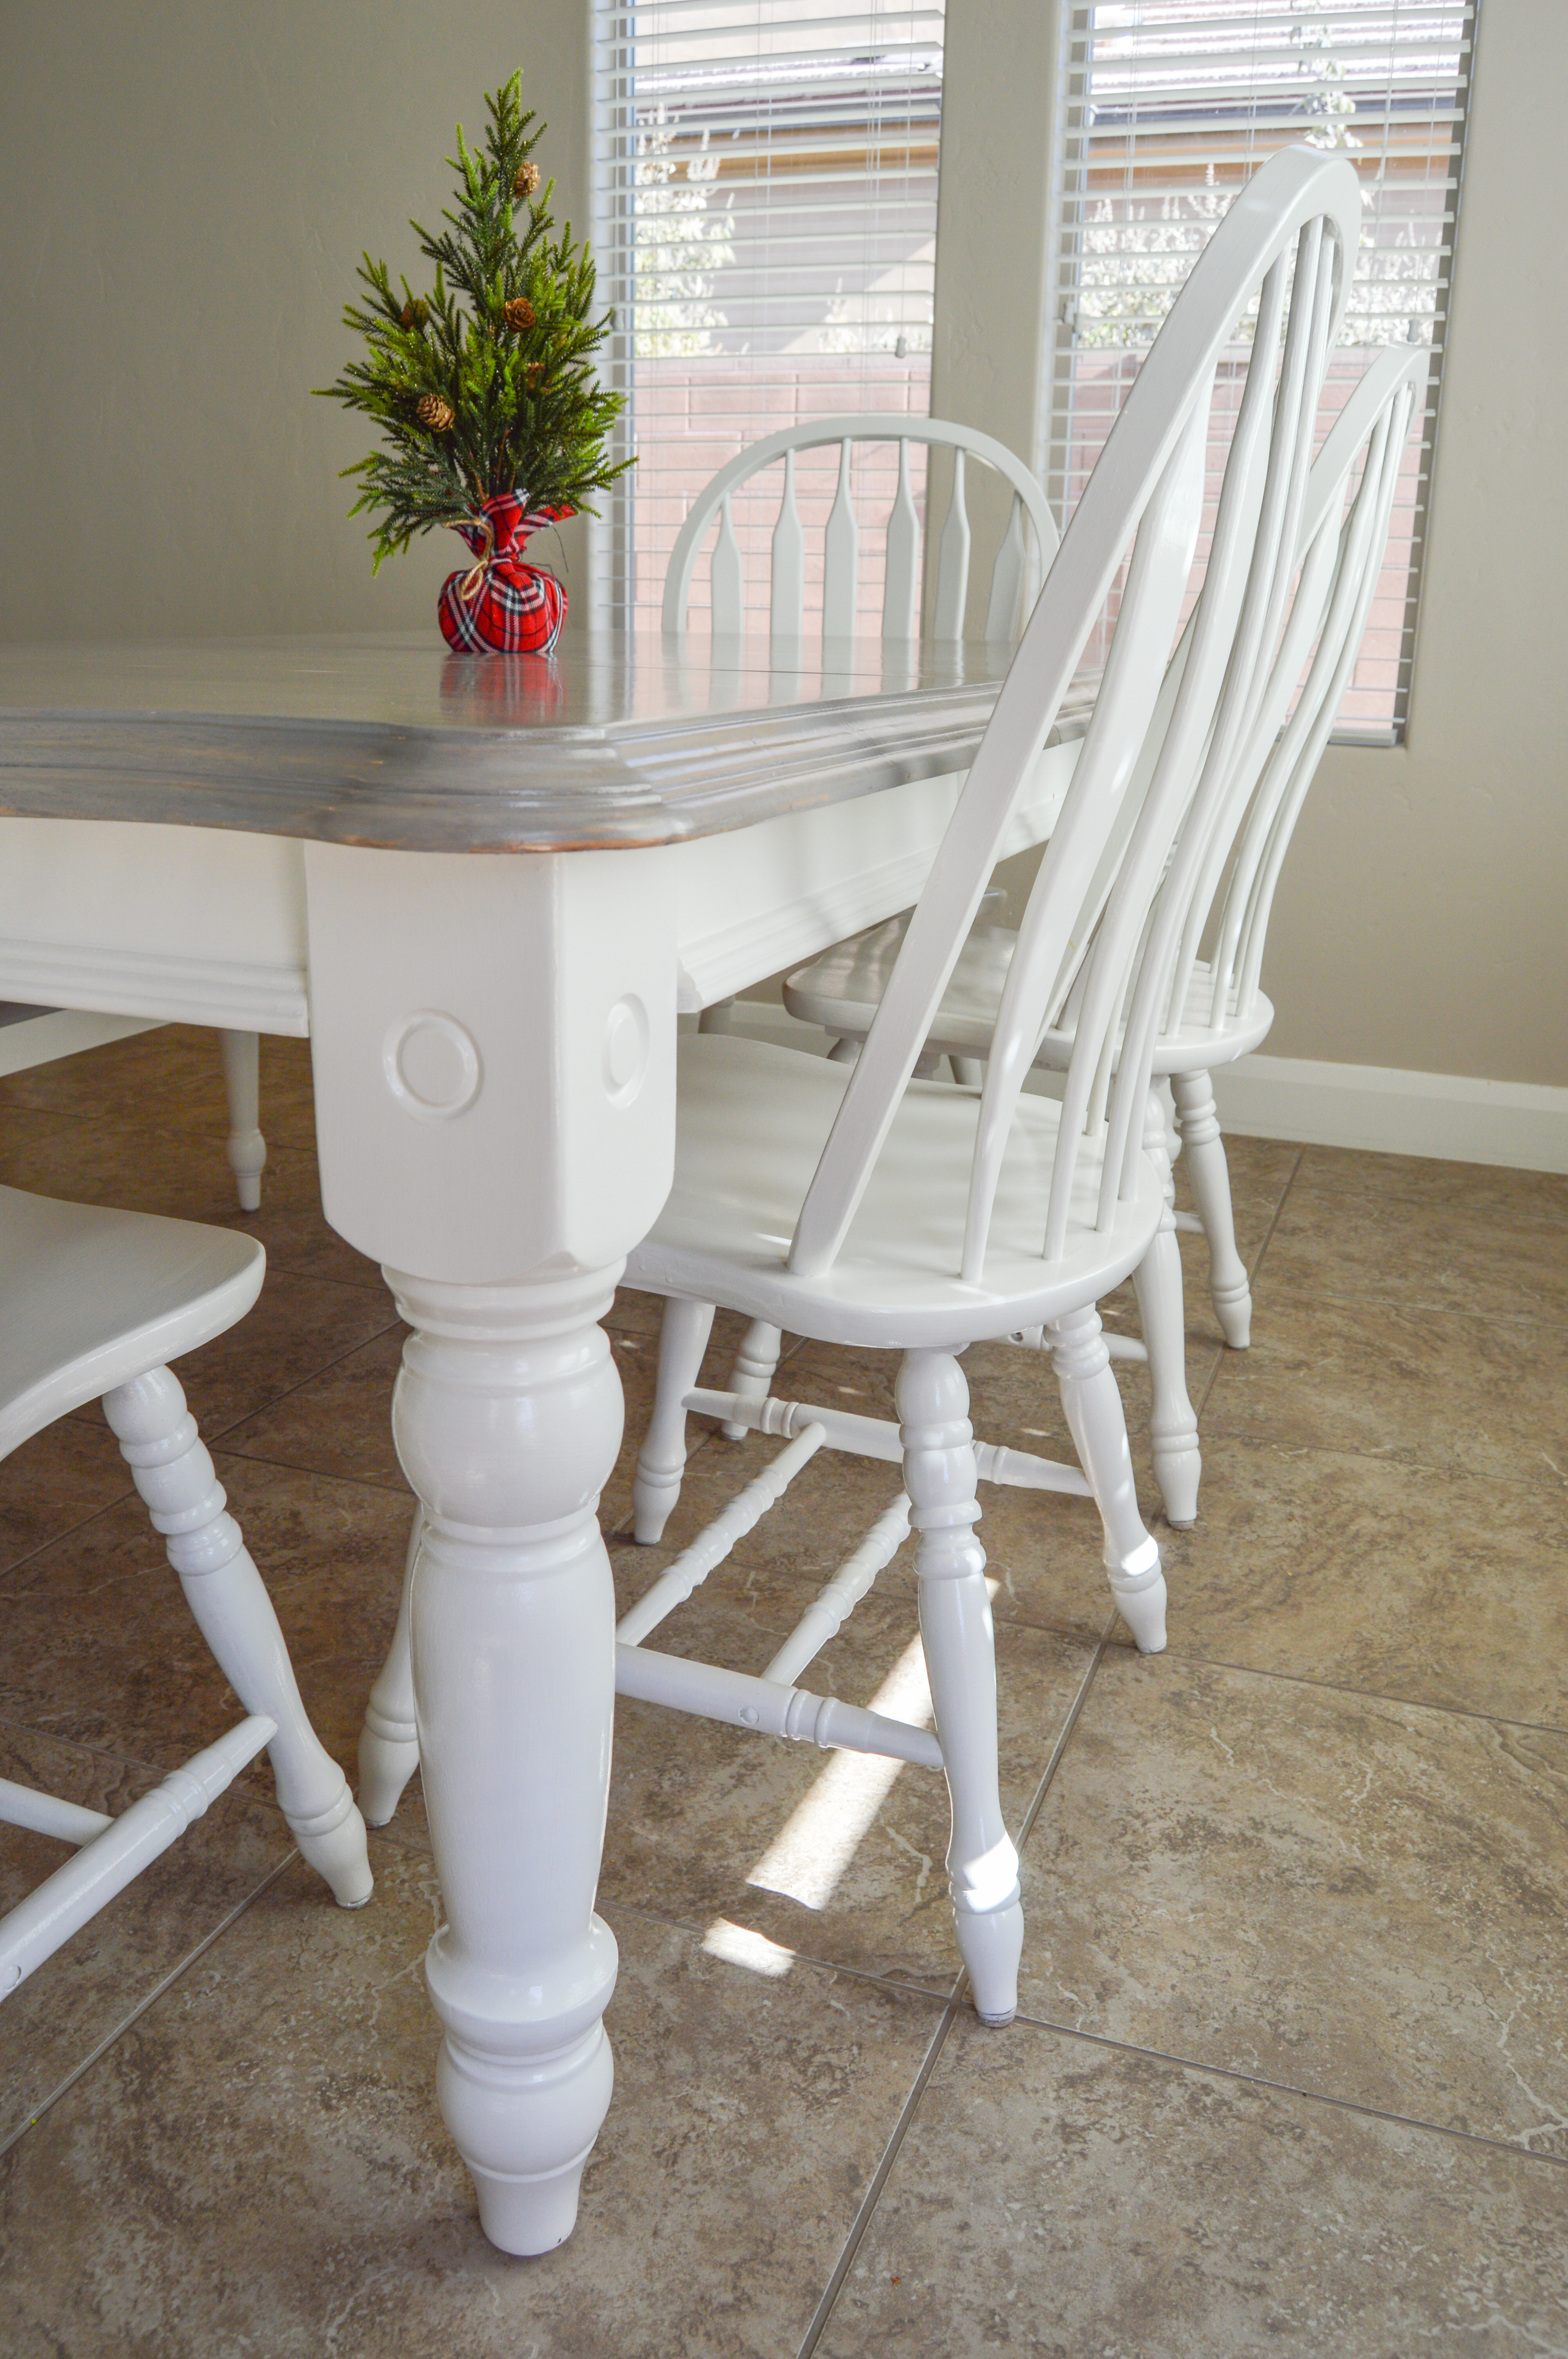
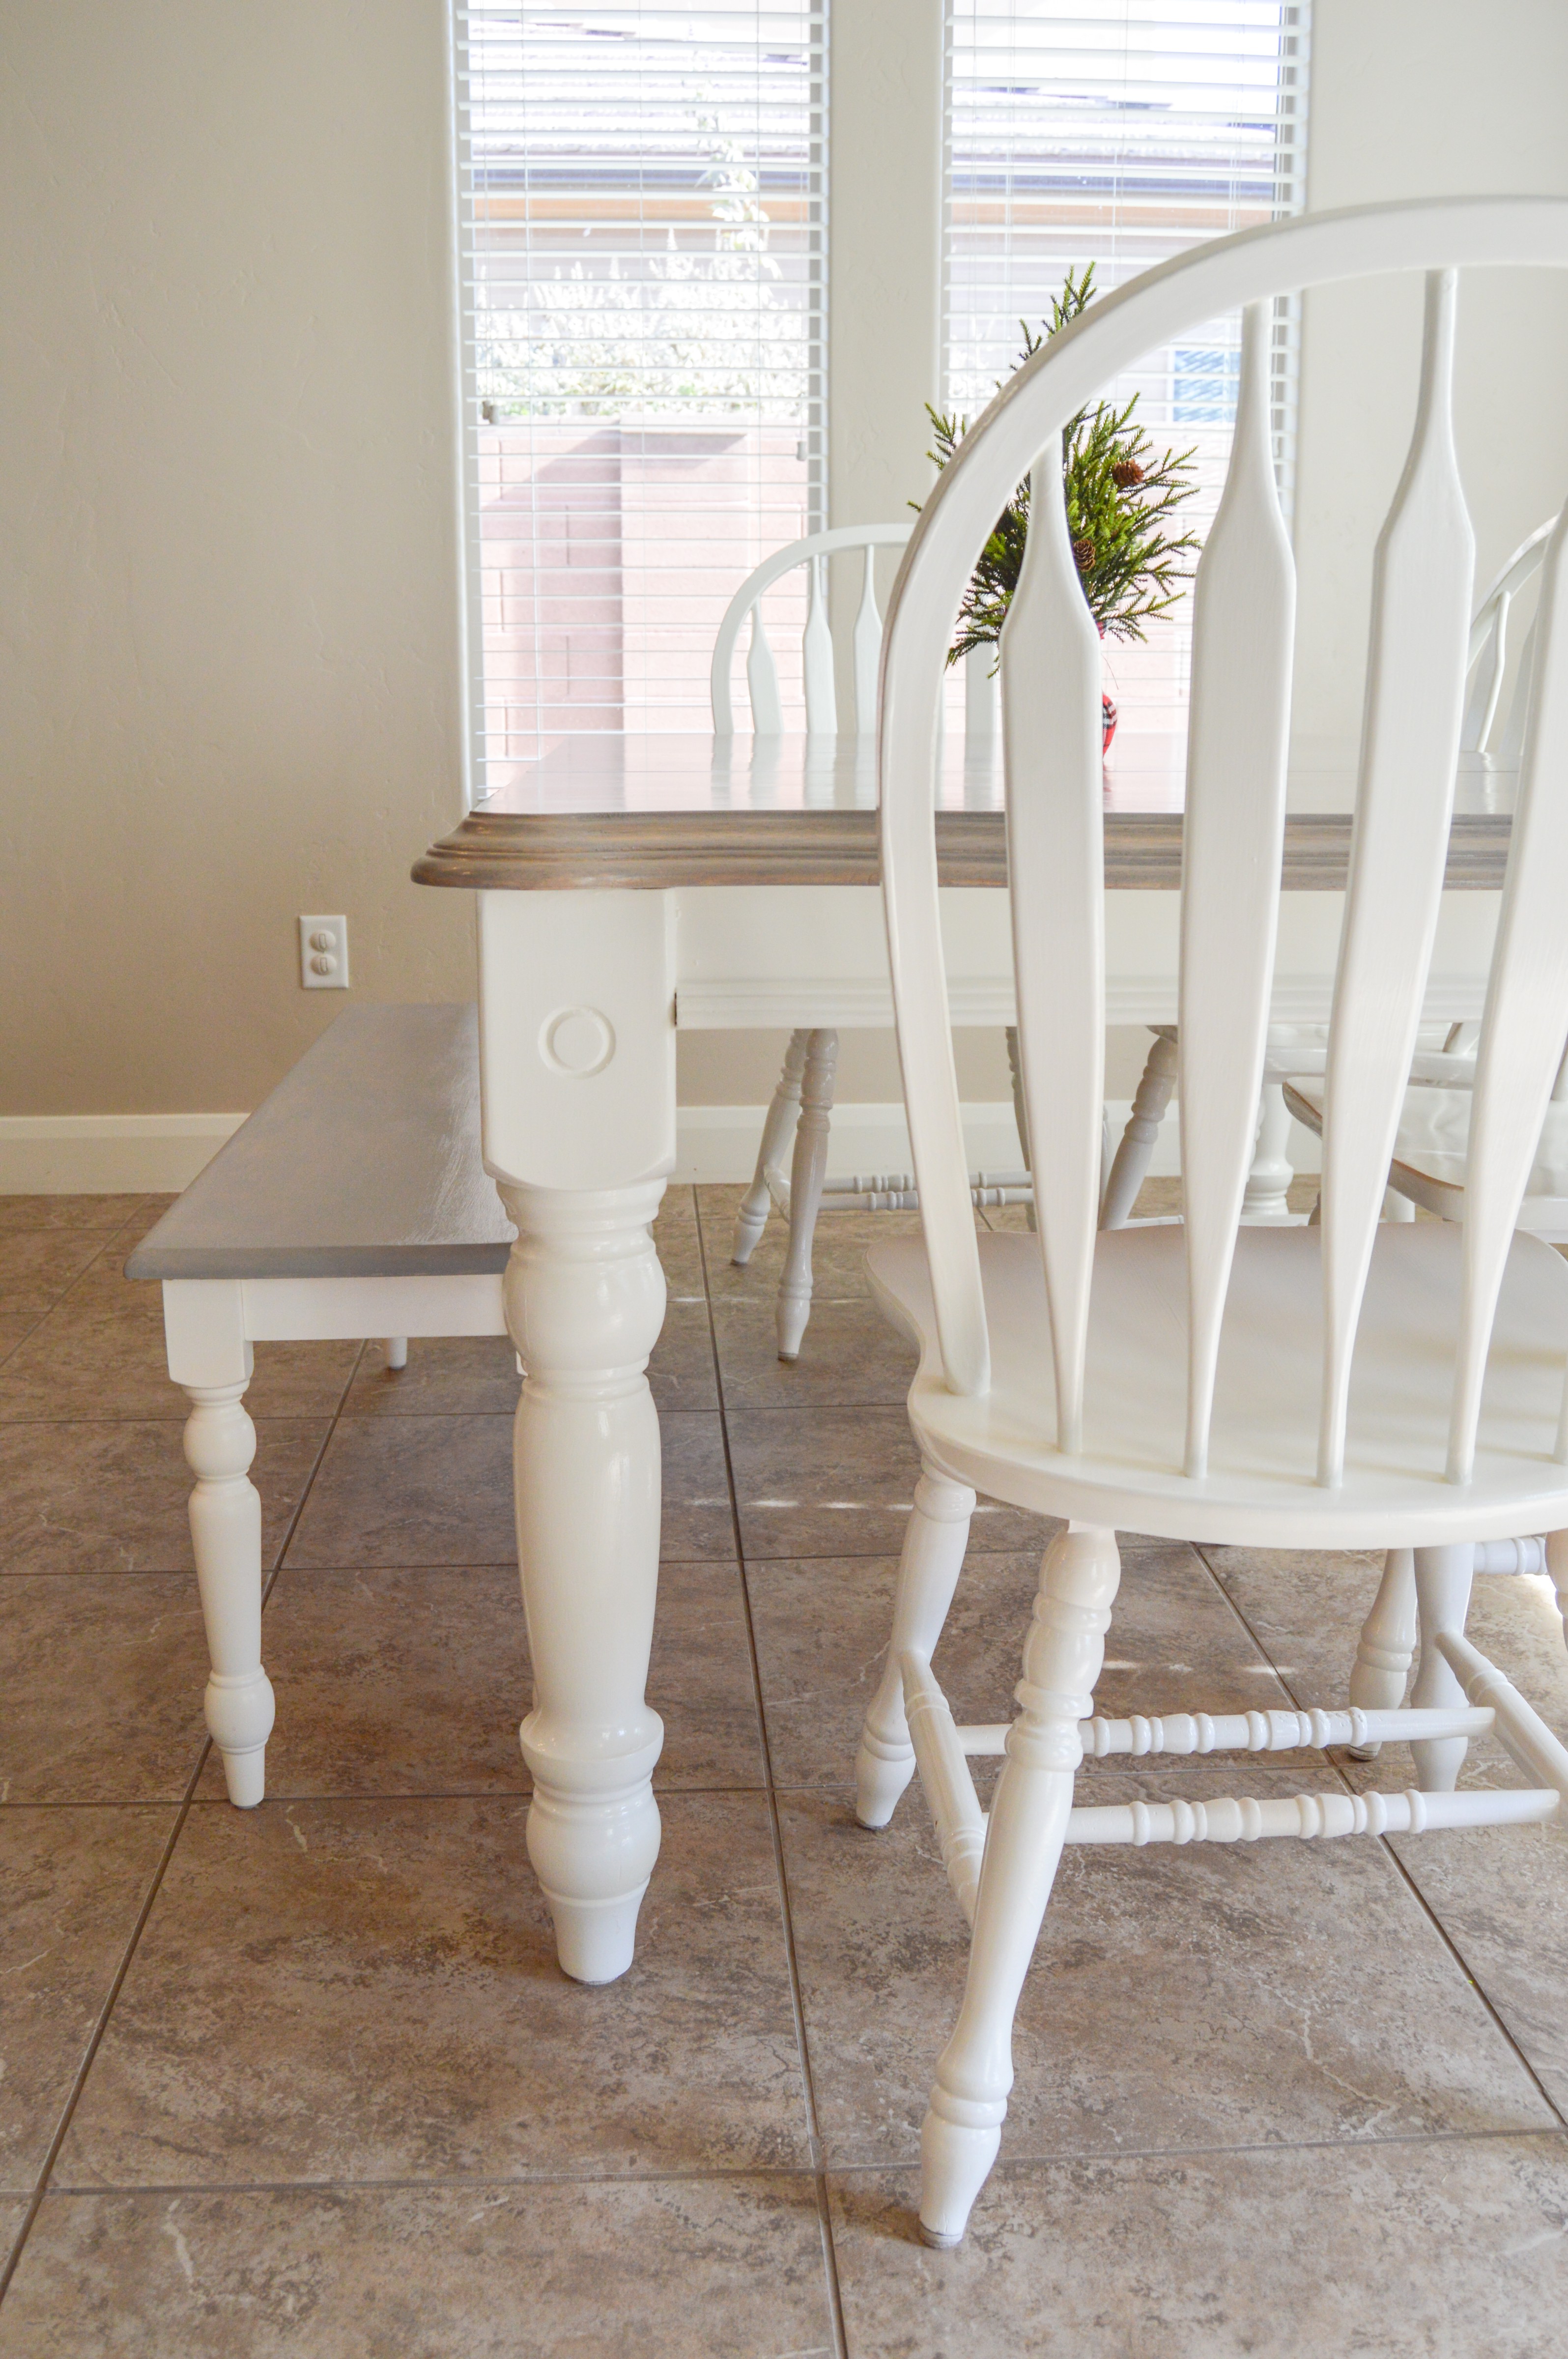
The Finished Dining Table, Bench, & Chairs
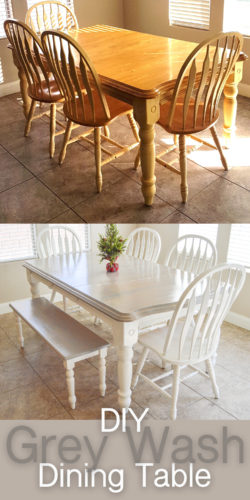
And after waiting for them to dry, the table and bench and chairs were all done! All in all it was about a month-long process because of all the hiccups and waiting along the way. But we’re so glad we did it. Just look at these before and afters!
And this before/after of the table top with my bad stain job in the mix.
We are loving the grey paint wash table and the white paint chairs. What do you think? Please let me know by commenting below!
Pin It For Later
Please pin this to save for later and to help us share this grey paint wash post with others!
Other Posts You Might Like
20 of the Coolest Hammocks Ever

How to Easily Paint a Mountain Mural
How to Paint, Stain, and Distress a Dresser