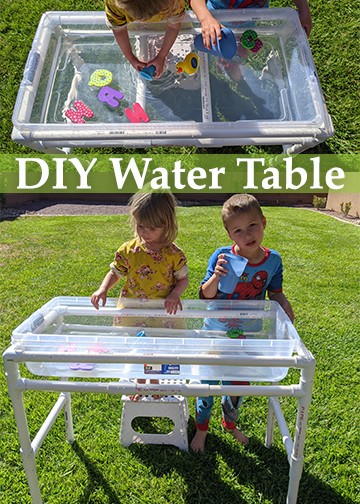
We live in St George, Utah and it gets hot here in the summer. We’re talkin’ hot enough that we only like doing outings in the morning. By the afternoon it’s just too hot to handle. To give the kids some backyard fun they can enjoy even in the heat of the day, my husband and I wanted to get a water table. We (okay, mostly my husband) ended up making a DIY PVC pipe water table.
(This DIY PVC pipe water table post contains affiliate links that I may be compensated for. Your clicks and purchases help support The DIY Lighthouse at no extra charge to you.)
We could have bought something like this pirate water table, or this mermaid water table, but we didn’t want to spend 50+ bucks getting a table our kids would quickly outgrow. After looking at a dozen options, we decided to make a DIY PVC pipe water table out of PVC pipe and a plastic bin.
How to make a PVC Pipe Water Table
Our inspiration came from this blog post and this blog post. We decided to go with the PVC pipe version for 3 reasons. 1) We liked how versatile the water table could easily be–you can turn it into a sand table or sensory table by just filling it up with something else. 2) It looked relatively easy to make. 3) We thought the DIY PVC pipe water table would hold up really well to water and direct sunlight. There wouldn’t be a lot of fading going on.
Supplies Needed
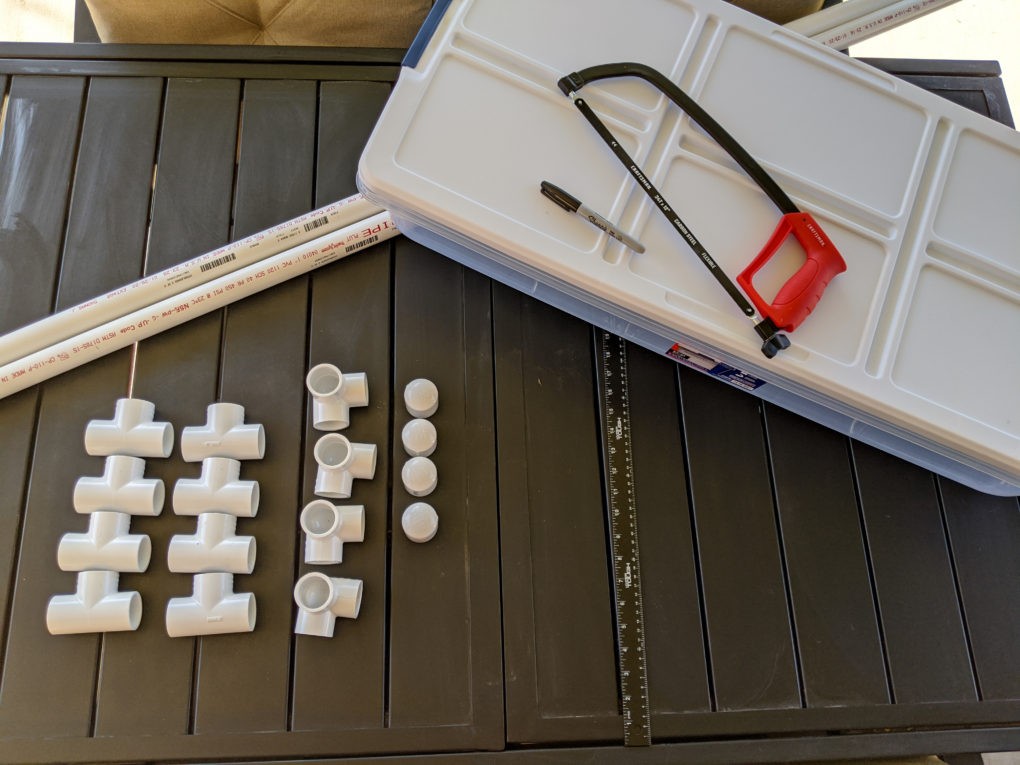
After making a run to Lowe’s we had everything (almost–we ended up having to make another trip for more supplies) we needed to start the project. To recreate our PVC pipe water table, you will need…
- Three 10-foot-long poles of 1-inch PVC pipe (we ended up using 313 inches of that)
- Twelve 1-inch PVC pipe tee connectors
- Four 1-inch PVC pipe elbow connectors
- Four 1-inch PVC pipe end caps
- One 13-gallon Hefty bin (35.96 in x 16.81 in x 6.59 in)
- Saw (we ended up using a jigsaw)
Tutorial for a PVC Pipe Water Table
After gathering our supplies, we were ready to get going on building the water table.
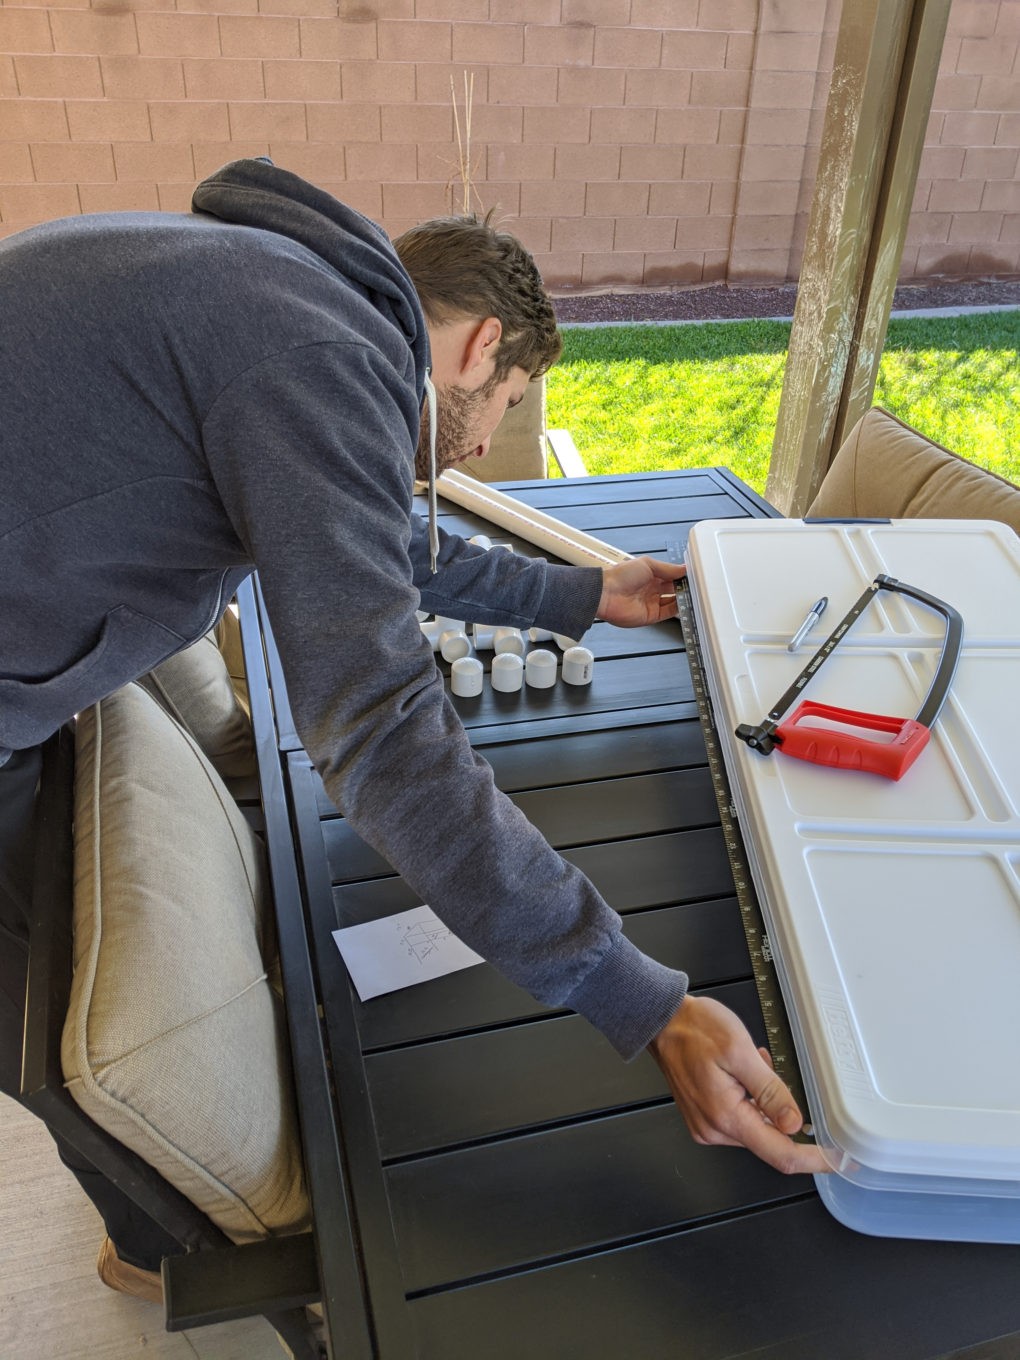
Measure and mark the PVC Pipe
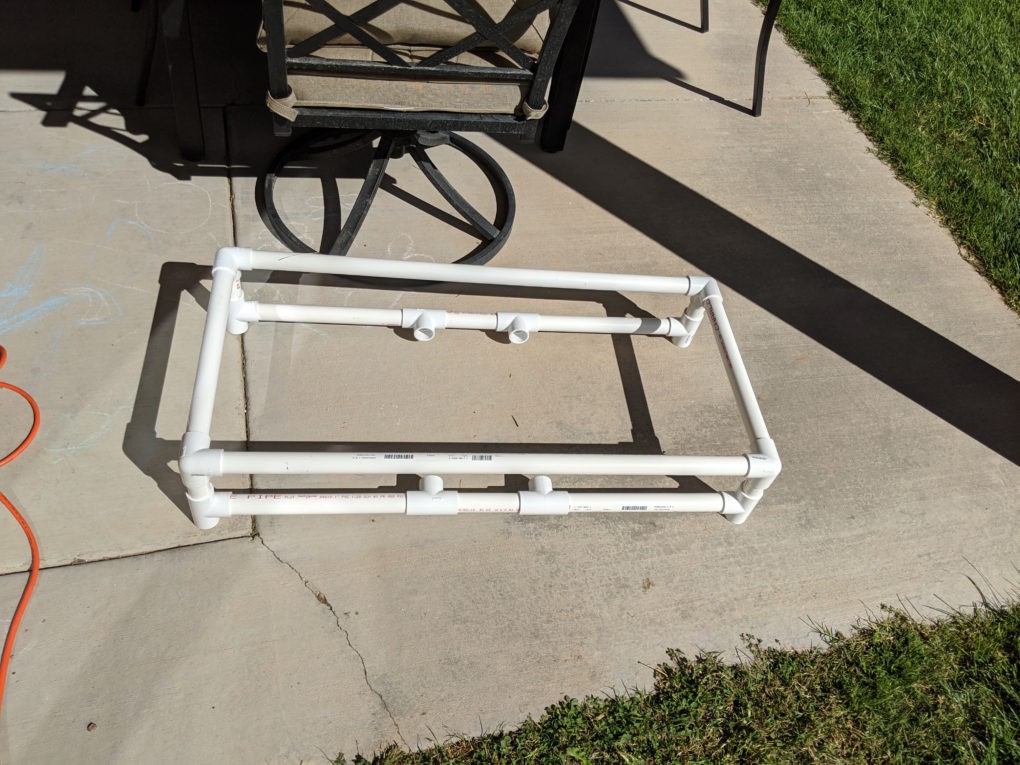
First, we measured and marked the PVC pipe to fit around the plastic bin. We wanted the bin to be able to slip inside, but we needed the PVC pipe to catch the bin on the lip so it couldn’t fall all the way through. For us that meant 34.5 inches on the long sides and 15 inches on the short sides.
Then we measured and marked how tall we needed it. The beauty of this DIY PVC pipe water table is that you can customize it to fit the height of your kids. We wanted the table high enough that our tall 4-year-old would be comfortable playing in it for a while. We also didn’t want it low enough that our baby would be able to reach it (and fall in) any time soon. With a step stool, our 2-year-old can easily play as well. In the end, we decided to go with about 30 inches tall total.
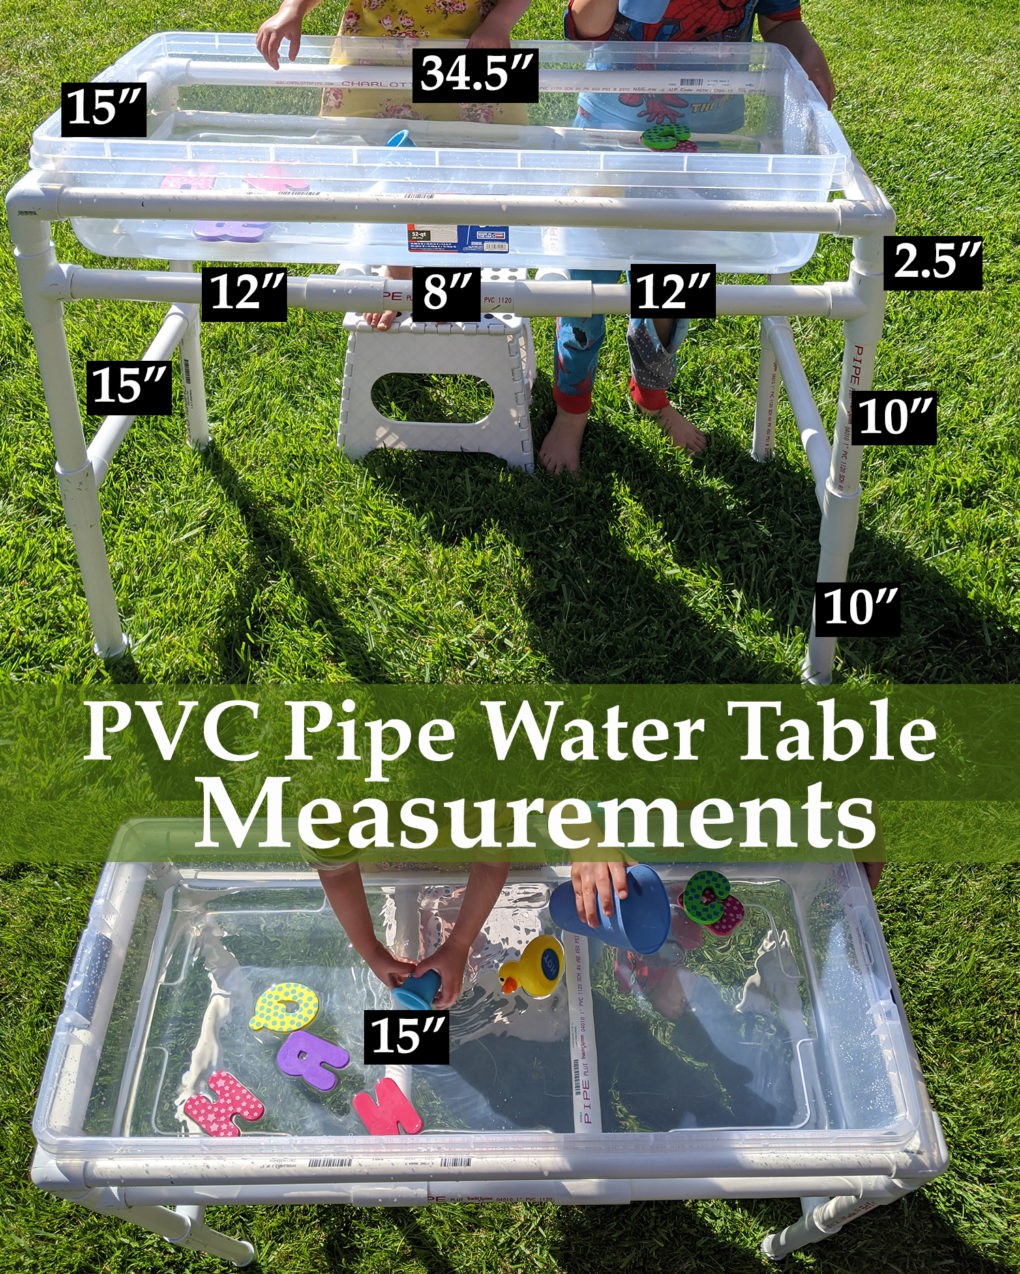
We had 2.5, 10, and 10 inches of PVC pipe on each leg plus connectors. (You can reference the measurements image above.) When measuring for whatever height you choose, be sure to account for the height the connectors will add. And remember that it’s always easier to cut off more PVC pipe than add more on.
We also had to cut supports. Support #1 was to help hold up the bin. For this we had 12, 8, and 12 inches of PVC pipe on the two long sides and two 15 inches of PVC pipe under the center of the bin. (Look at the measurements picture to make sense of this.) Support #2 was to help stabilize the legs. To do this, we added 15 inches of PVC pipe to both short sides about halfway down.
Cut the PVC Pipe
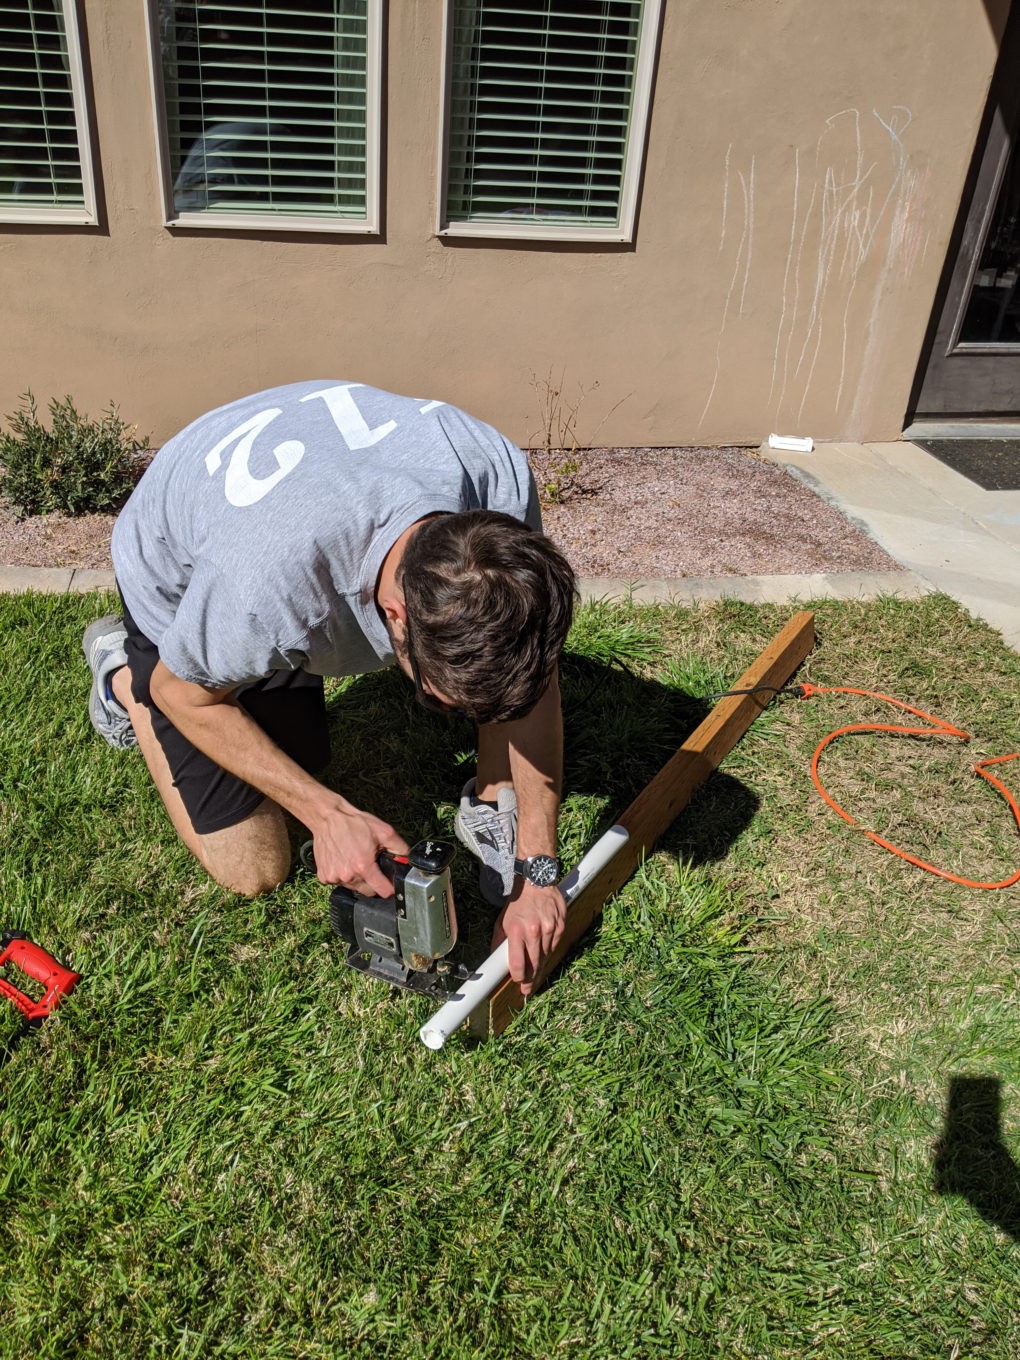
We started off trying to get away with using a hacksaw to cut the PVC pipe. It took way too much work (for my husband–I was watching haha) and it was pretty sketchy because the hacksaw would slip frequently.
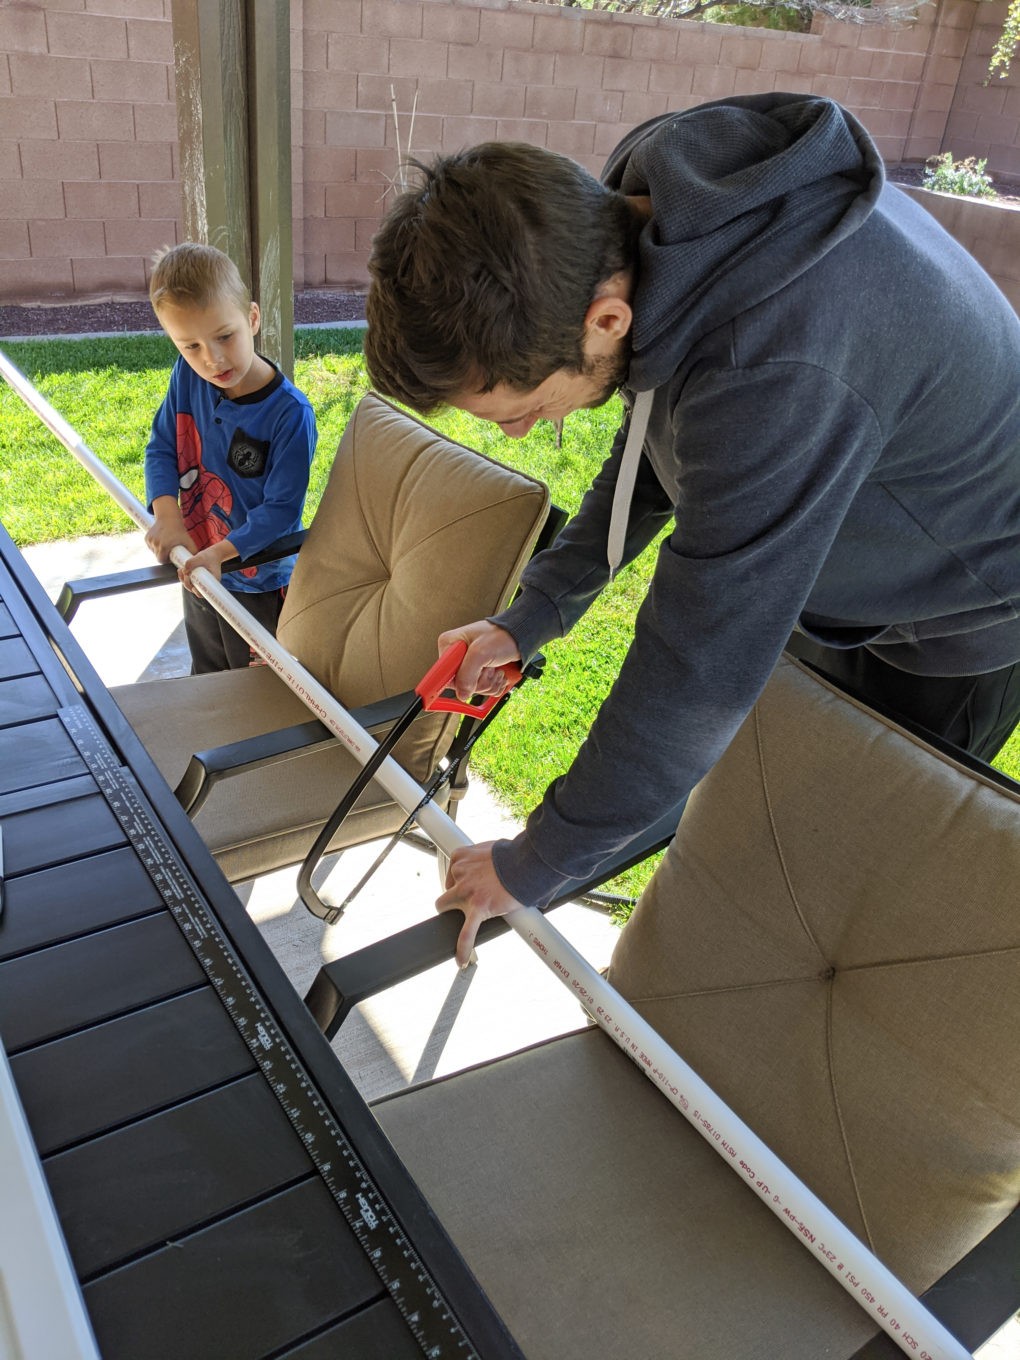
Not wanting my husband to chop a finger off, we borrowed a jigsaw to finish the job. It went a lot faster. Moral of the story… don’t try to use a hacksaw.
Assemble PVC Pipe with the Connectors
After you have all of your cuts made you can start assembling your PVC pipe water table with your PVC pipe connectors.
FYI… You can tell from the picture below that we tried cutting another corner (haha always trying to make life easier) by not adding the support bar between each of the shorter side legs. When we assembled it, we could tell the water table just wasn’t going to be sturdy enough when full of water without the extra side supports. So we had to go back and make some more cuts before proceeding to fit it all together again.
In the end, we used 12 tee connectors (two on each leg and four total for the bin support), 4 elbow connectors (at the top), and 4 end caps (at the bottom of each leg).
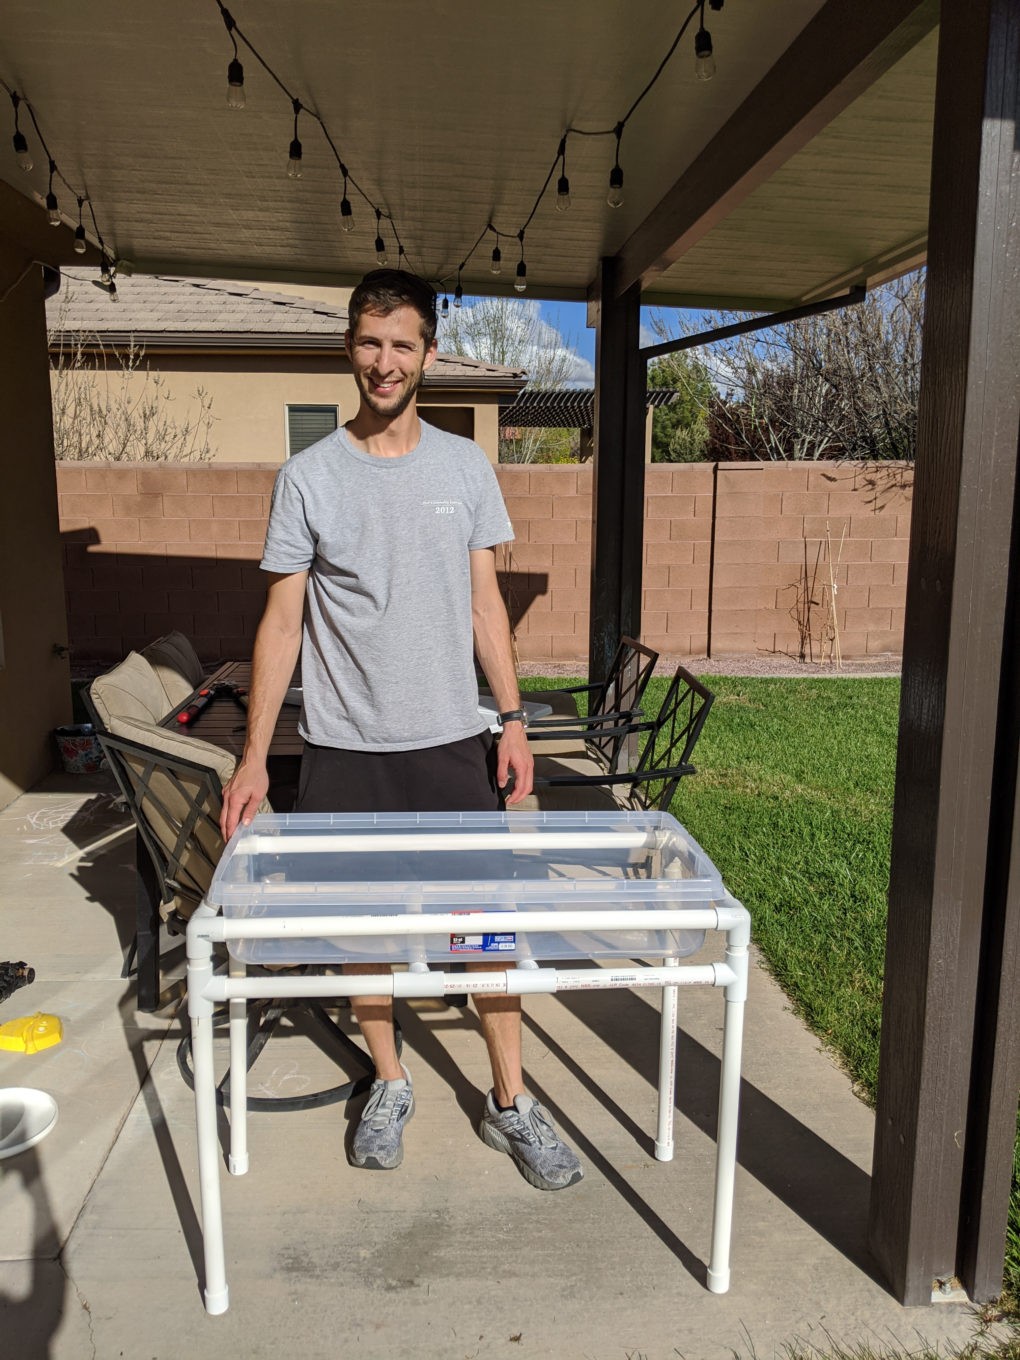
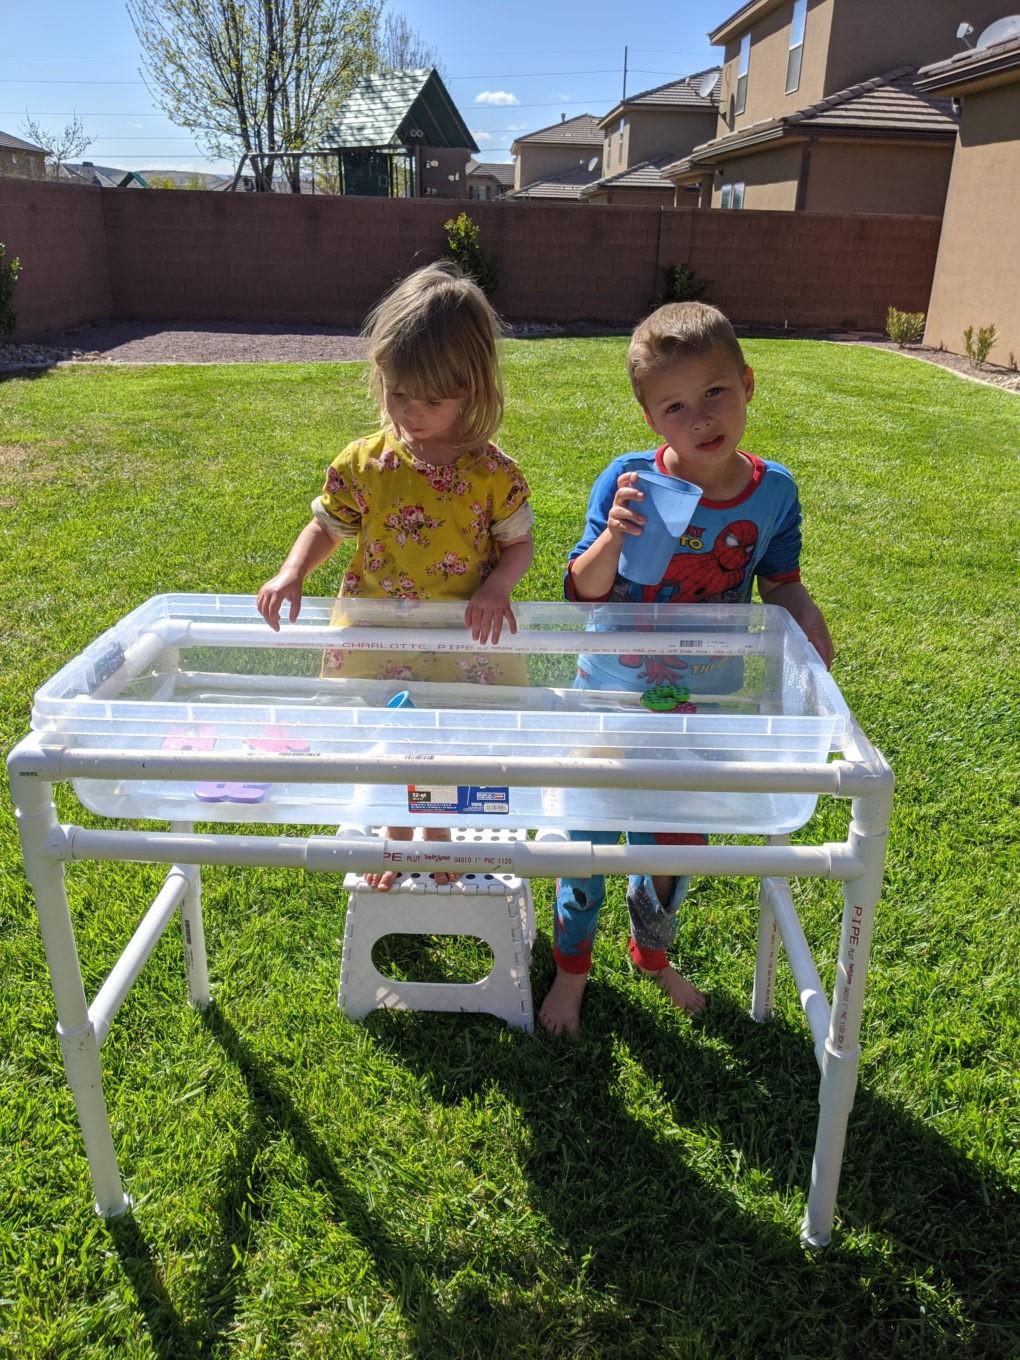
The Final Product
Here are the kids playing in the final product!
After 2 Months Outside
Our PVC pipe water table has held up really well for the 2+ months we’ve had it outside. We’ve used it at least a dozen times, and it’s been a great option to mix up activities for the kids. We do dump the water out overnight so we don’t attract bugs.
Feel free to ask questions on how to make your own PVC pipe water table!
Pin it for Later