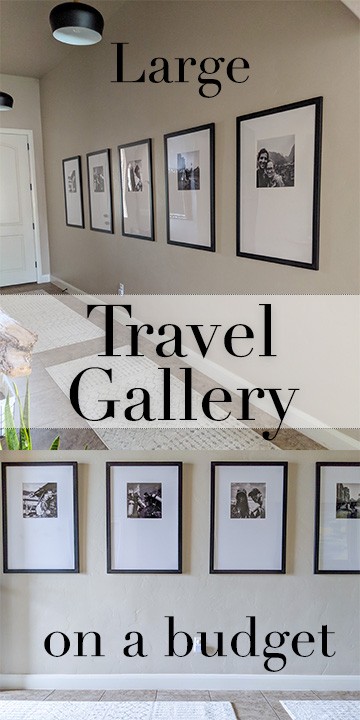
I recently revealed our long entry hallway makeover and promised to go into more detail on a few of the projects we did. So, in this post, I’ll share our steps for creating the large travel gallery wall.

(This large travel gallery wall page contains affiliate links that we may be compensated for. Your clicks and purchases help support The DIY Lighthouse at no extra charge to you. We only put links to products we love and would recommend anyway.)
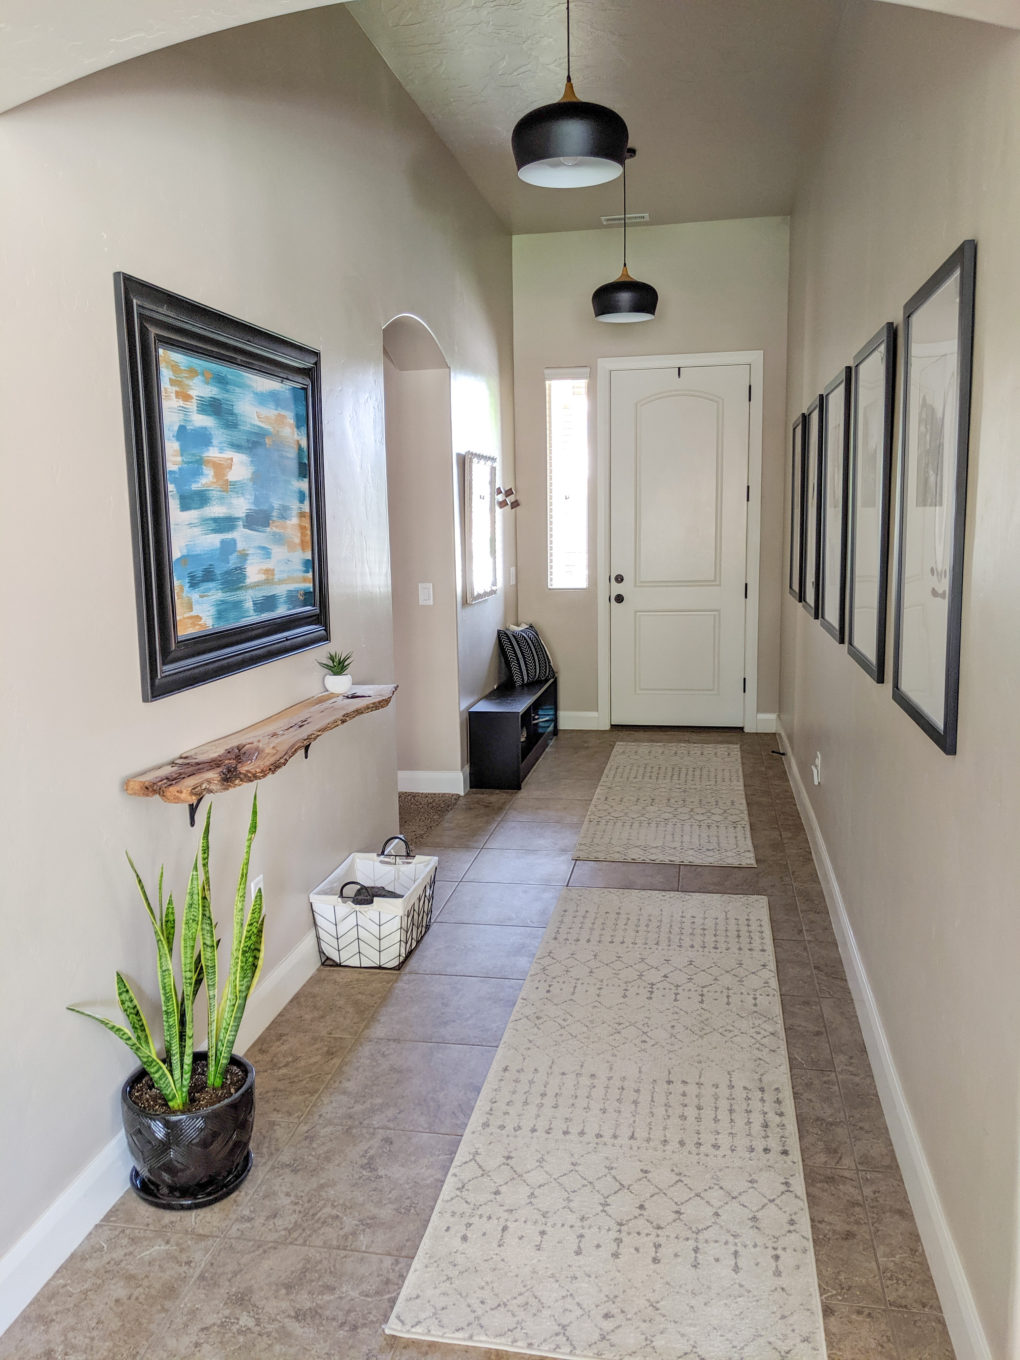
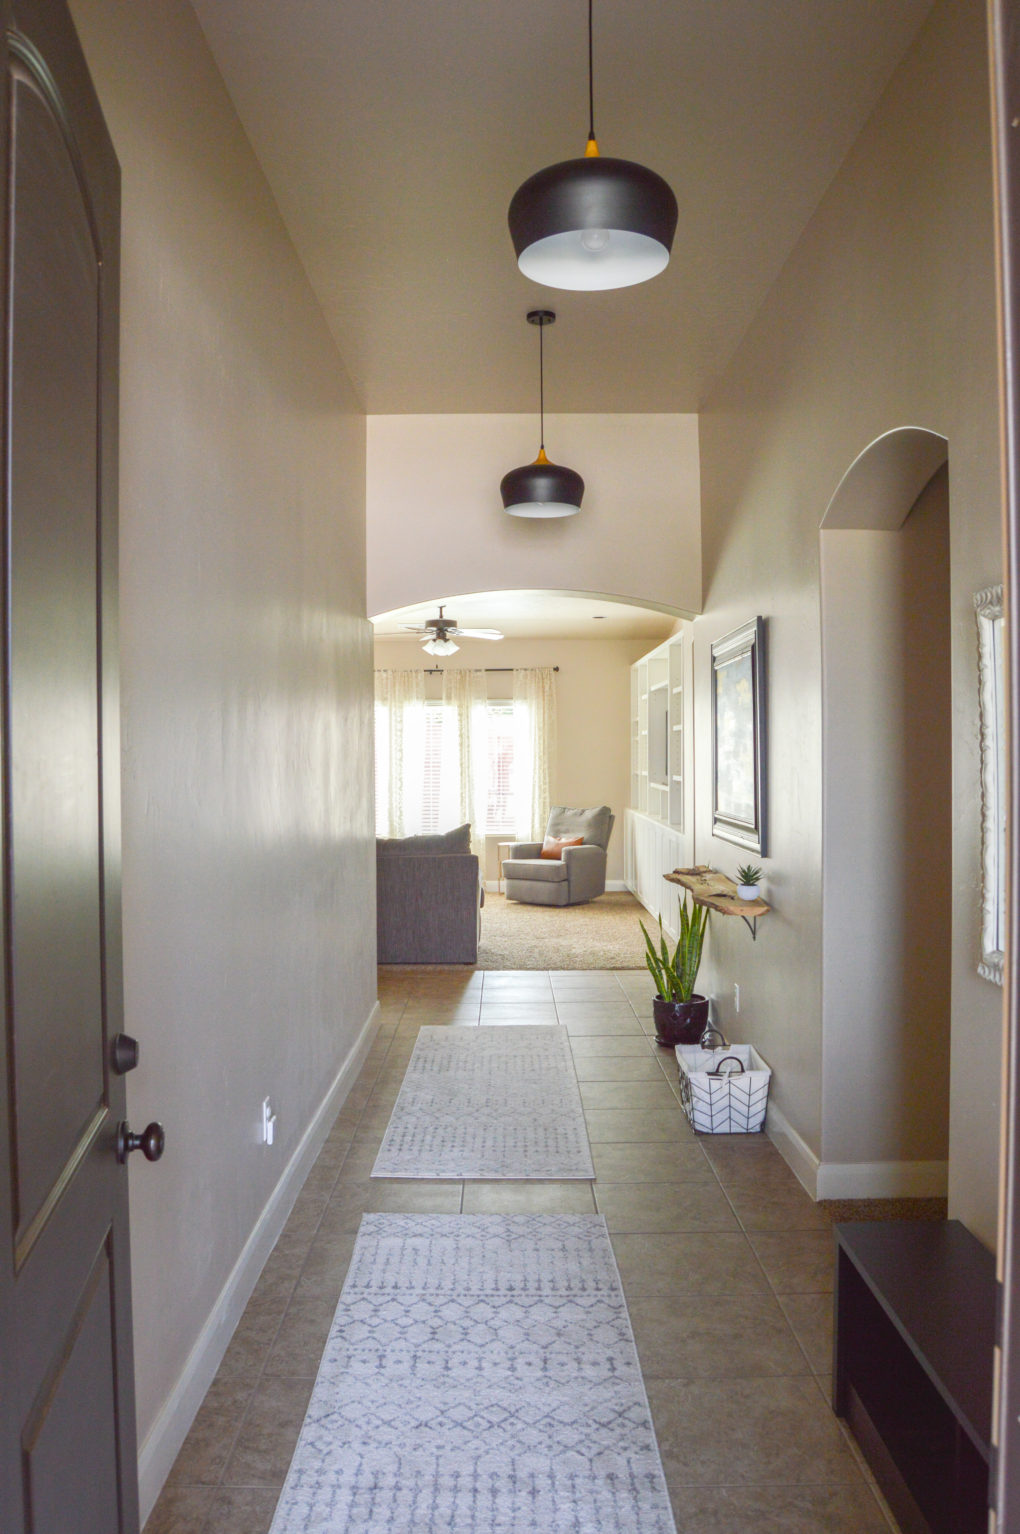
If you read the long entry hallway makeover post, you remember that we started with a bare, awkwardly long/weirdly wide hallway that served as our entryway. Here is the entryway just before adding the last touch, our large travel gallery photo wall. Notice all the blank space on the left?
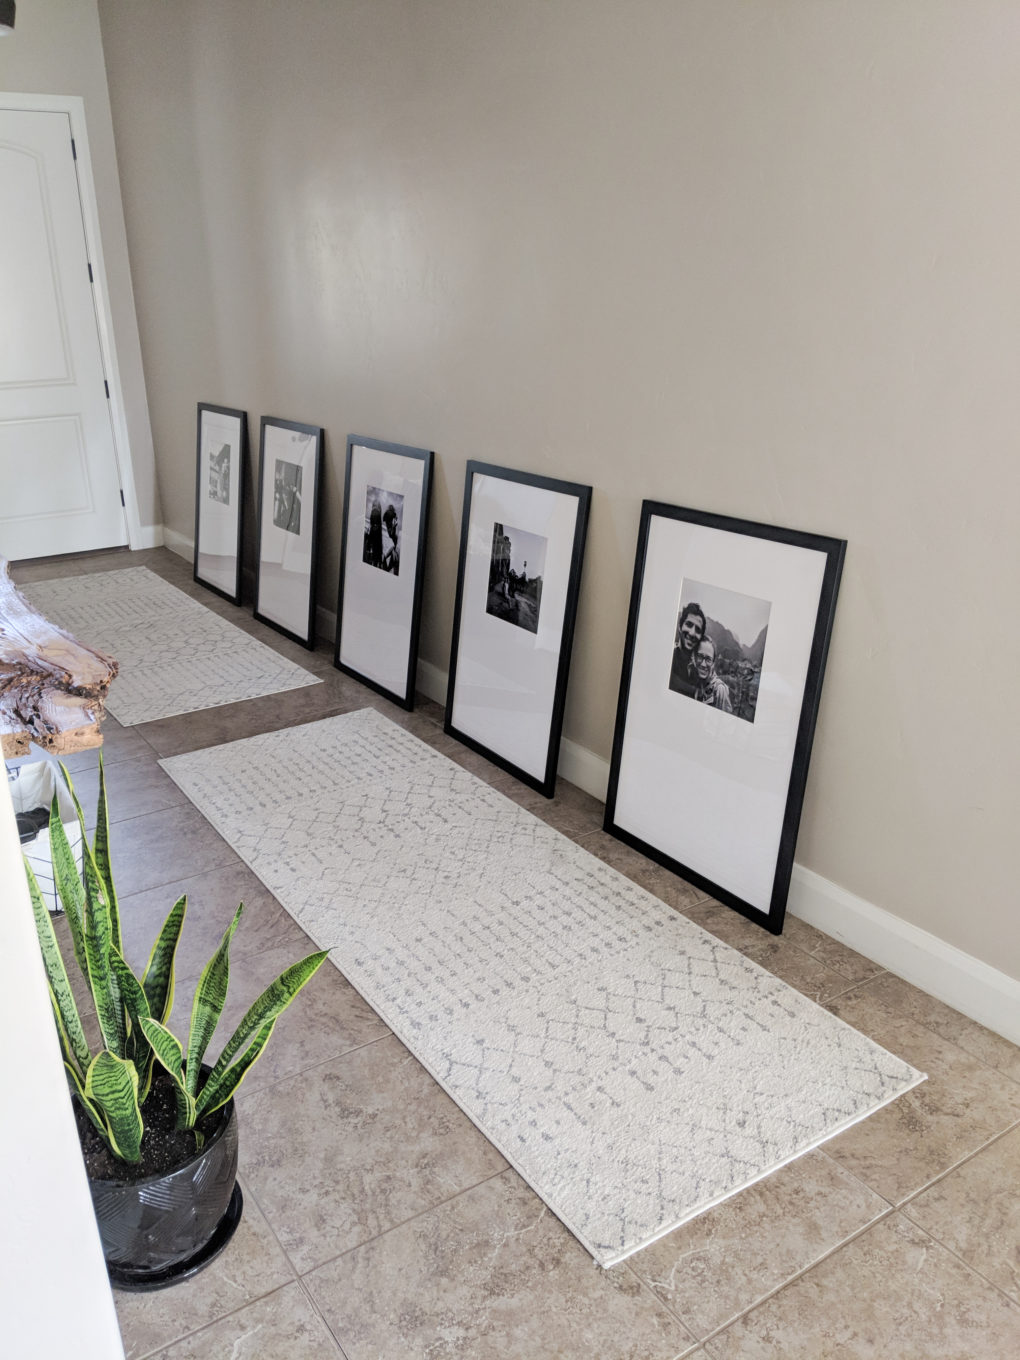
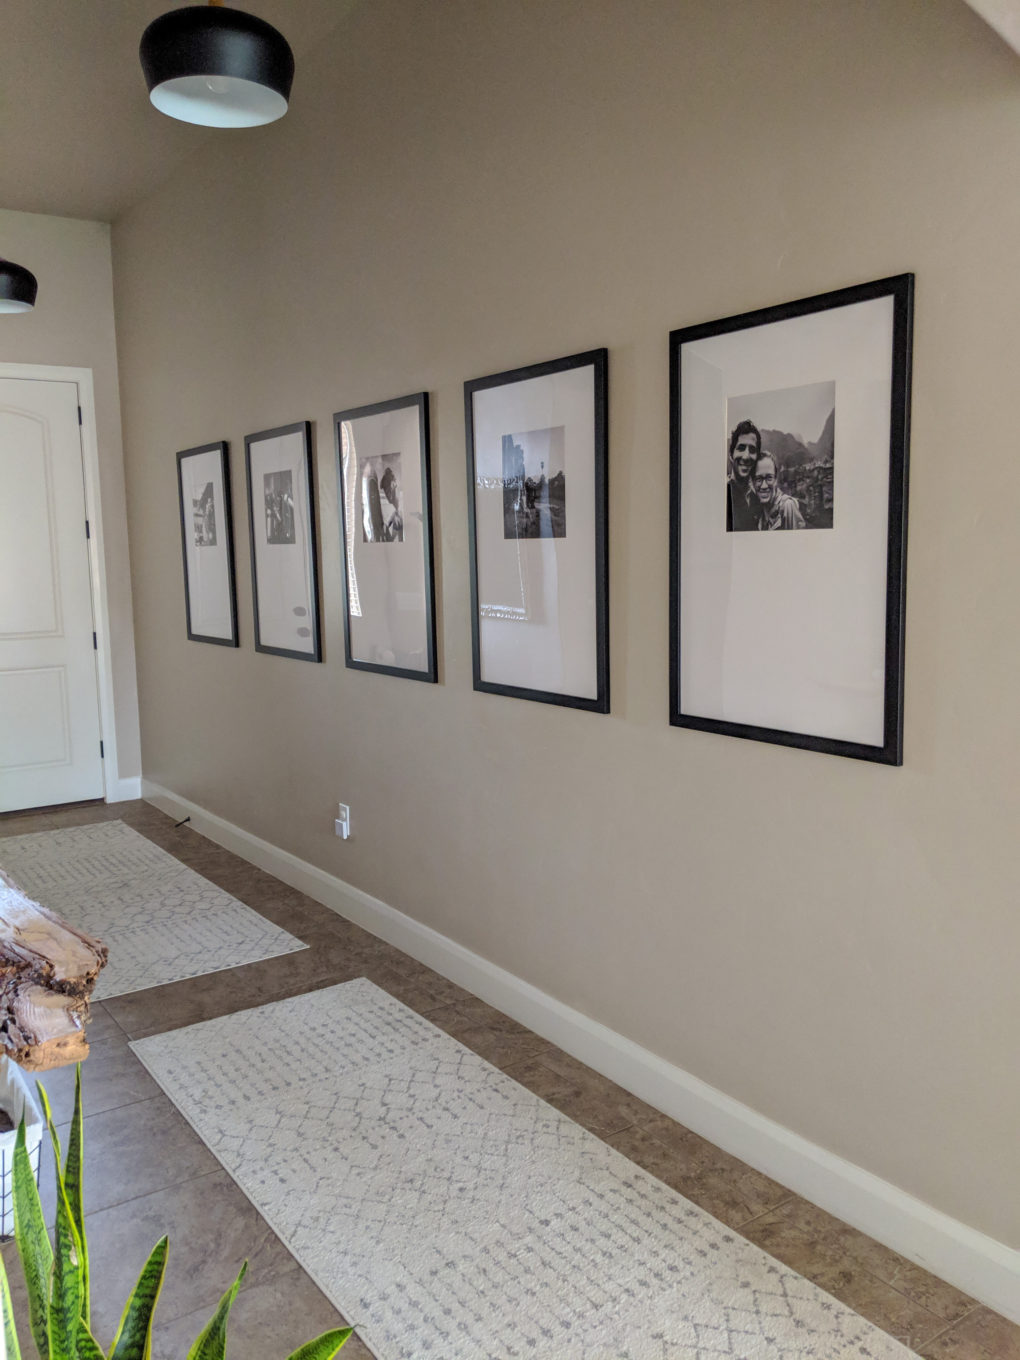
To help fill the space on the longest wall, we decided to have a large travel gallery. Why travel? I thought of what was important to our family and travel definitely made the list. We husband and I have loved traveling the world together, so we put up five over-sized frames with some travel photos from different countries around the world.
Large Travel Gallery Tutorial
Getting the Frames
Michaels is awesome and always has rotating majorly-on-sale categories. I waited until the frames were on sale and then pounced on their $20 (instead of $49.99) 24″ x 36″ black Belmont frame by Studio Decor.
Having 5 of these giant frames side by side is impressive and definitely a statement. I’m so glad I went with these big ones instead of a smaller version–especially because they are so inexpensive. $20?! That’s a great deal. ~$100 total for all five.
Getting the Prints
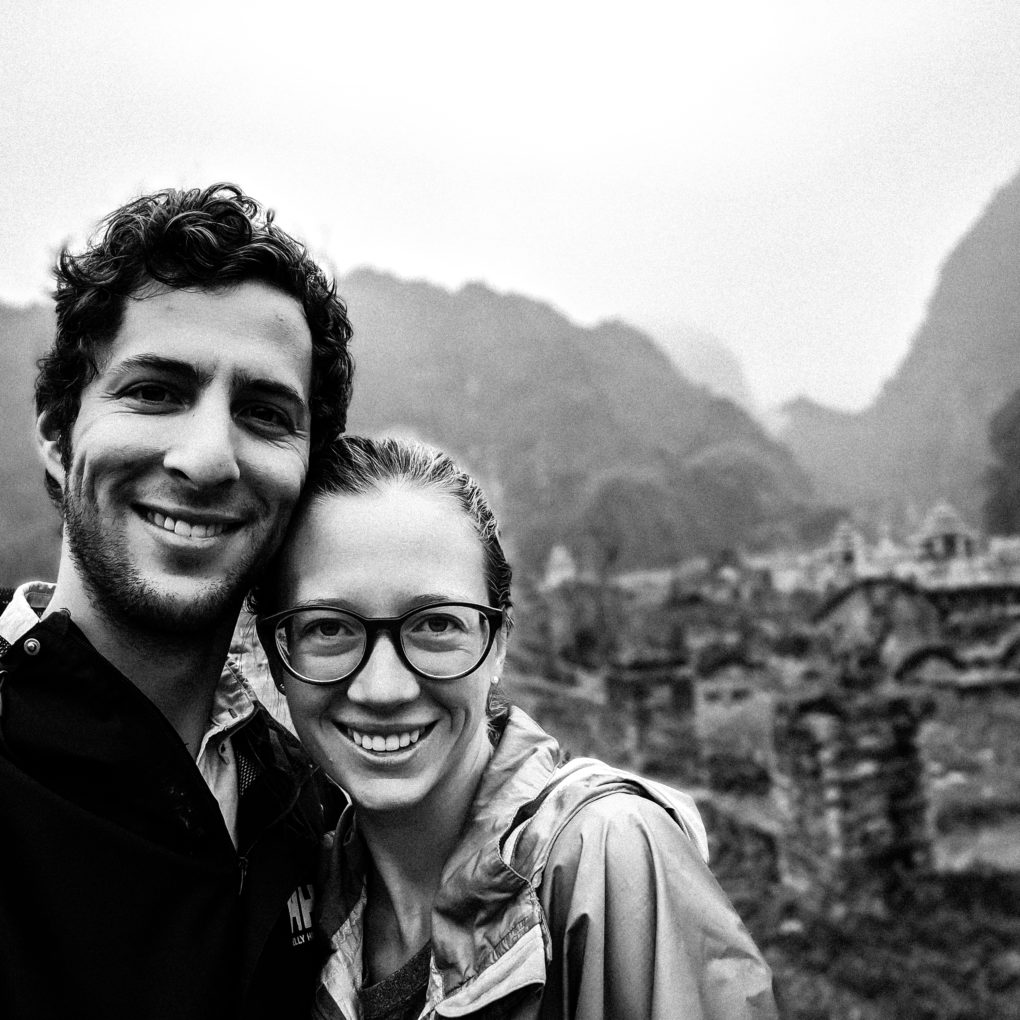
As described above, we went with the travel theme because it is something my husband and I love to do together. Because we had 5 frames to fill, we decided to do a different country in each frame. For consistency sake, we made them all black/white and square (12″ x 12″).
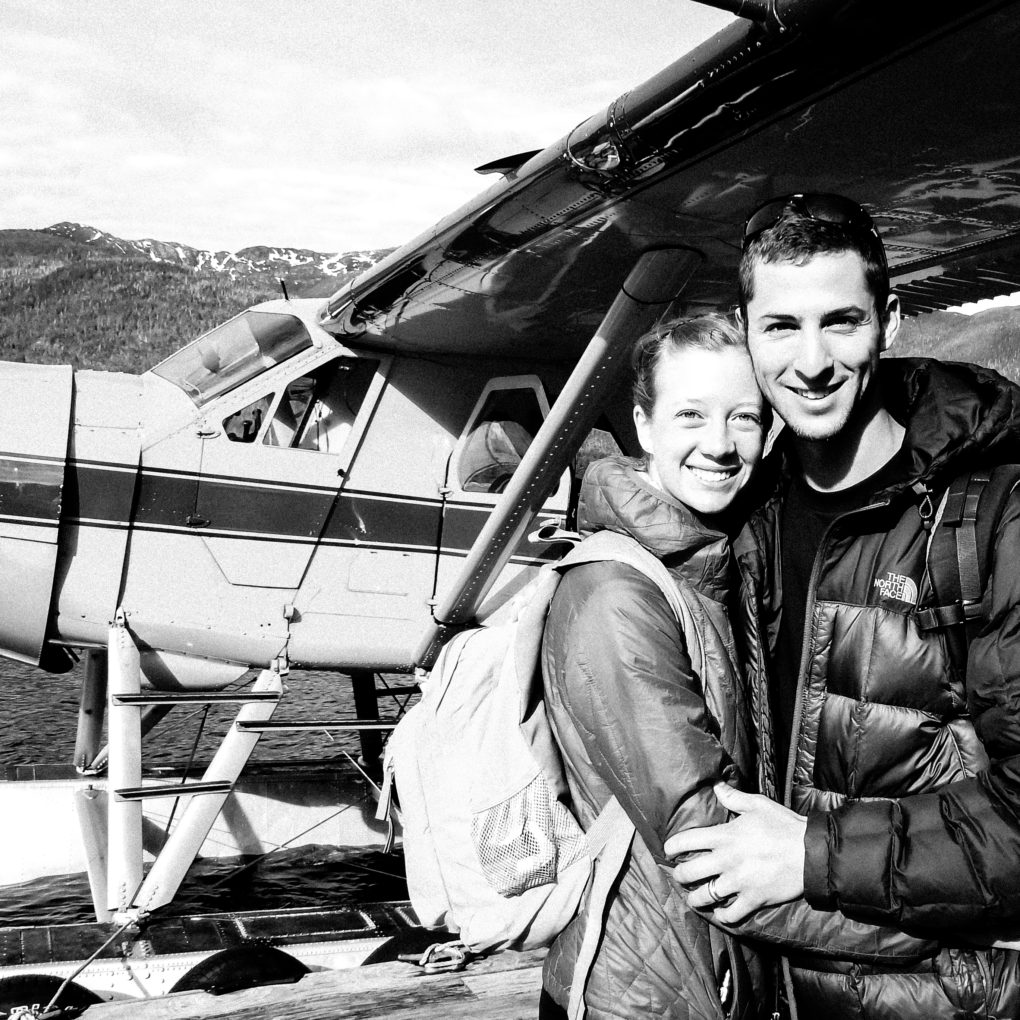
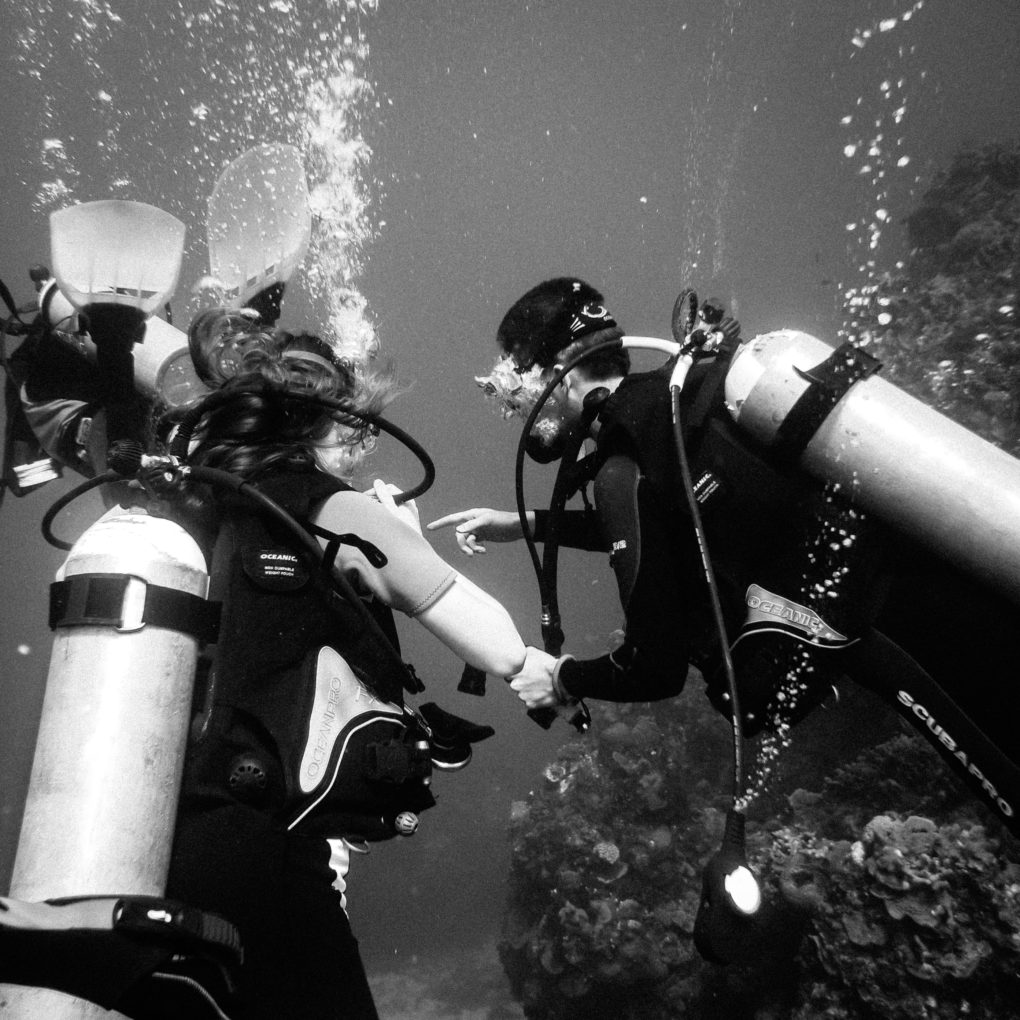
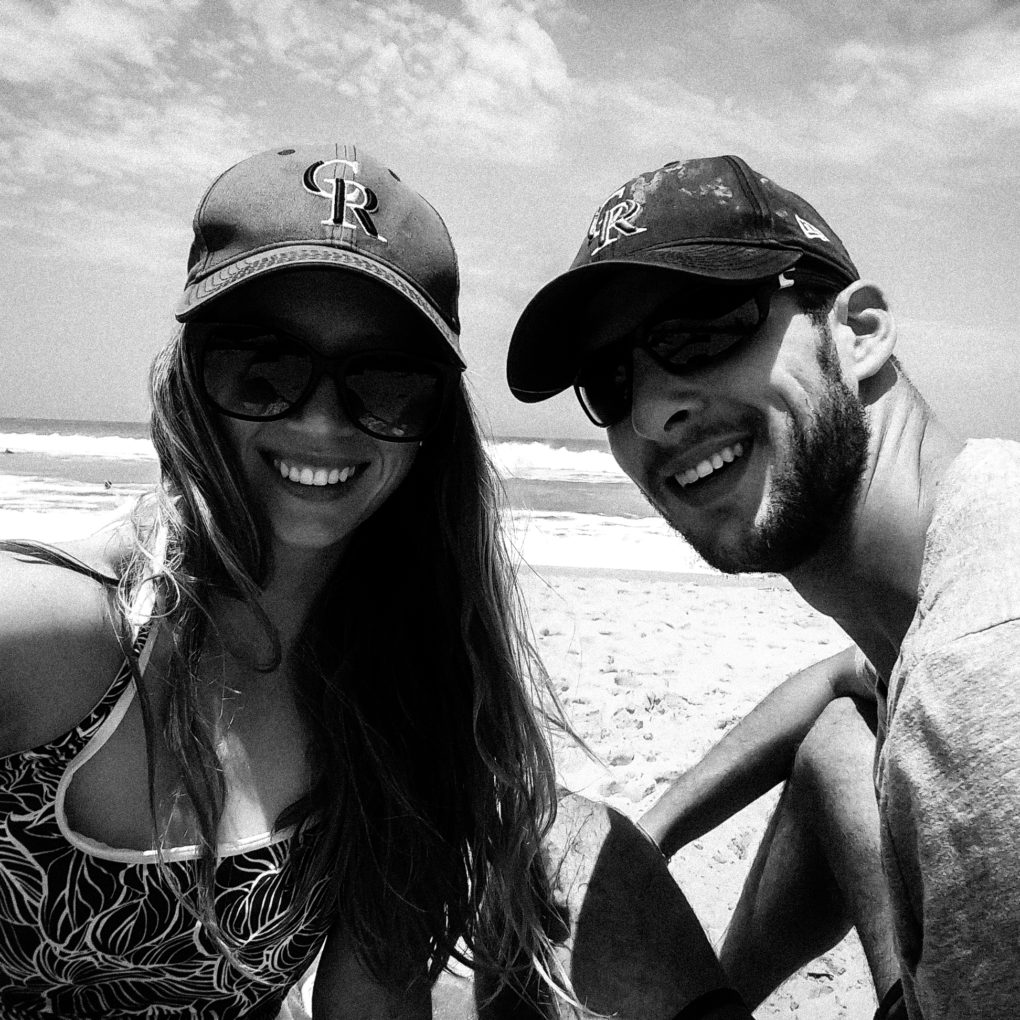
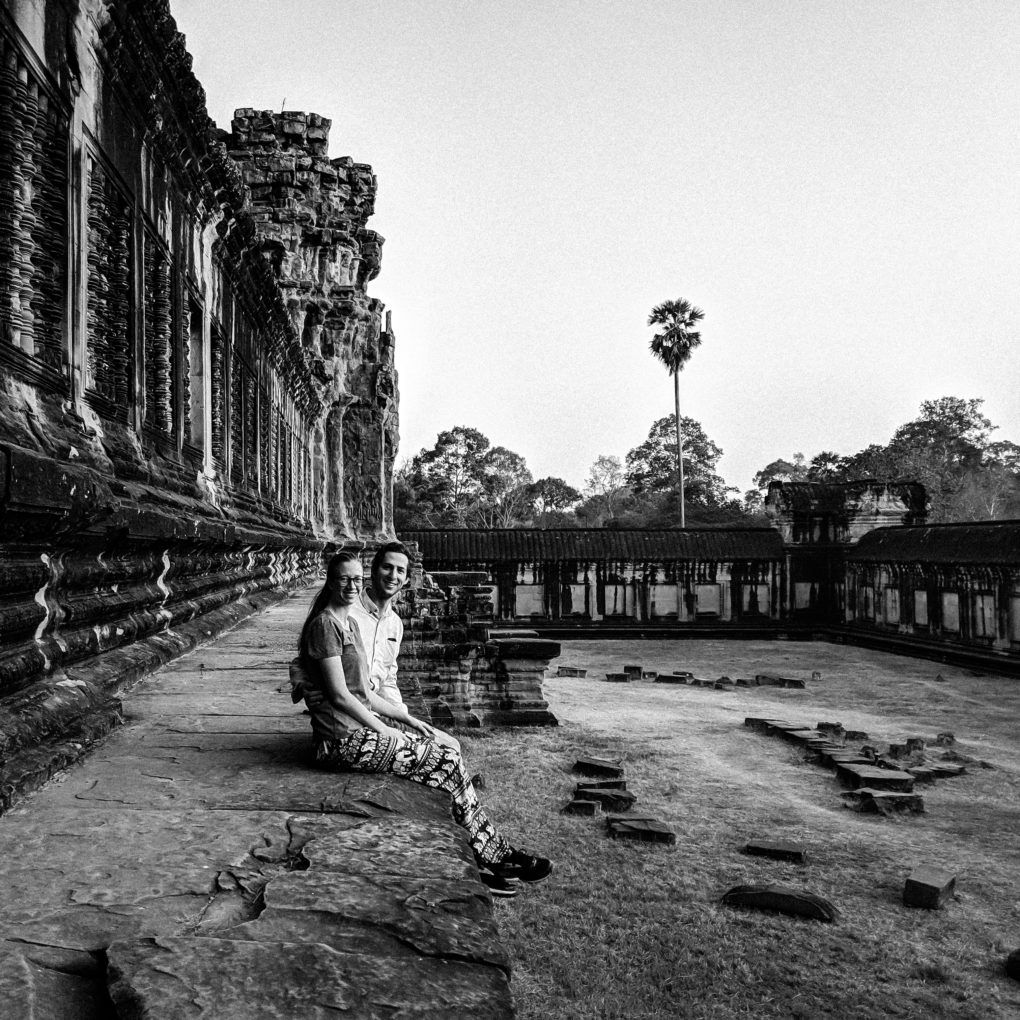
Here are the pictures we went with (in chronological order–the same order we put them up on the wall): United States (Alaska), Mexico (Cozumel), Australia (Sydney), Cambodia, and Vietnam.
After editing them in Photoshop, I ordered prints with Nations Photo Lab. I bought 12″ x 12″ metallic prints for $5.19 each with a total cost of $28.03. I found them to be reasonably priced and ordering was an easy process.
One feature I appreciated told me if my resolution wasn’t good enough for the size I was wanting to print. I had to swap out photos last minute because one that I originally planned to use didn’t have large enough resolution.
I was mostly happy with the print quality. A couple of them seemed a little fuzzy but it was probably my fault for printing such big sizes with not super high quality. (Some of these pics were taken on a cell phone.)
Getting the Mats
My next step to our large travel gallery was to get mats and cut them. The frames I purchased didn’t come with a mat inside, which worked out in my favor because of the custom position of the hole I wanted in the mat. Michaels also had a mat that worked with my large frames. I went with 5 white 24″ x 36″ uncut mats by Studio Decor ($8.39 each so $41.95 for 5).
Now I was ready to cut the holes! I tried following Ashley from Bigger Than the Three of Us because her way which seemed really cheap and easy by purchasing this mat cutter off of Amazon. Unfortunately for me, my experience wasn’t like Ashley’s (but you might have better luck?!). The mat cutter I received would not cut in a straight line to save my life. My husband and I were fighting it like crazy and ultimately called it quits and returned it. Finally, we got the holes cut at a local photo framing store. The guy there only charged me $2 per mat so it wasn’t too bad.
I like the trendy look of having extra matting on the bottom half of the mat. So, instead of centering the hole in the middle, I moved it up leaving the same distance of mat between the left, top, and right sides.
Mat Tip #1
You may need to get your mats trimmed. Even though the frames and mats both said 24″ x 36″ and were made by the same brand and both bought at Michaels, when I tried to put the mats into the frames the mats were slightly too big. I’m so glad I discovered this before cutting the hole in my mats or else I would have had the headache of trying to cut evenly off both sides!
After explaining the problem to Michaels, they were very obliging and did complementary cuts to make the mats fit within the frames. So, I suggest checking in store when you buy your products to see if the mats are not fitting and then ask Michaels to cut them in the back for you. It only takes a couple minutes so saved me a bunch of time and headache trying to cut them to size myself.
Mat Tip #2
Don’t cut the holes the same size as your prints. I can’t believe I made such a stupid mistake when cutting the mats. I accidentally had him cut 12″ x 12″ holes!! Why is this a stupid mistake? Because my photo prints are exactly 12″ x 12.”
I was horrified when I went to assemble the photo frames and realized my photos literally fit the hole leaving no room to secure the picture behind the mat. Instead of eating the cost and doing it all over again, I made do and somehow managed to get the photos to not fall through (after spending way more time than I would have liked lining things up perfectly).
Pretty sure no one has noticed my mistake. Why am I telling you this embarrassing mishap? So you don’t accidentally make the same mistake!
After all the mat drama, they were finally done. In total, my mats + cutting was ~$50.
Assembling the Frames
If you read “Getting the Mats” section and my tips, you’ll know this assembly process was painful. Had the mats been cut to the right size, this part would have been a breeze. I recommend using a flat head screwdriver to help move the frame brackets up and down to spare your fingers from doing all the work.
Hanging the Frames
Before hanging the frames, I leaned them up against the wall to get a feel for how they would go. Then, using a pencil, level, and a yard stick, I measured and remeasured to make sure they were going to be hung evenly spaced and at the right height.
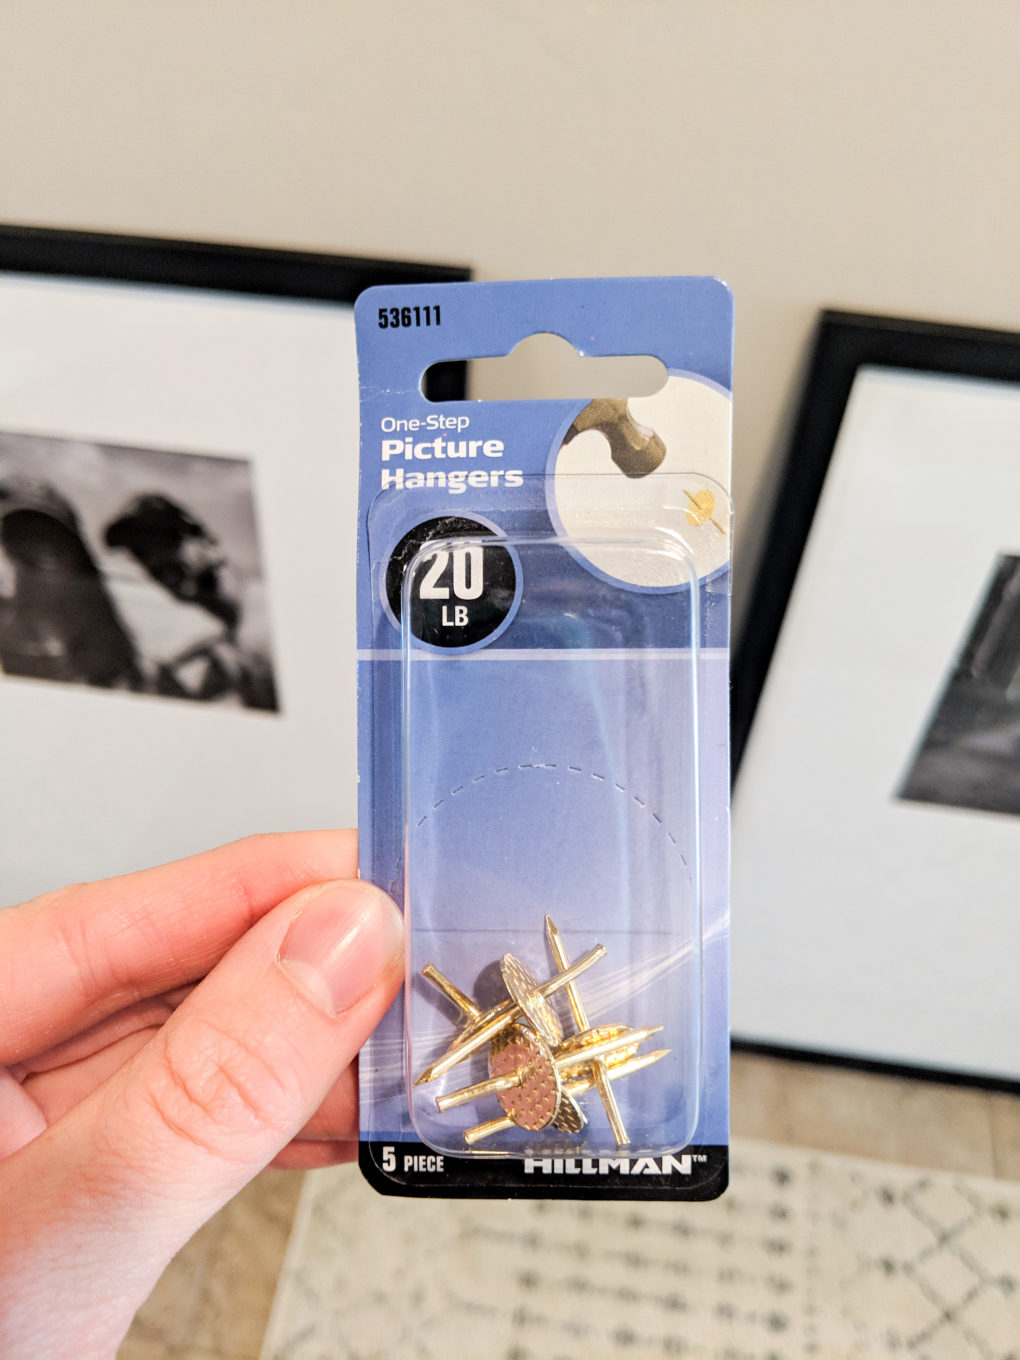
To hang them, I got these one-step picture hangers from Lowes that hold 20 lbs each. They are more than sturdy enough for these frames.
And here they are hanging up! Much better than a blank wall I’d say. Total I spent under $200 to create this large travel gallery wall, which is pretty darn good for its size!
If you want to recreate this for yourself and have any questions let me know! I’m happy to try and help!
Pin it for Later