Want adorable back-to-school or baby photos without breaking the bank or getting professional portraits taken? Totally doable. You can take adorable photos at home of your children or baby using these 6 do-it-yourself photo shoot tips.
1. Nail the theme
Deciding on a theme will give you clarity and direction as you plan and execute your DIY back-to-school or baby photo shoot. A theme greatly influences the backdrop, clothing, and photo editing choices, so it’s important to nail a theme first. While it’s important functionally throughout the photo shoot, a theme also balances function with form. A good theme well executed will take any photo shoot up a notch. And it adds fun to the entire process!
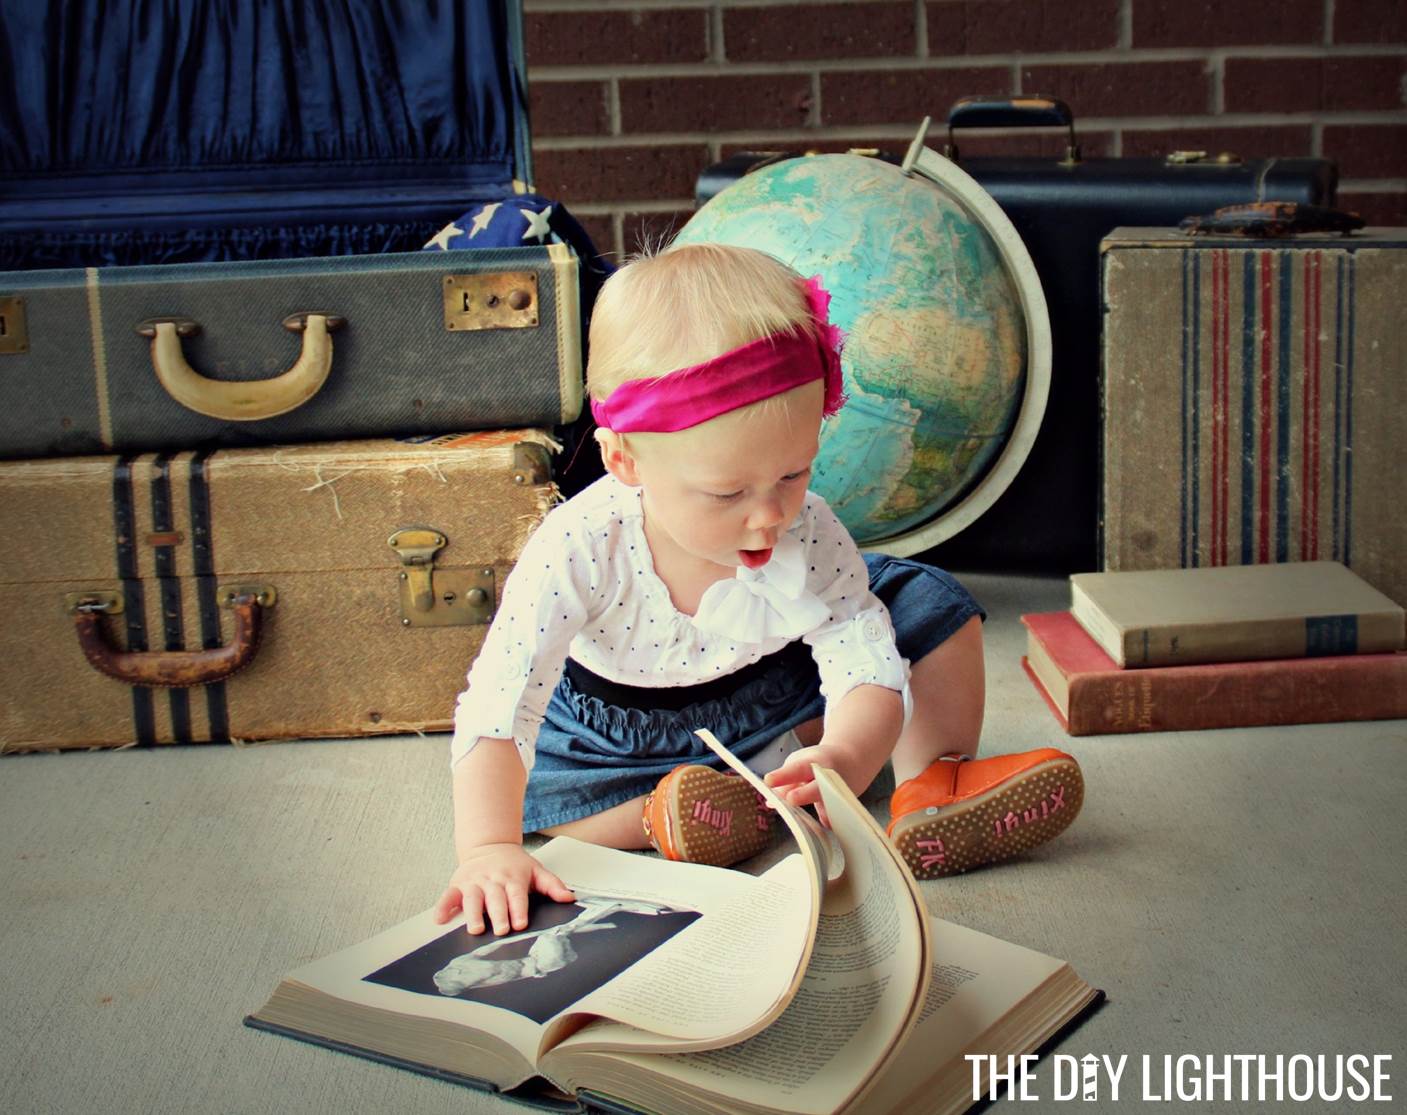
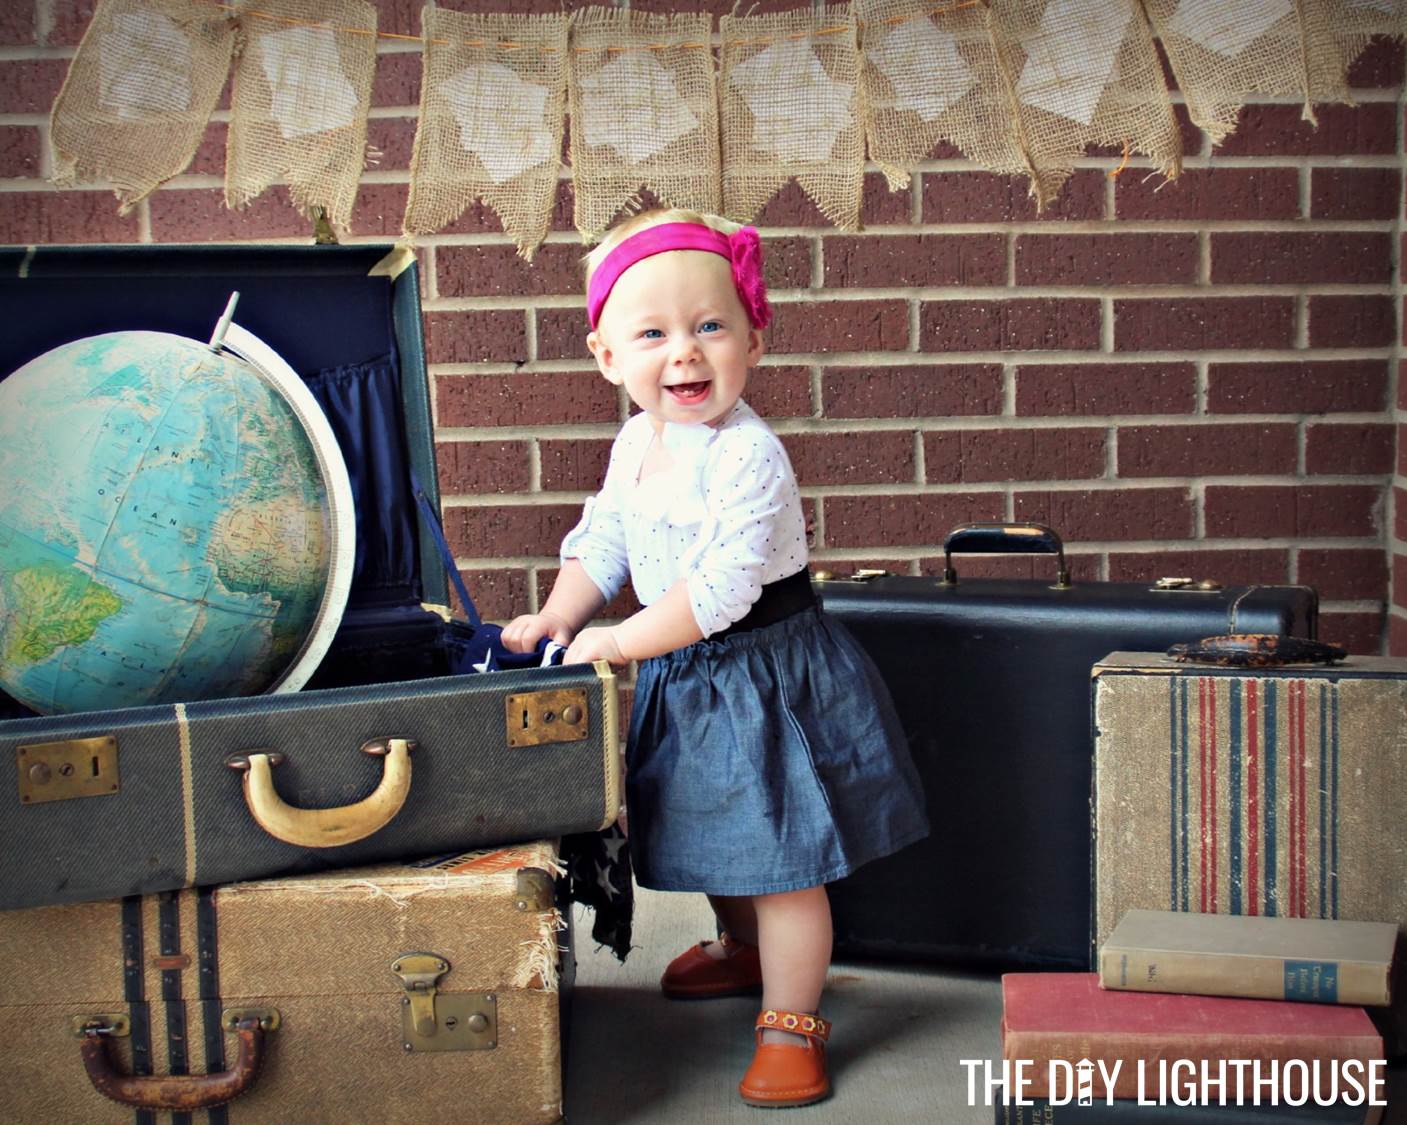
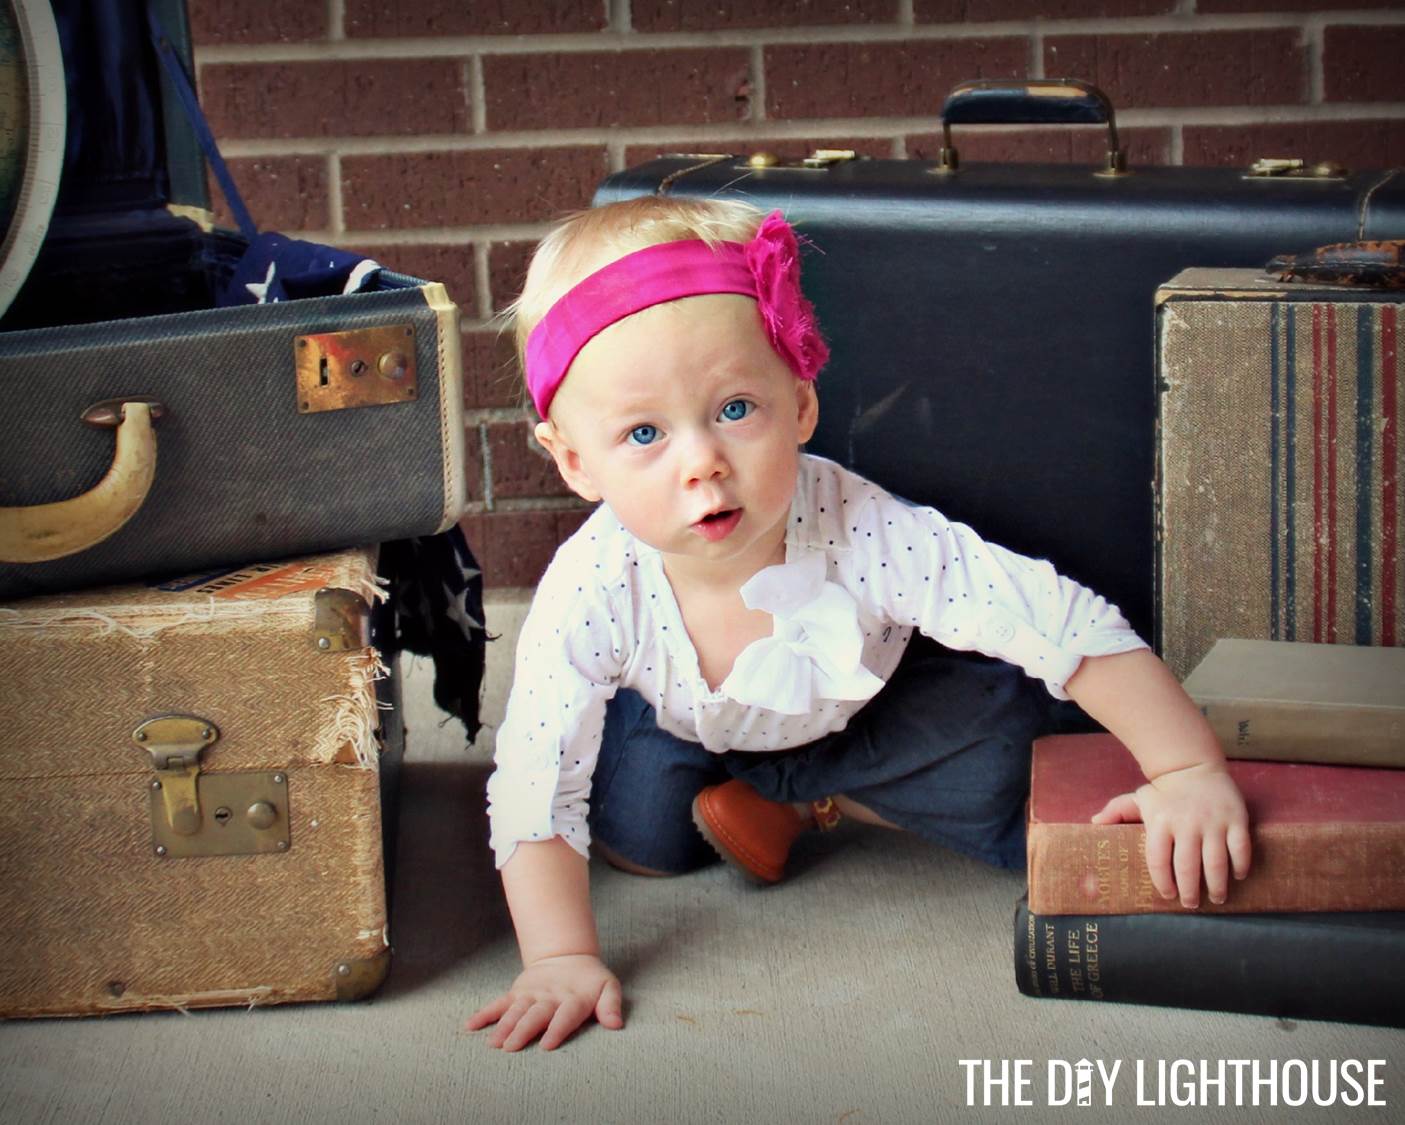
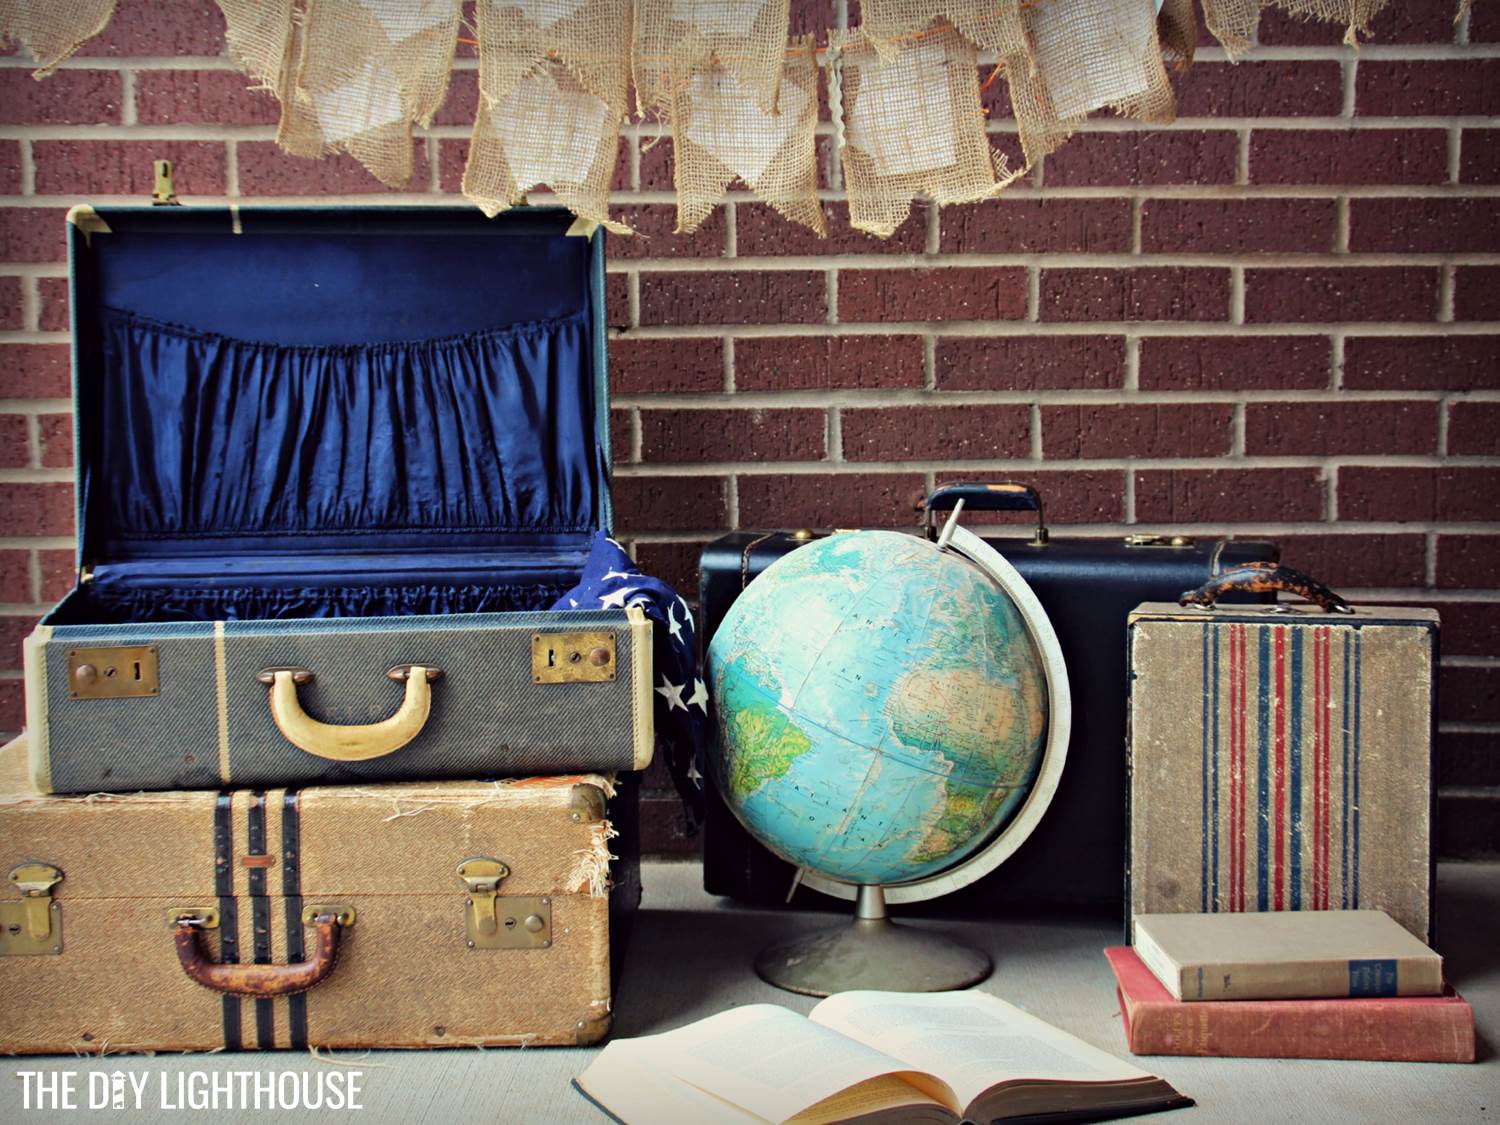
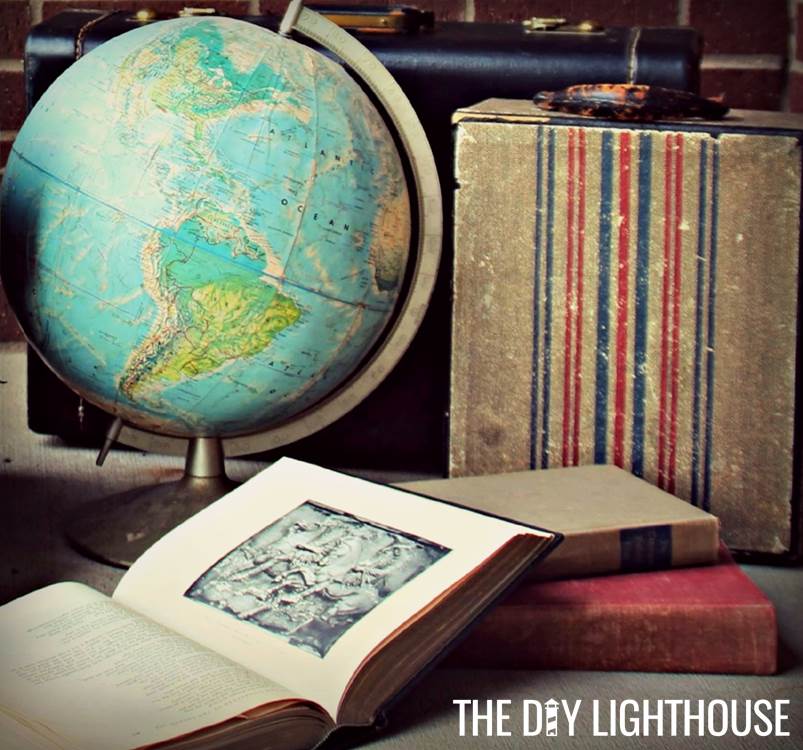
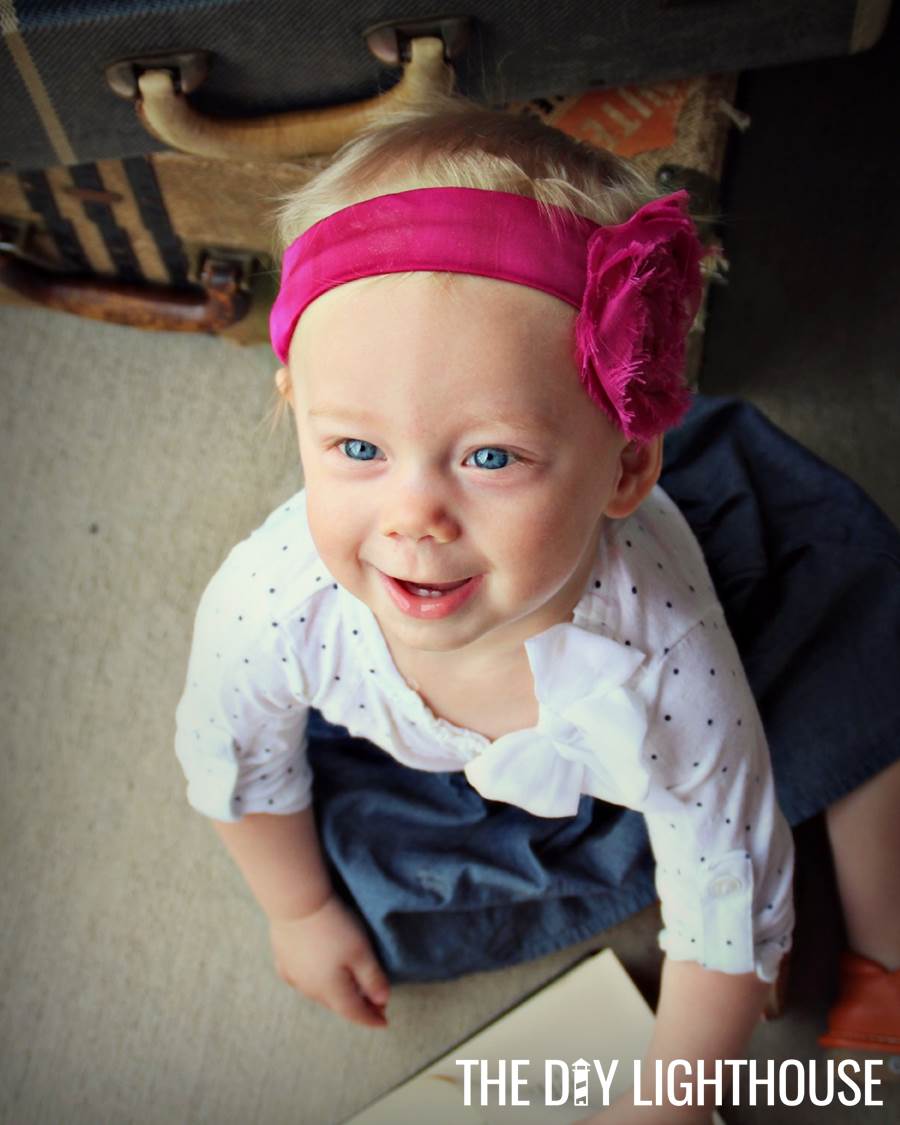
I used a vintage travel theme in this photo shoot. Here are 5 other theme ideas that would be fun for your DIY back-to-school or baby photo shoot:
- Secret Garden: a bench, green turf, flowers, metal pails, stone or brick backdrop, wrought iron, antique books, vintage outfit
- Vintage American Indian: feathers, arrows, braids, wooden crates, plush blanket, wheat, colors in rose, light blue, mint, light yellow, and white
- ABC School Classroom: small desk, chalkboard with chalk, ABC blocks, large textbooks, an apple, large glasses frames, a bow tie or dress
- Painting Watercolors: pastel colors, a white paper backdrop, painted on words, paint splatters, child’s artwork clothespinned to twine
- Nautical: rope, twine, wooden crates, boat, take the photo shoot next to a lake if possible, wheat, seashells, helm, sailor’s outfit or casual clothes, colors of red, navy, and white
2. Decide on a backdrop
Now that you’ve nailed your theme, it’s time to decide on the backdrop of your photo shoot. Keep in mind that no matter what type of camera the photographer is using, the photographs won’t look their best without quality lighting (natural or artificial). For most beginner photographers, a location with indirect or diffused natural light is best. (The sun gives subjects a warm glow instead of creating harsh shadows.) Be wary of locations, like under trees, where shadow lines will ruin all your hard work. If natural light isn’t available, artificial light is an option by using a flash, but there is a learning curve to that. So if you’re new to photography, perhaps stick with natural light for this DIY back-to-school or baby photo shoot.
My photo shoot was actually taken on my apartment patio. I love the brick and thought it worked nicely with my vintage travel theme. While the patio is a small space, it fit my daughter and the photo shoot scene perfectly! I took the photos in the morning while the sun was still out but before the area received any direct sunlight. Harsh shadows and bright sunlight right in the eyes equals no bueno!
3. Acquire the props
When thinking about props for your theme, first pull together everything you already have around the house that could work well. And feel free to use your creativity! Do you want to know a secret? During my shoot, I used a burlap banner that is actually a “Happy Halloween” banner turned backwards. But you know what? Nobody knows (until now), it totally works in the scene, and it saved so much time and money I would have spent making or finding another one. If you’d like to make one, be sure to read “DIY Decoration Banner: Supplies, Directions, and Tips” for some do-it-yourself inspiration (click here).
After seeing what you already have to work with, it’s up to secondhand stores, garage sales, and online used stuff sites to fill in the gaps. If you plan your photo shoot well in advance, you can be on the hunt for your remaining theme props and have time to strike a bargain deal, but it’s totally possible to acquire your props on short notice too. I gave myself 3 months to be casually looking for suitcases, a globe, and some thick, old books to use in my vintage travel theme photo shoot. With a stroke of luck, I found everything in about 1 week for bargain prices! I found the 4 vintage-looking suitcases all for $35 at a garage sale, and I found the globe online for $10. The books were a collective $1 at another garage sale. Depending on your budget, you can spend more time haggling for the right price, or you can try making your own props that fit your theme. Either way you go, pretend you’re Sherlock Holmes on a case to acquire those perfect props, and just have fun with it!
4. Coordinate the outfit
While the backdrop and props bring in a whole extra level of cuteness—is that even a word?—to your photos, the star of the show should be your child. With this in mind, it’s best to dress your child in an outfit that works with the theme but also something that doesn’t distract from their face.
Clothing to avoid in a photo shoot include strong patterns (especially thin stripes…these never photograph well), clothing that stands out so much you hardly notice your child (like massive scarves or hats), and clothing items with sayings or words on them. While heavy patterns are not preferred, textures and layers are your best friend. Textured and layered clothing add interest and dimension to the photo. Just remember, the clothing should complement both your theme and your child.

5. Rock being a photographer
Not only are you the stager and fashion designer, you’re the photographer too! Um, way to be awesome! As the photographer, it’s important to relax and have fun. It’s hard because you have put so much work into getting your photo shoot scene and your child looking picture perfect, but if you’re having a good time with it, chances are your child will too. And that will only help the end result.
When is comes to wiggly kids, I suggest using the sports setting (or a very high shutter speed and wide aperture) on your camera. Using a high shutter speed, this setting will help you get sharp, detailed photos even during movement while minimizing blurriness. These captured moments of your child in natural poses definitely work best if you have the great lighting we talked about earlier. The more light coming into your camera, the better for this camera setting. Another quick suggestion when photographing babies is to have someone, if possible, help you position and move your child within the set and to hand them props. This way you can focus your attention on the camera.
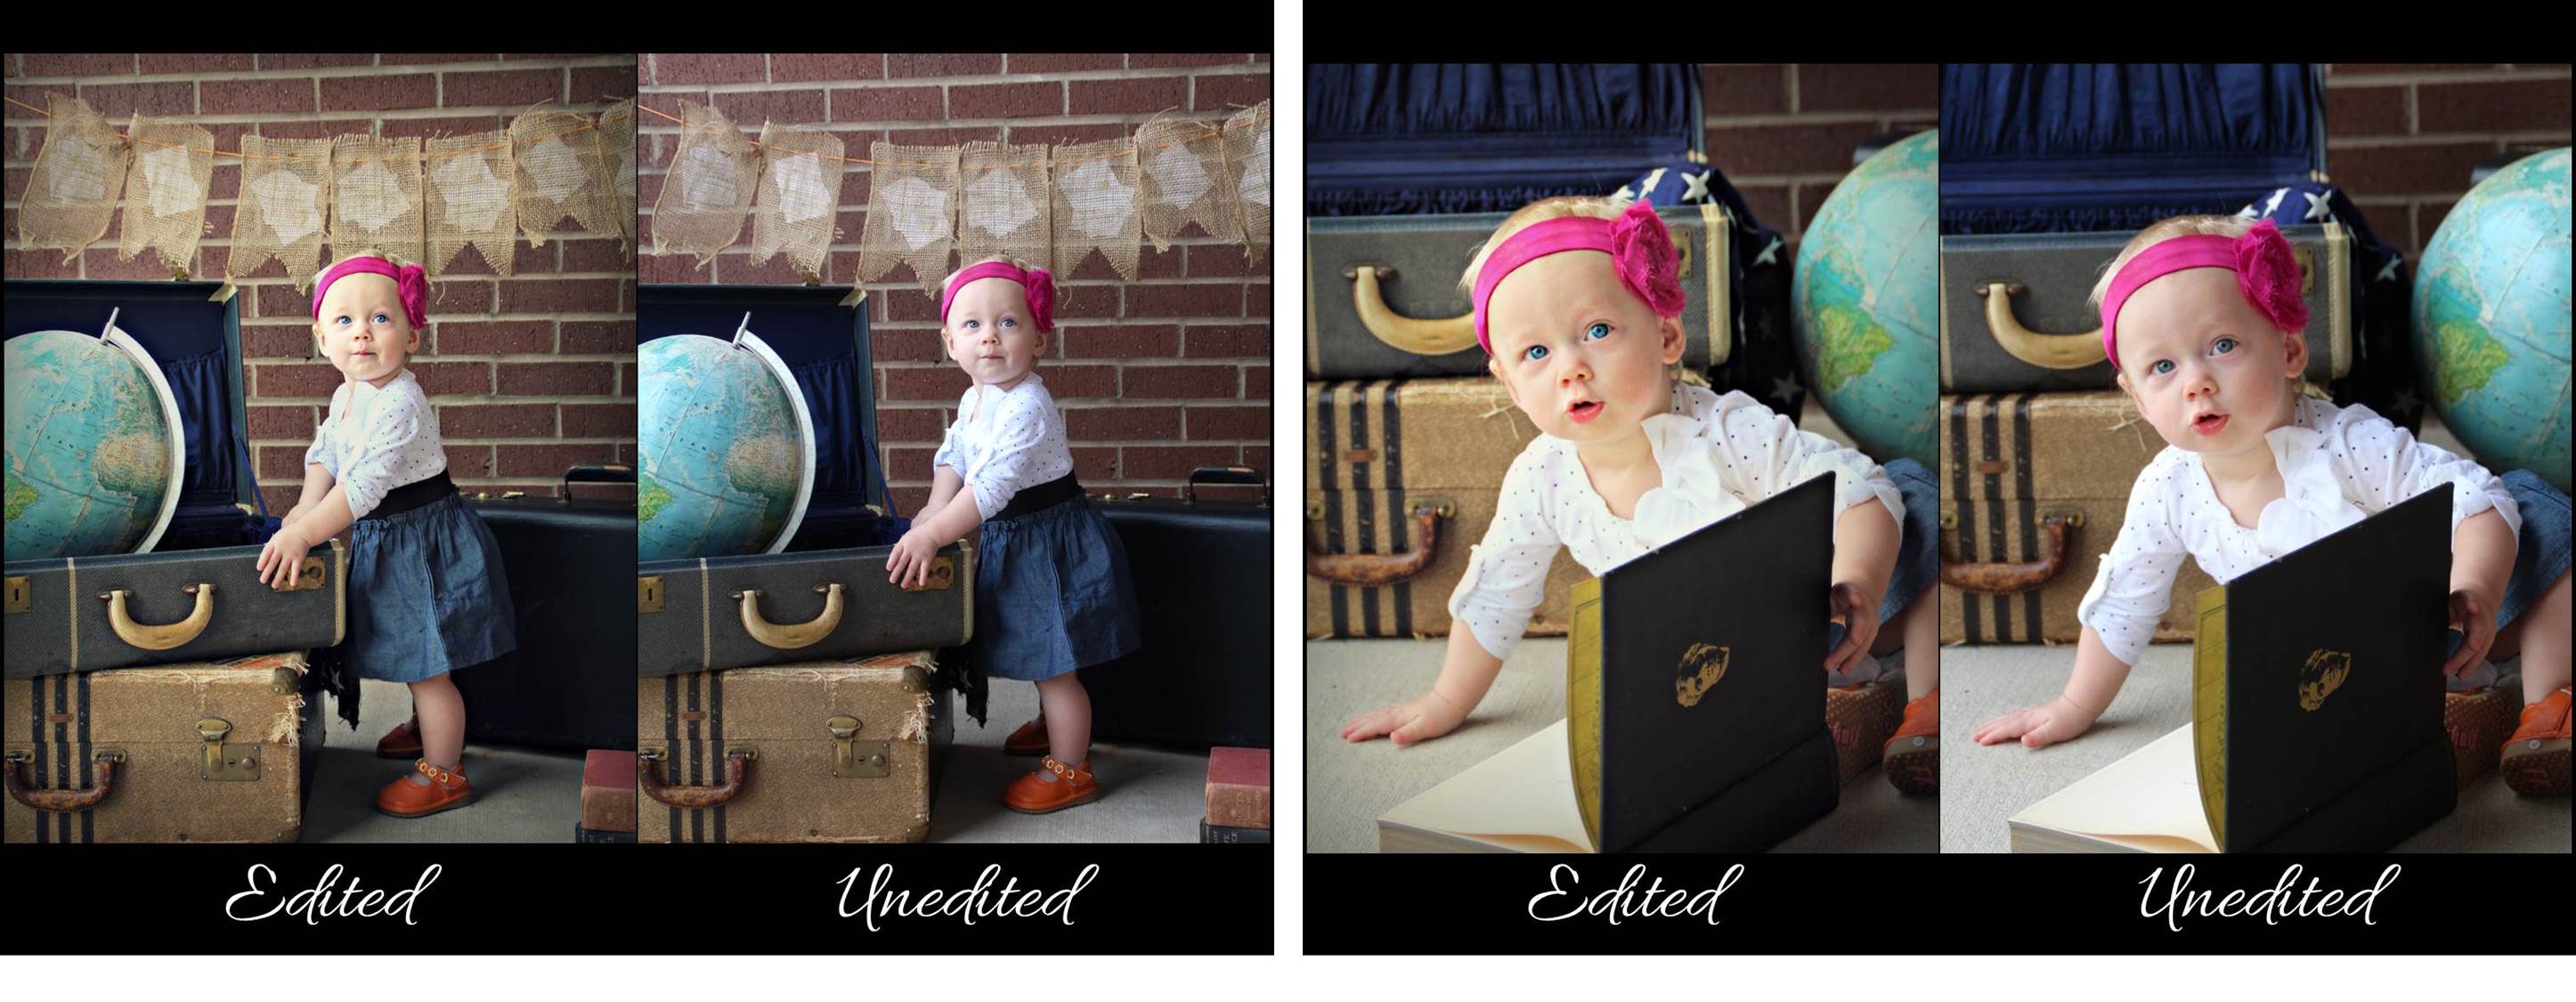
6. Enhance through photo editing
Let’s be honest, your child is already perfect. Editing simply emphasizes the “spotlight” on your child. This can be done through several effects, such as adding a focal blur, adding a color boost to certain areas of the photo, darkening the edges of the image, cropping out unwanted space, sharpening/clarifying the photo, rotating/repositioning the image, changing the overall coloring, and loads of other adjustments. Warning: editing can easily be overdone, so be sure that the editing additions add to the overall look and don’t distract from the main focus (your kiddo).
While Photoshop is the bees knees when it comes to photo editing, there are free editing options too. I love picmonkey.com because they give you many editing features for free and it’s super straightforward, so the learning curve is by no means steep. All the photos on this post were edited in picmonkey.com to give you an idea of what you can do for free.
A photo shoot is such a fun project, and the beautiful memories you capture will last forever. Please let us know how your DIY back-to-school or baby photo shoot goes! And we’re far from experts, so we’d love to know any photo shoot tips and tricks you have up your sleeve, so please comment below.