(Condensed Version) DIY Wedding Bouquet
Short on time? On a tight budget? No problem! Here is a short 5 step tutorial on how to make an easy and cheap DIY wedding bouquet.
(This page contains affiliate links that we may be compensated for. Your clicks and purchases help support The DIY Lighthouse at no extra charge to you. We only put links to products we love and would recommend anyway for making this wedding bouquet on a budget.)
Step 1–Gather Supplies
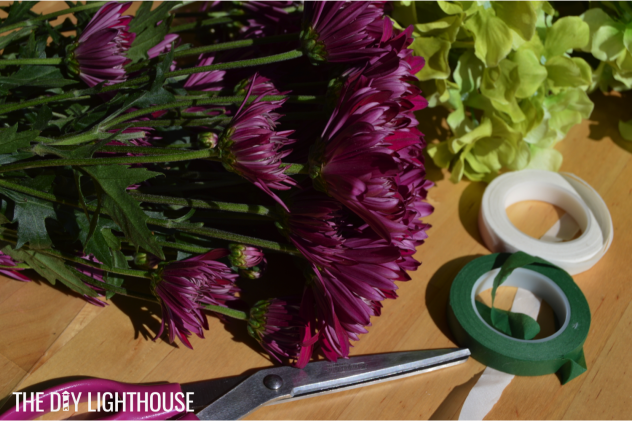
- At least 2 different kinds of flowers–1 main flower type and at least 1 accent flower type (you can use real flowers, fake flowers, or a combination of both)
- 1 roll floral tape (Like this kind here.)
- 1 roll of ribbon about an inch thick (Like this one.)
- 1 sewing pin (Like these pearl headed pins.)
Step 2–Strip & Cut Stems
Rip off any leaves or lower-set stems that are shooting off of the main stem branch. You will want only the top, big flower left. Do this to all of your flowers, then cut the stems to your desired length. (If you need a pair of scissors, these are great!)
Step 3–Arrange Flowers
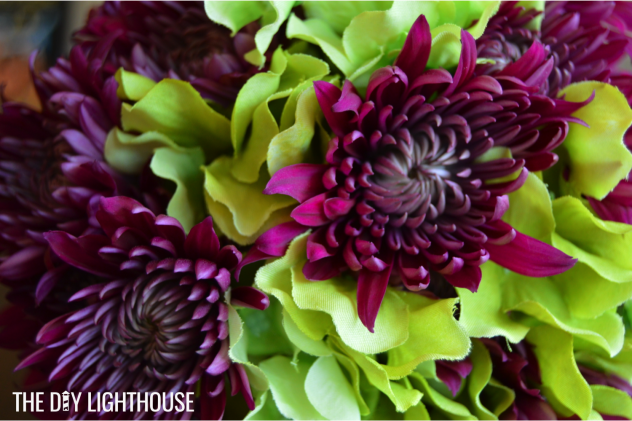
Put the biggest and prettiest flower that is your main color in the center. Work your way out adding in the accent flower evenly throughout the bouquet.
Tip: To help them stay together better, crisscross the stems a bit when arranging.
Step 4–Tape Stems Together
Tape your stems together by wrapping them tightly with floral tape.
Tip: If your tape isn’t sticking very well, feel free to try wrapping it with scotch tape first to make sure they are firmly held together and then wrap with a layer of floral tape. This part will be covered up later so it doesn’t have to look beautiful.
Step 5–Wrap with Ribbon
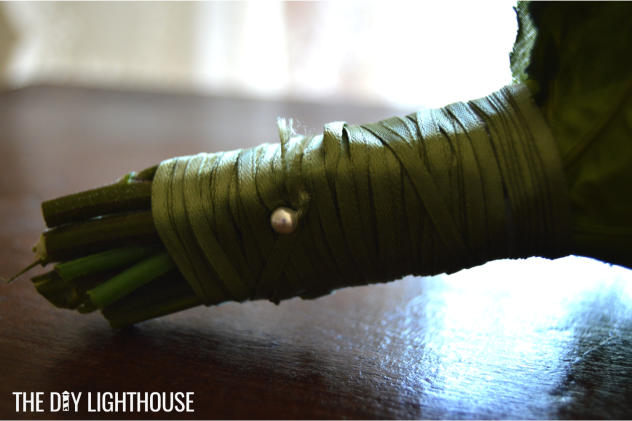
Tightly wrap your stems with ribbon to cover up the stems and tape. Secure the end of your ribbon by fastening it to the bouquet stem with your sewing pin.
The end!
Tip: Be sure to keep your bouquet refrigerated until it is ready to use!
(Extended Version) DIY Wedding Bouquet
Have you recently had a “what was I thinking?!” moment? I have. From an unexpected turn of events, the other day I found myself volunteering to make a wedding bouquet for a friend. Slight problem… I have never made any sort of flower arrangement ever! (Unless you count making a dandelion bouquet as a kid.) So, there I was needing to make a bouquet, and I had roughly a day’s notice and about 20 minutes of time available the morning of the wedding to actually make the bouquet.
So, if…
- You need to make a bouquet
- You want the quickest process possible because you have next to no time
- You want to spend as little money as possible
- You don’t care if it’s 100% perfect, you just have to get it done
…then this post is for you.
I watched about half of this youtube video on how to make a bouquet before doing mine. If you need a visual then go for it, but if you’re short on time then keep reading and I’ll go over everything she does but faster.
So, here you have it: 5 steps to the easiest homemade wedding bouquet ever.
Step 1–Gather Supplies
Here are the essential you will need…
1. At least 2 different kinds of flowers (1 main flower type and at least 1 accent flower type)
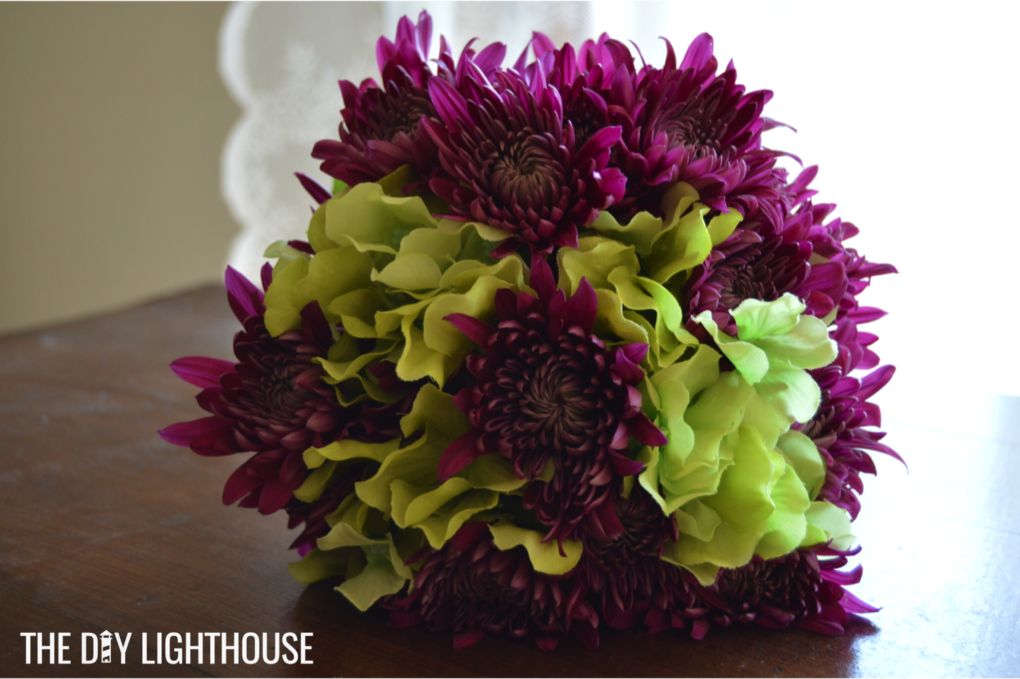
You can use real flowers, fake flowers, or a combination of both! (Click here to answer some personality questions to see if real flowers or fake flowers are best for you.) Working off of the bride’s colors, I bought 1 small bouquet of some sort of purple daisy from Trader Joe’s and then used 1 little bouquet of fake light green hydrangea flowers from Walmart that I happened to have on hand.
2. 1 roll of floral tape
Click here for an example. Luckily, I borrowed this from a friend because you don’t need an entire roll. I also ended up using scotch tape which I’ll explain later.
3. 1 roll of ribbon
You will want your ribbon to be about an inch thick. (I only had a really thin ribbon and wished I was working with something wider.) Get a white ribbon or a nice color that matches or complements your flower colors as this will be visible.
4. 1 sewing pin
Pick a nice color as this will be visible (like this one), or go with one the same color as your ribbon. (You don’t want a bright red dot if your bouquet is white and light purple.) Side note: If you’d rather, you can use hot glue instead of a sewing pin.
Tip: All or most of these supplies can be found at Walmart or any big shopping center. If you can borrow some floral tape, ribbon, and a sewing pin that is ideal so you don’t have to buy a whole roll or package–you likely won’t end up using all of it.
Step 2–Strip & Cut Stems
Rip off any leaves or lower-set baby stems that are shooting off of the main stem branch. You will want only the top, big flower left. Do this to all of your flowers, and then cut the stems to your desired length. (I recommend just over two fist lengths.)
Step 3–Arrange Flowers
Put the biggest and prettiest flower that is your main color in the center. Work your way out adding in the accent flower evenly throughout.
Tip: To help them stay together better, crisscross the stems a bit when arranging.
Step 4–Tape Stems Together
Tape your stems together by wrapping them tightly with floral tape.
(My tape wasn’t sticking very well so I ended up wrapping scotch tape around them first to make sure they were firmly held together and then wrapping with a layer of floral tape.)
Step 5–Wrap with Ribbon
To cover up the ugly tape job, tightly wrap your stems with your pretty ribbon. As I mentioned above, I would recommend using about a 1 inch thick ribbon. I got some thinner ribbon for free so that is what I used, but it was harder to work with. Secure the end of your ribbon by fastening it to the bouquet stem with your sewing pin.
Tip: If you’d rather, use a hot glue gun to fasten down the loose end–just make sure the ribbon is secured tightly so that it doesn’t unwind.
Hooray! The end!
My Last Tip: Be sure to keep your bouquet refrigerated until it’s ready to use! You can store it in a vase so the flowers don’t get smashed. I made my bouquet the morning of the wedding and then kept them in the refrigerator until I had to leave for the wedding about 3 hours before go time. The bouquet held up nicely outside of the fridge for the remainder of the day.
My Takeaways from Doing this Project
I learned a lot from doing this DIY wedding bouquet. Here are my takeaways:
Takeaway #1: Amber, don’t volunteer to make a bride’s wedding bouquet when you’ve never made any sort of floral arrangement before. You’ll get stressed out.
Takeaway #2: Amber, if you happen to find yourself making another wedding bouquet in the future, don’t stress–it’s just 5 simple steps.
Takeaway #3: Wedding bouquets are easier to make than I thought and you don’t have to spend an arm and a leg to do it–I spent under $10 on my DIY wedding bouquet.
So, give it a try! Good luck, and let me know if you have any questions about my process.
Pin it for Later
